




Improve poor soil by adding 2 to 3 inches of organic matter like compost or aged manure and tilling it into the top 6 to 8 inches of earth. The exact amount depends on your current soil texture and what you plan to grow, so a basic test should always come first. This guide covers the steps, material choices, and maintenance schedules that turn depleted ground into productive planting space.
Understanding poor soil quality: How Can Poor Soil
Be Improved
Poor soil lacks the physical structure, biological activity, or chemical balance needed to support healthy plant growth. It isn’t just dirt that’s missing fertilizer; it’s a broken system where water either drains too fast or pools on the surface, roots can’t penetrate, and beneficial microbes have died off.
Gardeners often mistake poor soil for simple nutrient deficiency and respond with synthetic fertilizers, but this treats a symptom while ignoring the underlying structural collapse. True improvement requires rebuilding the soil ecosystem, not just feeding plants directly.
The core mechanism behind soil improvement is the addition of stable organic carbon, which binds mineral particles into aggregates that hold both air and water. According to the USDA Natural Resources Conservation Service, soil organic matter is the single most important indicator of soil function because it drives infiltration, nutrient cycling, and root penetration. Without this carbon base, added nutrients wash away and compaction returns within a single season.
This work is for gardeners, small farmers, and landscapers managing existing planting areas. It isn’t for construction sites needing engineered fill or contaminated brownfields requiring professional remediation. If your soil smells chemical, has visible oil sheens, or sits on a former industrial site, stop and contact your state environmental agency before adding anything. Testing confirms whether you’re dealing with biology or toxicity, and guessing wrong here risks plant failure or personal exposure.
Improving poor soil step by step
- Collect soil samples from at least five spots across the area, digging 6 inches deep, and mix them in a clean bucket to get one representative composite sample for testing. Send this to your local university extension lab rather than using a home kit, as lab results provide precise pH and cation exchange capacity values that dictate your amendment strategy. Results typically take two weeks, so start this before planting season begins.
- Spread 2 to 3 inches of finished compost or well-aged manure evenly across the soil surface, assuming standard garden bed density. For heavy clay soils prone to compaction, use the full 3-inch depth; for sandy soils that already drain quickly, 2 inches prevents excessive nitrogen leaching. Never use fresh manure, as it burns roots and introduces pathogens—aged material should be dark, crumbly, and smell like forest floor.
- Till or fork the organic matter into the top 6 to 8 inches of soil, working when the ground is moist but not wet to avoid creating hard clods. If your soil is severely compacted, use a broadfork instead of a rototiller to fracture layers without inverting them, preserving existing fungal networks. Wet soil tilled aggressively destroys pore space and sets back improvement by months.
- Apply lime or sulfur based strictly on your soil test pH results, spreading it evenly and incorporating it during the same tilling pass as your organic matter. Most vegetables need pH 6.0–7.0; blueberries require 4.5–5.5. Adding pH adjusters without a test wastes money and can lock up nutrients—guessing “a little lime” is how gardens fail silently for years.
- Water the amended area deeply to settle the soil and activate microbial decomposition, then wait 2 to 4 weeks before planting to let biological processes stabilize. During this rest period, soil organisms break down fresh carbon and release nutrients in plant-available forms. Planting immediately after heavy amendment risks seedling burn and uneven germination as the soil chemistry shifts beneath young roots.
- Mulch the surface with 2 to 3 inches of straw, shredded leaves, or wood chips after planting to protect the newly built structure from rain impact and UV degradation. Bare soil loses organic matter faster than it accumulates, undoing your work within a single growing season. Replenish mulch as it decomposes to maintain continuous coverage.
The judgment call separating success from failure is knowing when to stop tilling. Overworking soil pulverizes aggregates and accelerates organic matter loss, so if your soil feels powdery or forms a crust after watering, you’ve gone too far and must rebuild structure through cover cropping instead of more mechanical intervention.
Soil amendment rates and timing
Different soil problems require different materials, application rates, and patience levels before results appear. Matching the right amendment to your specific condition prevents wasted effort and avoids creating new imbalances while fixing old ones. Use this table as a field reference when planning your improvement schedule.
| Situation | What to use | How long | What to watch for |
|---|---|---|---|
| Heavy clay drainage | Compost plus coarse sand | 2–3 seasons | Water pooling after rain decreases; roots penetrate deeper each year |
| Sandy nutrient loss | Compost plus biochar | 1–2 seasons | Plants show less yellowing between feedings; mulch lasts longer |
| Low pH acidity | Agricultural lime | 3–6 months | Soil test confirms pH rise before planting acid-sensitive crops |
| High pH alkalinity | Elemental sulfur | 6–12 months | Retest before adding more; sulfur acts slowly and overcorrection locks iron |
| Compacted subsoil | Deep-rooted cover crops | 1 full year | Daikon radish or clover dies back naturally; no tilling needed |
| Depleted organic matter | Finished compost only | 1–2 seasons | Earthworm counts increase; soil holds shape when squeezed then crumbles |
| Salt accumulation | Gypsum plus leaching | 1–2 seasons | Electrical conductivity drops on retest; sensitive plants survive transplant |
These timelines assume moderate climate conditions and adequate moisture. In arid regions, decomposition slows significantly, extending every timeline by 30–50%. In tropical zones with heavy rainfall, nutrients leach faster, requiring more frequent smaller applications rather than single large doses. Always retest annually until your target range stabilizes, then shift to maintenance monitoring every two to three years.
Details that determine success
Experienced soil builders test before spending money, not after problems appear. They pull samples at the same time each year, track results in a notebook, and adjust amendments based on trends rather than single readings. Skipping this step means you’re guessing at pH, guessing at nutrient ratios, and guessing at organic matter percentage—three guesses that compound into expensive failures. A lab test is inexpensive relative to the cost of wasted amendments and lost crops.
Order matters as much as material choice. Lime and sulfur need direct soil contact to react, so they go in during tilling, not on top of mulch later. Compost works best when incorporated, but mulch must stay on the surface to protect structure.
Reversing these placements wastes half their value. Also, never apply high-nitrogen amendments like fresh manure right before planting tomatoes or peppers; excess nitrogen promotes leafy growth at the expense of fruit set, and the trade-off isn’t worth the rush.
Partway through the season, check soil moisture at root depth weekly, not just surface dryness. Improved soil should feel cool and damp 4 inches down even when the top looks dry. If it’s bone-dry at depth despite regular watering, your organic matter hasn’t integrated yet or your mulch is too thin.
Conversely, if it stays soggy for days after rain, you’ve added too much fine-textured compost to clay and need coarse material next season. These mid-season checks catch problems before they kill plants.
Leave alone what’s already working. Don’t re-till established beds showing good structure just because it’s spring habit. Don’t add phosphorus if your test shows adequate levels, even if neighbors swear by bone meal. Unnecessary amendments disrupt the biology you’ve spent seasons building, and the cost isn’t just financial—it’s the reset button on microbial communities that took years to establish.
Diagnosing common soil problems
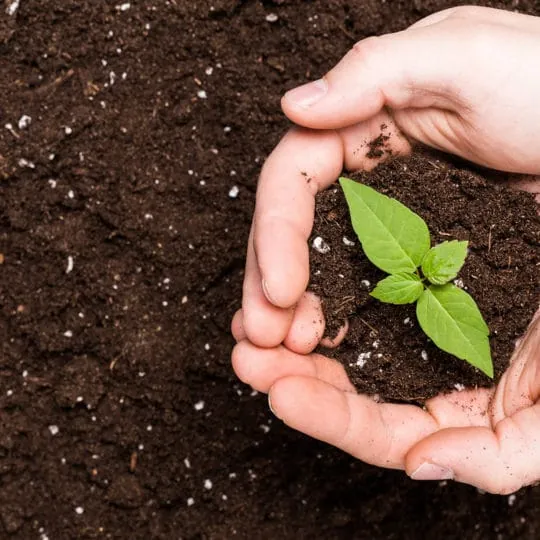
Soil symptoms are often misleading, and misdiagnosis leads to amendments that worsen the original problem. Match what you observe to verified causes before acting, and remember that multiple issues can coexist in the same bed. When uncertain, test rather than guess.
| What you notice | What it usually means | What to do first |
|---|---|---|
| Water pools for hours after rain | Compaction or clay pan layer | Core aerate or broadfork; add compost, not sand alone |
| Plants yellow despite fertilizing | pH imbalance locking nutrients | Test pH before adding more fertilizer; adjust based on results |
| Crusty white surface deposits | Salt buildup from irrigation or over-fertilizing | Leach with deep watering; test electrical conductivity |
| Stunted roots, easy pulling | Nematodes or fungal pathogen | Send root sample to diagnostic lab; solarize or rotate crops |
| Rapid drying, wilting by noon | Low organic matter in sandy soil | Add compost plus biochar; increase mulch thickness to 3 inches |
| Blue-green algae or moss on surface | Chronic wetness plus low fertility | Improve drainage first; address fertility only after water moves |
If symptoms persist after correct diagnosis and treatment, the issue may be contamination or a problem beyond DIY scope. Heavy metals, petroleum residues, and persistent herbicides require professional assessment. Contact your county extension office or state environmental department when plants fail repeatedly despite proper care—they offer free or low-cost diagnostic services that prevent further wasted effort.
Soil health regulations and safety
Soil amendment isn’t unregulated, especially when sourcing materials commercially. The USDA National Organic Program sets standards for compost temperature and turning frequency to ensure pathogen destruction, and certified products carry documentation proving compliance. Using uncertified manure or municipal biosolids on food crops carries real risk of E. coli or heavy metal contamination, so verify certification before purchasing bulk amendments for vegetable gardens.
Local ordinances may restrict manure storage, compost pile size, or runoff from amended areas near waterways. Check with your county agricultural extension or municipal code office before starting large-scale projects, particularly in suburban zones where neighbors can file nuisance complaints. Violations aren’t just fines—they can force removal of improvements you’ve already invested in.
For properties with unknown history, assume contamination until proven otherwise. Former orchards may have arsenic from legacy pesticides; old gas stations leak petroleum; treated lumber sites leave copper and chromium. This isn’t paranoia—it’s the difference between safe food and toxic harvest.
When handling lime, sulfur, or concentrated fertilizers, wear gloves and eye protection. These materials cause skin burns and respiratory irritation, and the safety data sheet from your supplier specifies exact PPE requirements. Store all amendments locked away from children and pets, and never mix chemicals unless the label explicitly permits it.
Maintaining improved soil long term
Improved soil degrades without ongoing care, typically losing measurable organic matter within two to three years if left bare and untended. Maintenance isn’t optional; it’s the price of keeping what you’ve built. Annual compost top-dressing of 1 inch replaces what crops harvest and microbes consume, applied in fall or early spring when soil biology is most active.
Keep soil covered year-round with living plants or mulch. Winter cover crops like cereal rye or hairy vetch prevent erosion and add biomass without extra labor, while summer mulch suppresses weeds and moderates temperature. Bare soil between seasons is the fastest way to undo years of improvement, as rain impact seals surfaces and UV light breaks down organic compounds.
Retest every two to three years once baseline targets are met, shifting from corrective amendments to maintenance rates. Record-keeping matters here—without notes on what you added and when, you’ll repeat past mistakes or miss emerging deficiencies. Your local extension service publishes region-specific maintenance schedules accounting for climate and crop rotation patterns; consult their guidance rather than generic national averages that ignore your actual conditions.
When soil improvement won’t work
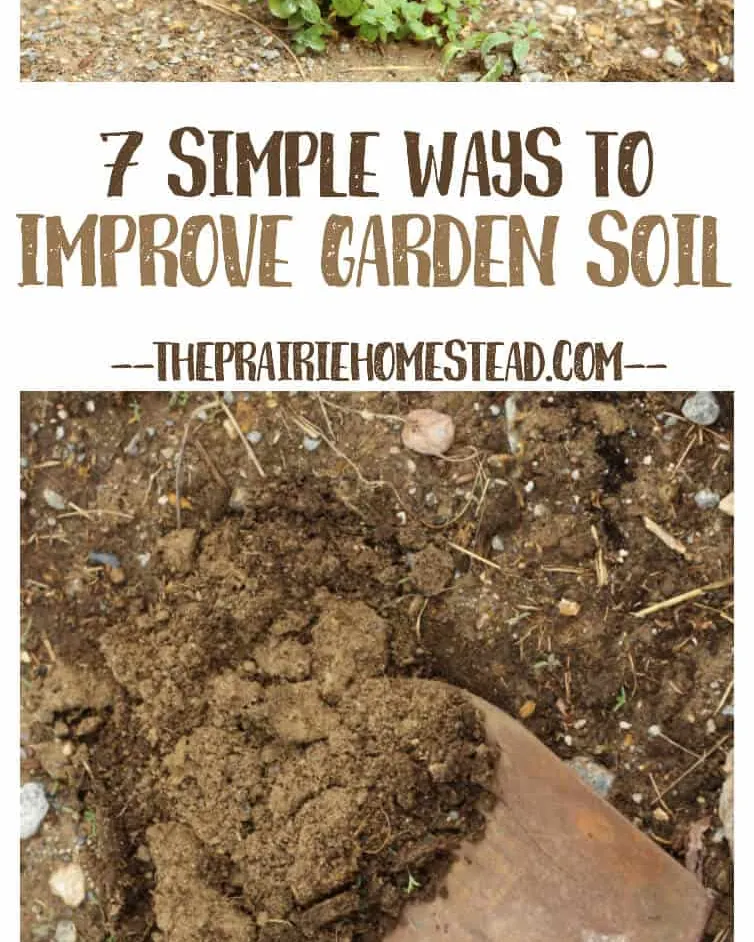
Some situations demand abandoning in-place improvement entirely. Contaminated sites with lead above 400 ppm, arsenic above your state’s screening level, or detectable petroleum hydrocarbons can’t be safely gardened regardless of organic matter additions. Raised beds with imported clean soil or complete soil replacement are the only viable options here, and testing confirms which threshold you’ve crossed.
Severely degraded subsoil with bedrock within 12 inches or impenetrable hardpan below tillage depth won’t respond to surface amendments alone. Deep ripping or subsoiling requires specialized equipment and professional operators; attempting this with garden tools damages equipment and creates worse compaction. Consult a soil conservationist or landscape contractor experienced in subsoil rehabilitation before investing in surface treatments that will never reach the limiting layer.
Wetland soils or areas with seasonal high water tables present legal and ecological constraints beyond soil science. Draining or amending wetlands violates federal Clean Water Act provisions in many jurisdictions, and permits are rarely granted for residential gardening. Instead, choose water-tolerant native species adapted to existing conditions, or relocate your garden to better-drained ground. Fighting hydrology is a losing battle that ends in regulatory penalties and dead plants.
Frequently asked questions
How long does it take to improve poor soil?
Noticeable improvement takes 1–2 growing seasons with consistent compost additions and proper management, assuming moderate starting degradation. Severely depleted or compacted soils may require 3–5 years to reach full productivity. Timeline depends on climate, amendment quality, and whether you maintain continuous soil cover—bare soil extends recovery significantly. Retest annually to track progress objectively rather than relying on visual estimates alone.
Can I use fresh manure to improve soil quickly?
No, fresh manure burns plant roots, introduces pathogens, and releases ammonia that damages soil biology. Age manure for at least six months with regular turning, or purchase certified composted products tested for pathogen reduction. The USDA National Organic Program requires specific temperature and time protocols for safe manure composting. Rushing this step risks crop loss and food safety violations that outweigh any time saved.
Is sand effective for improving clay soil drainage?
Sand alone makes clay soil worse by creating a concrete-like texture when mixed in typical garden quantities. You need 50% sand by volume to actually improve drainage, which is impractical for most gardens. Combine compost with coarse sand at 2:1 ratio instead, or use gypsum to flocculate clay particles without adding bulk. Test drainage improvement with percolation tests before and after amendment to verify results.
Why does my soil test show adequate nutrients but plants still struggle?
pH imbalance is the most common cause, locking nutrients in unavailable forms despite adequate total levels. Soil test results include pH and cation exchange capacity values that explain availability, not just quantity. Other causes include compaction restricting root access, salt toxicity, or biological imbalance from over-fertilization. Address pH and structure first before adding more nutrients, as excess fertilization worsens lockout and pollutes groundwater.
How often should I add compost to maintained soil?
Apply 1 inch of finished compost annually as maintenance once target organic matter levels are reached, typically 3–5% for most garden soils. Higher rates (2–3 inches) are corrective measures for depleted soils, not sustainable long-term practices. Over-application causes nutrient runoff, salt accumulation, and suppressed mycorrhizal fungi. Your soil test’s organic matter percentage dictates whether you’re in correction or maintenance mode—don’t guess based on calendar alone.
Is it safe to use municipal biosolids in vegetable gardens?
Class A biosolids are used on food crops, but many gardeners avoid them due to persistent concerns about pharmaceutical residues and microplastics not regulated under current rules. Class B biosolids carry stricter application restrictions and waiting periods before harvest. Request the supplier’s latest contaminant analysis and pathogen test results before deciding, and consider compost alternatives if uncertainty remains unacceptable for your risk tolerance.
What happens if I add too much lime to acidic soil?
Over-liming raises pH above optimal range, locking up iron, manganese, and zinc while promoting molybdenum toxicity in some crops. Correction takes months to years, as sulfur reacts slowly and overcorrection risks swing the pendulum back toward acidity. Always apply lime based on soil test buffer pH recommendations, not generic charts, and retest 3–6 months after application before adding more. Prevention through accurate testing costs far less than fixing alkaline damage.
Conclusion
Building productive soil is a multi-year commitment measured in test results and harvest quality, not single-season transformations. Start with accurate diagnosis, apply amendments at verified rates, and maintain consistent coverage to protect your investment. The soil remembers every shortcut and rewards every disciplined season of care, so trust the process and let biology do the heavy lifting at its own pace.
{“@context”:”https://schema.org”,”@type”:”FAQPage”,”mainEntity”:[{“@type”:”Question”,”name”:”How long does it take to improve poor soil?”,”acceptedAnswer”:{“@type”:”Answer”,”text”:”Noticeable improvement takes 1–2 growing seasons with consistent compost additions and proper management, assuming moderate starting degradation. Severely depleted or compacted soils may require 3–5 years to reach full productivity. Timeline depends on climate, amendment quality, and whether you maintain continuous soil cover—bare soil extends recovery significantly. Retest annually to track progress objectively rather than relying on visual estimates alone.”}},{“@type”:”Question”,”name”:”Can I use fresh manure to improve soil quickly?”,”acceptedAnswer”:{“@type”:”Answer”,”text”:”No, fresh manure burns plant roots, introduces pathogens, and releases ammonia that damages soil biology. Age manure for at least six months with regular turning, or purchase certified composted products tested for pathogen reduction. The USDA National Organic Program requires specific temperature and time protocols for safe manure composting. Rushing this step risks crop loss and food safety violations that outweigh any time saved.”}},{“@type”:”Question”,”name”:”Is sand effective for improving clay soil drainage?”,”acceptedAnswer”:{“@type”:”Answer”,”text”:”Sand alone makes clay soil worse by creating a concrete-like texture when mixed in typical garden quantities. You need 50% sand by volume to actually improve drainage, which is impractical for most gardens. Combine compost with coarse sand at 2:1 ratio instead, or use gypsum to flocculate clay particles without adding bulk. Test drainage improvement with percolation tests before and after amendment to verify results.”}},{“@type”:”Question”,”name”:”Why does my soil test show adequate nutrients but plants still struggle?”,”acceptedAnswer”:{“@type”:”Answer”,”text”:”pH imbalance is the most common cause, locking nutrients in unavailable forms despite adequate total levels. Soil test results include pH and cation exchange capacity values that explain availability, not just quantity. Other causes include compaction restricting root access, salt toxicity, or biological imbalance from over-fertilization. Address pH and structure first before adding more nutrients, as excess fertilization worsens lockout and pollutes groundwater.”}},{“@type”:”Question”,”name”:”How often should I add compost to maintained soil?”,”acceptedAnswer”:{“@type”:”Answer”,”text”:”Apply 1 inch of finished compost annually as maintenance once target organic matter levels are reached, typically 3–5% for most garden soils. Higher rates (2–3 inches) are corrective measures for depleted soils, not sustainable long-term practices. Over-application causes nutrient runoff, salt accumulation, and suppressed mycorrhizal fungi. Your soil test’s organic matter percentage dictates whether you’re in correction or maintenance mode—don’t guess based on calendar alone.”}},{“@type”:”Question”,”name”:”Is it safe to use municipal biosolids in vegetable gardens?”,”acceptedAnswer”:{“@type”:”Answer”,”text”:”Class A biosolids are used on food crops, but many gardeners avoid them due to persistent concerns about pharmaceutical residues and microplastics not regulated under current rules. Class B biosolids carry stricter application restrictions and waiting periods before harvest. Request the supplier’s latest contaminant analysis and pathogen test results before deciding, and consider compost alternatives if uncertainty remains unacceptable for your risk tolerance.”}},{“@type”:”Question”,”name”:”What happens if I add too much lime to acidic soil?”,”acceptedAnswer”:{“@type”:”Answer”,”text”:”Over-liming raises pH above optimal range, locking up iron, manganese, and zinc while promoting molybdenum toxicity in some crops. Correction takes months to years, as sulfur reacts slowly and overcorrection risks swing the pendulum back toward acidity. Always apply lime based on soil test buffer pH recommendations, not generic charts, and retest 3–6 months after application before adding more. Prevention through accurate testing costs far less than fixing alkaline damage.”}}]}