


Sowing seeds 6 to 8 weeks before the last spring frost, maintaining soil at 70–80°F, and moving seedlings under bright light within hours of sprouting yields the best results for growing tomatoes from seeds indoors, with the process taking about two months inside before plants are ready for outdoor soil.
Your exact timing depends on three things: your local last frost date, the tomato variety you picked, and the strength of your grow light. Each one changes when you start and how fast the plants move.
Who should start tomato seeds indoors : how to grow tomatoes from seeds indoors
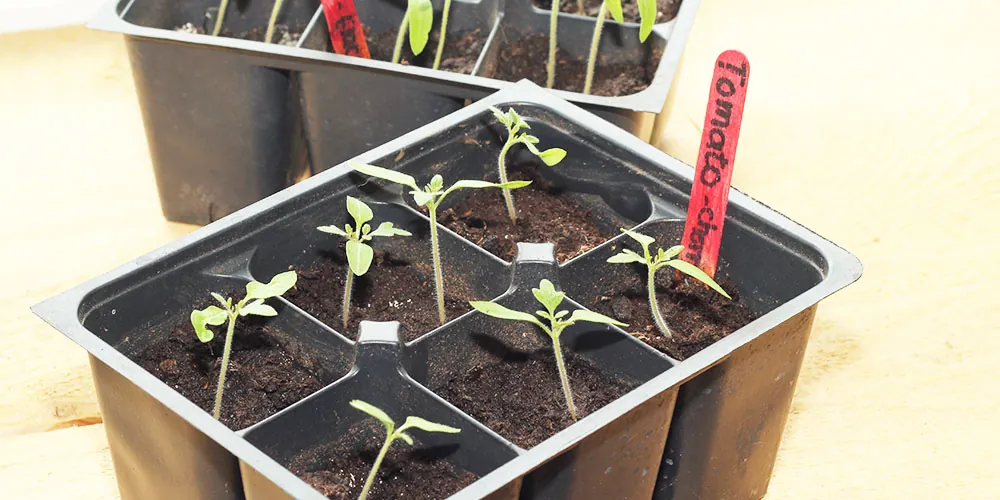
Three different people search for this information, and they don’t all need the same thing. The first is a home gardener with a sunny windowsill who wants a few cherry tomato plants for summer salads. They already have potting mix but no special equipment, and what they actually need is a realistic warning about weak window light.
The second reader has a basic setup: a shop light or small LED panel, a heat mat, and some plastic trays. They’ve grown herbs or lettuce inside before and now want fruiting plants.
They need the specific spacing, temperature range, and feeding schedule that separates a flowering tomato plant from a leggy one that drops its blossoms. This page serves that person best. It assumes you’re willing to buy a heat mat and a dedicated light source, because those two items decide whether indoor tomato seedlings survive their first month.
The third reader runs a small market garden and starts hundreds of seeds each February in a heated greenhouse. They need germination percentages, tray density limits, and hardening-off protocols tied to commercial transplant dates. That reader shouldn’t rely on this page; they’ll get more from their local university extension’s production guide instead.
Everything below assumes a home scale of 5 to 20 plants, standard 1020 plastic trays, and an LED fixture drawing 20 to 40 watts. If your setup differs, the timelines will shift.
What decides your success
Four factors control whether your seedlings turn into strong transplants or stretch into weak, pale stems. Getting any single one wrong costs you weeks of growth or the entire batch.
Soil temperature at planting time. Tomato seeds won’t germinate reliably in cold dirt. At 60°F, germination takes over two weeks and often fails completely. At 75°F, sprouts appear in 5 to 7 days. A seedling heat mat set to 75°F is the fastest way to hit this target. Check the mat’s thermostat against a separate soil thermometer, because cheap mats can run 10 degrees hotter than their dial suggests.
Light intensity after sprouting. This is where most setups fail. A south-facing window rarely delivers enough energy for fruiting crops, causing stems to stretch toward the glass. Seedlings need 14 to 16 hours of direct light daily from a fixture hung just 2 to 4 inches above the top leaves. If the distance grows past 6 inches, the plants spend their stored energy reaching instead of building roots.
Timing relative to your frost date. Start too early, and you’ll end up with root-bound plants trapped inside during cold weather. Start too late, and you’ll miss the summer harvest window. Count backward 6 to 8 weeks from your area’s average last frost date. Indeterminate varieties, which keep growing taller all season, need the full 8 weeks. Determinate types, which stop at a set height, do better with 6 weeks.
Container depth for root development. Tomatoes push taproots down quickly. Shallow trays force roots to circle, stunting the plant before it ever goes outside. Move seedlings into pots at least 3 inches deep once their first true leaves open. If you skip this step, the trade-off is immediate: you save time on transplanting, but you lose the thick stem base that supports heavy fruit later.
Starting tomato seeds step by step
Follow these steps in order. Skipping the heat mat or delaying the lights will change the outcome, so gather everything before you open the seed packet.
- Fill a clean 1020 plastic tray (without holes) or a tray with inserts using a sterile, soilless seed-starting mix. Don’t use garden soil, as it compacts and carries disease. Moisten the mix in a bucket until it feels like a wrung-out sponge, then press it firmly into the cells.
- Poke a hole exactly 1/4 inch deep in the center of each cell using a pencil or your finger. Drop 2 seeds into each hole. Cover them lightly with dry mix, and mist the surface with a spray bottle so you don’t wash the seeds out.
- Place the tray on a heat mat set to 75°F. Cover it with a clear plastic humidity dome to trap moisture. Keep the tray in any warm room; light doesn’t matter yet because the seeds are underground.
- Check the tray every morning. The moment you see green loops breaking the surface—usually day 5 to 7 at 75°F—remove the plastic dome entirely and turn off the heat mat. Leaving the dome on wet sprouts invites fungal rot.
- Turn on your grow light immediately. Hang the fixture 2 to 3 inches above the tallest sprout. Set a timer for 14 to 16 hours of light per day. Raise the light fixture as the plants grow to maintain that 2- to 3-inch gap.
- Water from the bottom. Pour room-temperature water into the solid bottom tray and let the cells soak it up for 20 minutes. Dump whatever water remains so the roots don’t sit in a puddle. Do this only when the top surface feels dry to the touch.
- Thin the seedlings at day 10. When the second set of leaves (the true leaves) fully opens, use small scissors to snip off the weaker seedling in each cell at the soil line. Never pull it out, or you’ll tear the roots of the one you’re keeping.
- Transplant into larger pots around week 3 or 4. When roots show through the bottom drainage holes, move each plant into a 3- or 4-inch pot filled with standard potting mix. Bury the stem up to the lowest leaves to encourage extra root growth along the buried stalk.
- Begin feeding at week 4. Mix a balanced liquid fertilizer (like a 10-10-10) at half the strength listed on the bottle. Apply it once a week during your regular bottom-watering routine.
- Harden off the plants starting 7 to 10 days before your last frost date. Move them outside into dappled shade for 2 hours the first day. Add 1 hour of exposure daily, slowly introducing them to direct sun and wind, before bringing them back inside at night.
The single judgment call separating a healthy transplant from a struggling one happens at step 8. You must bury the stem deeply when repotting. If you leave the long lower stem exposed, it stays weak and bends under the weight of future fruit.
Once a plant shows signs of severe wilting, leaf spotting, or mold at the base, stop trying to save it. Throw it away and sterilize the tray. Diagnosing advanced plant diseases requires lab testing, which falls outside a home grower’s safe limits.
Choosing the right setup
Different spaces and goals require different approaches. Match your situation to the row below to see what you’ll need and what to watch out for.
| Your situation | What to do | What it takes | Watch for |
|---|---|---|---|
| Only a windowsill available | Grow dwarf cherry varieties | 4 hours direct sun minimum | Leggy, pale stems falling over |
| Basic shelf and shop light | Use standard determinate seeds | $30 for bulbs, 16 hours daily | Light placed too high above leaves |
| Full LED grow tent setup | Grow indeterminate heirloom varieties | Higher electricity cost weekly | Overheating if fans aren’t running |
| Starting fewer than five plants | Buy seedling pellets instead of bulk mix | 10 minutes prep time total | Pellets drying out faster than loose soil |
| Cold basement environment | Run heat mat continuously until sprouting | Extra electricity for two weeks | Soil staying wet without evaporation |
| Warm living room above 75°F | Skip the heat mat entirely | Saves money upfront | Soil drying out much faster daily |
Details that make stronger tomato plants
Controlling moisture and air flow
Watering from the bottom keeps the soil surface dry, which stops damping-off—a fungal disease that kills seedlings overnight. The Clemson University Cooperative Extension notes that damping-off thrives in overly wet soil, making surface moisture your biggest threat. Bottom watering forces roots to reach downward for moisture, building a deeper root system.
Air movement matters just as much as water. Place a small oscillating fan on its lowest setting a few feet away from the trays. The gentle breeze strengthens the stems by forcing the plant to build thicker cellular walls to resist the wind. If the leaves are blowing wildly, the fan is too close. If they never move, the fan isn’t doing its job.
Feeding without burning roots
Seed-starting mixes contain zero nutrients by design. Sterile, empty soil prevents fungal growth during the vulnerable germination phase. But by week three, the seedling has used up the energy stored inside the seed itself.
If you apply full-strength fertilizer, you’ll burn the fine root hairs and stall growth for a week. Always dilute liquid feed to half the label’s recommended dose. If the lower leaves turn yellow while the top leaves stay green, the plant needs nitrogen. If the edges of the leaves look scorched and brown, you’ve fed it too much and need to flush the pot with plain water.
Fixing common seedling problems
When something looks wrong, check this table before changing your entire setup. Most issues trace back to one specific condition you can adjust today.
| What you notice | What it usually means | What to do first | How to stop it happening again |
|---|---|---|---|
| Tall, thin, pale stems | Not enough light intensity | Lower fixture to 2 inches | Keep light 2-3 inches away |
| White fuzz on soil surface | Overwatering or poor airflow | Scrape it off, add fan | Water only from the bottom |
| Seedlings fall over dead | Damping-off fungus infection | Remove and trash affected plants | Sterilize trays before planting |
| Leaves curling downward | Too much light or heat | Raise light 1 inch higher | Keep room temp under 80°F |
| Purple stems and veins | Phosphorus deficiency or cold | Check soil temp, add feed | Keep heat mat on until sprouted |
| No seeds sprouting yet | Soil was too cold initially | Check mat temp with thermometer | Always use a reliable heat mat |
Timing and safety rules
Your planting calendar isn’t a suggestion; it’s dictated by your local climate. The USDA Plant Hardiness Zone Map determines your average last frost date, which anchors the entire 6-to-8-week countdown. Check the USDA’s official zone map online to find your specific date, because guessing pushes your transplant day into dangerous territory. Setting seedlings out before the soil reaches 60°F shocks the roots and halts growth.
Sterilization is the other hard rule. Wash reused plastic trays in a solution of 1 part household bleach to 9 parts water for 10 minutes. Rinse them thoroughly and let them dry. Fungal spores survive winter in dirty plastic and will attack new seeds.
There’s a firm limit here regarding space and electrical load. Running multiple heat mats and high-wattage lights on a single extension cord creates a fire hazard. Calculate the total wattage of your mats and lights, and ensure it stays well below the amp rating printed on your power strip. If you’re wiring a large indoor growing room that requires new circuits, stop and hire a licensed electrician.
What you’ll actually spend
The cost of starting tomatoes indoors depends entirely on what you already own, but a reusable setup for about 30 plants is inexpensive relative to buying established transplants if you lack existing supplies.
Essential supplies like heat mats, LED fixtures, seed-starting mix, seeds, and plastic trays are inexpensive relative to purchasing nursery transplants, though specialty hydroponic shops charge significantly more than standard hardware store brands.
The hidden cost is electricity. A 20-watt LED light running 16 hours a day uses about 10 kilowatt-hours a month. A 15-watt heat mat running continuously for two weeks adds another 5 kilowatt-hours. Check your utility bill for your exact rate per kilowatt-hour to calculate your real monthly expense, because energy prices vary heavily by region.
Starting from seed is inexpensive relative to buying nursery transplants when growing ten or more unusual heirloom varieties not sold locally, whereas purchasing established plants is cheaper for small quantities.
Keeping seedlings healthy until planting
Once your plants are potted up into 3- or 4-inch containers, maintenance shifts from encouraging sprouts to managing rapid growth.
Check the weight of the pots daily. Lift one gently. If it feels light, it’s time to bottom-water. If it feels heavy, leave it alone. Overwatering established seedlings causes root rot just as fast as it kills sprouts.
Watch the roots at the bottom drainage holes. If thick white roots start circling the outside of the pot, the plant is root-bound and needs a larger container or an immediate move outdoors. You can’t pause a tomato plant’s growth once it hits this stage. If your outdoor weather is still too cold, you’ll have to pot them up into gallon containers temporarily to buy another week.
When to buy transplants instead
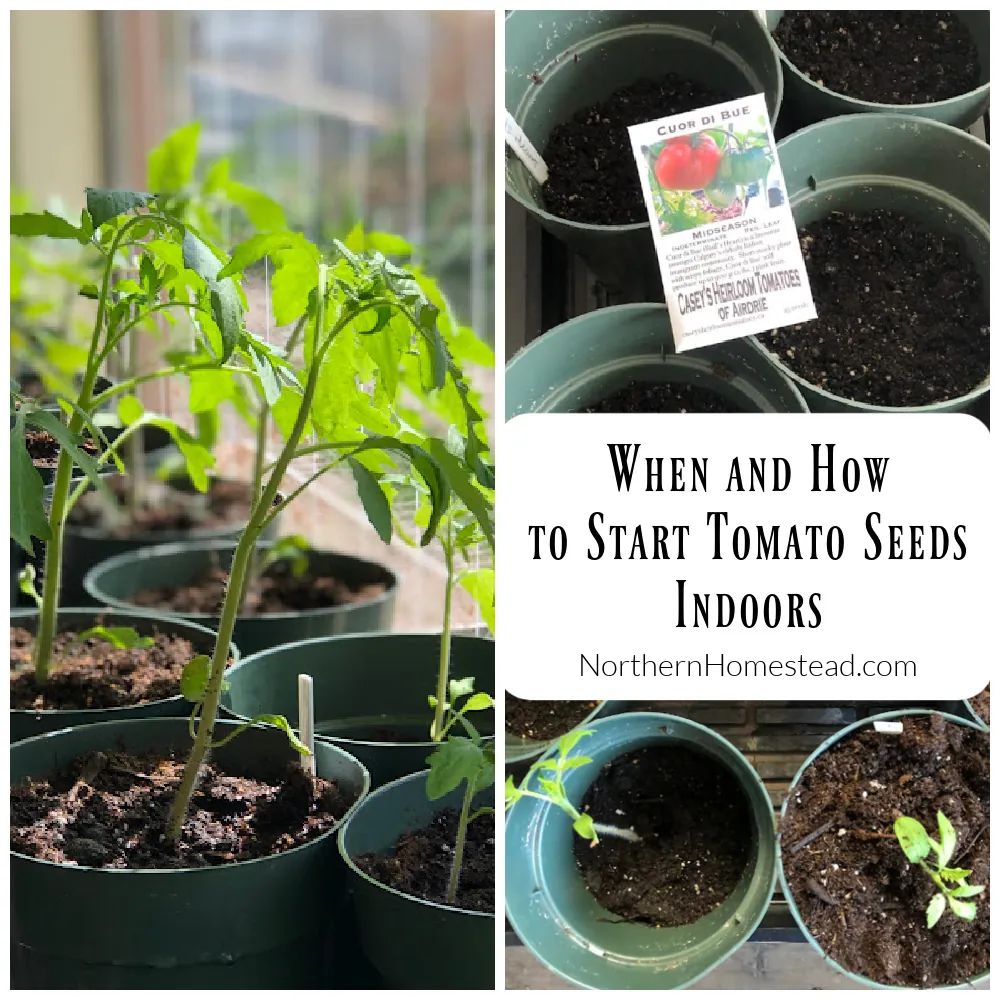
Starting seeds indoors demands daily attention for two straight months. If you travel frequently for work or forget to water houseplants, this method will fail. Buy nursery transplants instead. You’ll pay more per plant, but you skip the fragile germination phase entirely.
This approach also fails if you want to grow a specific patented hybrid variety that only sells as live plants. Some breeders restrict seed sales to protect their intellectual property. Check the seed catalog description before you buy; if it says “vegetatively propagated only,” you can’t grow it from seed.
Finally, if your indoor space lacks a grounded electrical outlet near your growing area, don’t run extension cords across walking paths to power heat mats. The risk of tripping and spilling water onto live wires is too high. In that case, wait until outdoor temperatures stay consistently above 65°F at night, and direct-sow fast-maturing cherry varieties outside, or purchase started plants from a local garden center.
Related guides
Frequently asked questions
How long does it take tomato seeds to sprout?
Tomato seeds take 5 to 7 days to sprout when kept at 75°F. If your soil temperature drops to 65°F, expect to wait 10 to 14 days. Below 60°F, germination becomes highly unreliable. Use a soil thermometer to verify your heat mat’s actual output.
Can I grow tomato seedlings on a windowsill?
No, a windowsill rarely provides enough light for healthy tomato seedlings. They will stretch toward the glass, producing weak stems that collapse under the weight of fruit. You need a dedicated light fixture placed 2 to 3 inches above the plants.
Why are my seedlings falling over and dying?
They likely have damping-off, a fungal disease caused by wet soil and poor air circulation. You can’t cure affected plants; throw them away immediately. Prevent it next time by using sterile seed-starting mix, watering only from the bottom, and adding a small fan.
Is it safe to reuse old plastic seed trays?
Yes, but only if you sterilize them first. Soak the trays in a mixture of 1 part bleach to 9 parts water for 10 minutes, then rinse completely. Skipping this step leaves fungal spores behind that will attack your new seeds.
How long should the grow light stay on each day?
Leave the grow light on for 14 to 16 hours every day. Use an outlet timer to keep this schedule exact. Plants benefit from a dark period for normal physiological development, so don’t leave the lights on for 24 hours. Eight hours of darkness is sufficient.
What happens if I start my seeds too early?
If you start more than 8 weeks before your last frost, the plants will outgrow their pots while stuck inside. Root-bound tomatoes stop growing, drop their flowers, and produce less fruit. Count backward carefully from your local frost date.
Does the type of potting mix matter for seeds?
Yes, it matters significantly. Never use garden soil or heavy potting mix for germination. Seeds need a sterile, soilless seed-starting mix that drains quickly. Heavy soil holds too much water, suffocates tiny roots, and introduces disease.
Can I put my seedlings outside during the day?
Only if you harden them off first. Moving indoor plants directly into outdoor sun and wind will scorch their leaves and shock their roots. Start with 2 hours in the shade, adding 1 hour daily over 7 to 10 days until they handle full sun.
Conclusion
Start by checking your local last frost date and counting backward 6 to 8 weeks to mark your planting day on the calendar. Within a week of sowing, you’ll see green loops break the soil surface, confirming your temperature and moisture levels are correct. If your seedlings develop black, mushy stems at the soil line despite following these steps, discard the batch and consult your local cooperative extension office before trying again.
{“@context”:”https://schema.org”,”@type”:”FAQPage”,”mainEntity”:[{“@type”:”Question”,”name”:”How long does it take tomato seeds to sprout?”,”acceptedAnswer”:{“@type”:”Answer”,”text”:”Tomato seeds take 5 to 7 days to sprout when kept at 75°F. If your soil temperature drops to 65°F, expect to wait 10 to 14 days. Below 60°F, germination becomes highly unreliable. Use a soil thermometer to verify your heat mat’s actual output.”}},{“@type”:”Question”,”name”:”Can I grow tomato seedlings on a windowsill?”,”acceptedAnswer”:{“@type”:”Answer”,”text”:”No, a windowsill rarely provides enough light for healthy tomato seedlings. They will stretch toward the glass, producing weak stems that collapse under the weight of fruit. You need a dedicated light fixture placed 2 to 3 inches above the plants.”}},{“@type”:”Question”,”name”:”Why are my seedlings falling over and dying?”,”acceptedAnswer”:{“@type”:”Answer”,”text”:”They likely have damping-off, a fungal disease caused by wet soil and poor air circulation. You can’t cure affected plants; throw them away immediately. Prevent it next time by using sterile seed-starting mix, watering only from the bottom, and adding a small fan.”}},{“@type”:”Question”,”name”:”Is it safe to reuse old plastic seed trays?”,”acceptedAnswer”:{“@type”:”Answer”,”text”:”Yes, but only if you sterilize them first. Soak the trays in a mixture of 1 part bleach to 9 parts water for 10 minutes, then rinse completely. Skipping this step leaves fungal spores behind that will attack your new seeds.”}},{“@type”:”Question”,”name”:”How long should the grow light stay on each day?”,”acceptedAnswer”:{“@type”:”Answer”,”text”:”Leave the grow light on for 14 to 16 hours every day. Use an outlet timer to keep this schedule exact. Plants benefit from a dark period for normal physiological development, so don’t leave the lights on for 24 hours. Eight hours of darkness is sufficient.”}},{“@type”:”Question”,”name”:”What happens if I start my seeds too early?”,”acceptedAnswer”:{“@type”:”Answer”,”text”:”If you start more than 8 weeks before your last frost, the plants will outgrow their pots while stuck inside. Root-bound tomatoes stop growing, drop their flowers, and produce less fruit. Count backward carefully from your local frost date.”}},{“@type”:”Question”,”name”:”Does the type of potting mix matter for seeds?”,”acceptedAnswer”:{“@type”:”Answer”,”text”:”Yes, it matters significantly. Never use garden soil or heavy potting mix for germination. Seeds need a sterile, soilless seed-starting mix that drains quickly. Heavy soil holds too much water, suffocates tiny roots, and introduces disease.”}},{“@type”:”Question”,”name”:”Can I put my seedlings outside during the day?”,”acceptedAnswer”:{“@type”:”Answer”,”text”:”Only if you harden them off first. Moving indoor plants directly into outdoor sun and wind will scorch their leaves and shock their roots. Start with 2 hours in the shade, adding 1 hour daily over 7 to 10 days until they handle full sun.”}}]}