Author: kamalhossainmgbl@gmail.com

  • Best Long Sleeve Gardening Gloves for Thorny Plants

    best long sleeve gardening gloves

    Best Long Sleeve Gardening Gloves for Thorny Plants, Pruning & Yard Work

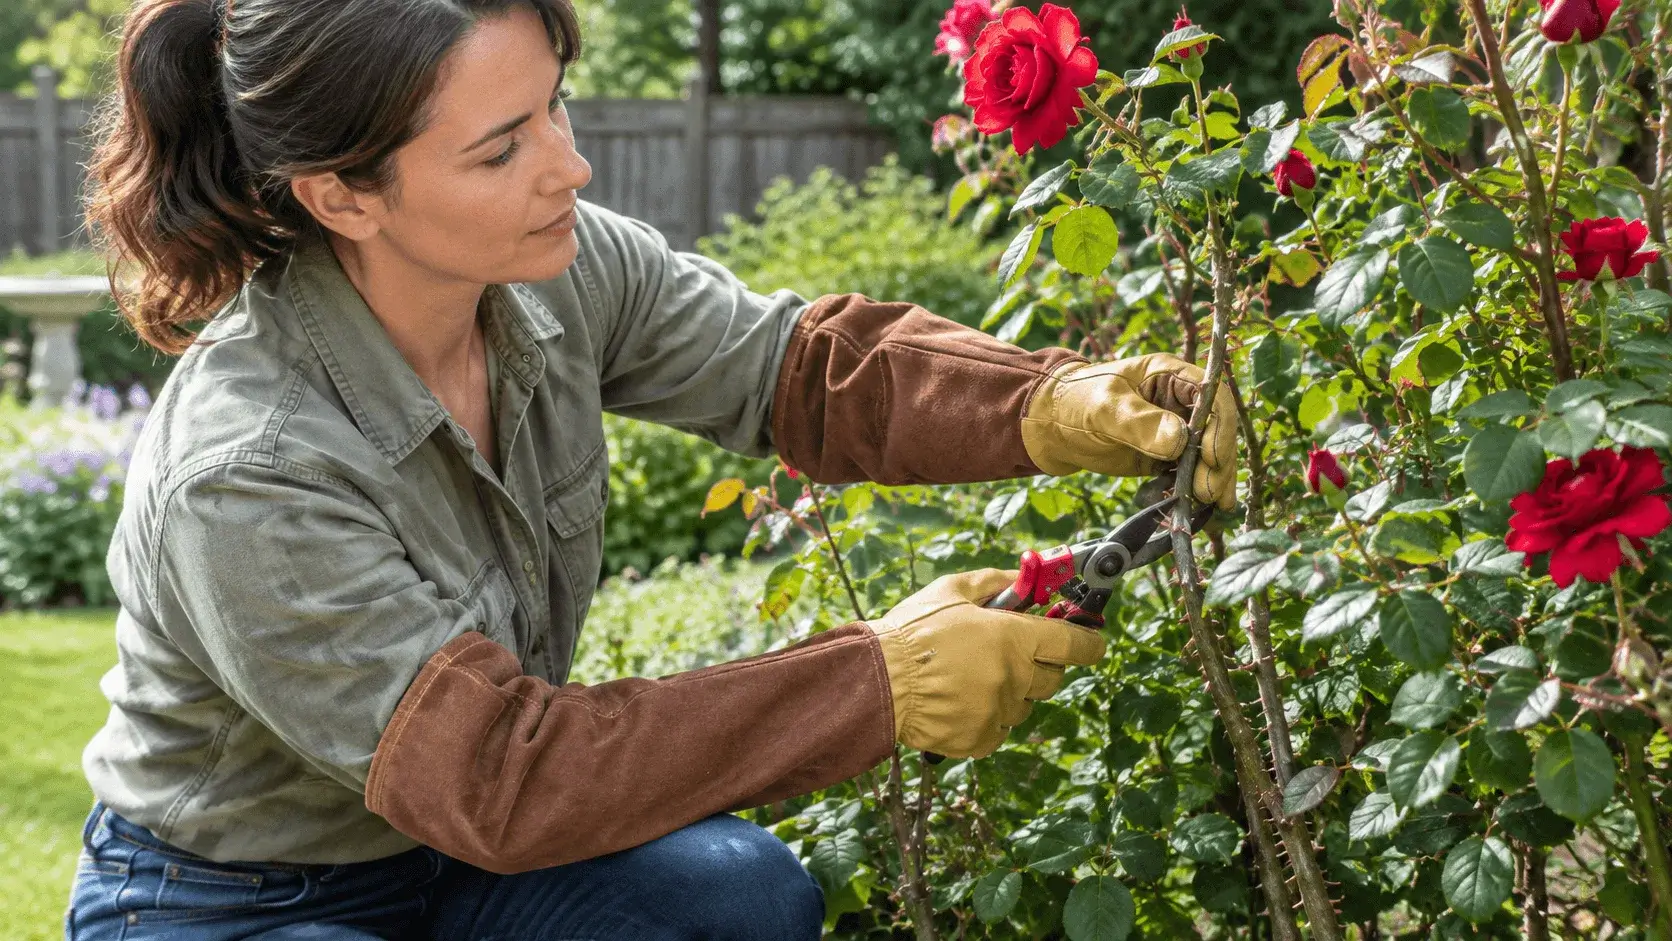
    If you’ve ever reached deep into a rose bush and pulled your arm back only to find a handful of scratches, you already know the weakness of ordinary gardening gloves: they protect your hands, but your wrists and forearms are still exposed.

    That’s where long sleeve gardening gloves can make a real difference. Their extended cuffs provide additional coverage while you prune roses, handle blackberry canes, clear thorny shrubs, or work around prickly plants.

    But not every long gardening glove is built the same way. Some prioritize soft leather and flexibility, while others focus on heavier protection. The right choice depends on what you’re actually doing in the garden.

    In this guide, we’ll look at the important features to consider and compare several long-cuff gardening gloves for different gardening situations.

    Quick answer: For rose pruning and other thorny work, look for a long gauntlet cuff, durable leather or another protective material, reinforced palms and fingertips, a secure fit, and enough flexibility to operate pruning tools comfortably.

    |

    Quick Comparison: Long Sleeve Gardening Gloves

    Product specifications and availability can change, so check the current manufacturer or retailer listing before purchasing.

    Why Choose Long Sleeve Gardening Gloves?

    Regular gardening gloves are excellent for many everyday jobs. Planting seedlings, pulling small weeds, moving potting soil, and handling garden tools usually don’t require much forearm protection.

    Thorny plants are different.

    Rose canes, blackberry brambles, holly, some cacti, and other prickly plants can reach around your hands and catch your wrist or forearm. A glove that ends at the wrist leaves a fairly obvious gap.

    A long gauntlet-style glove extends farther up the arm, helping cover that vulnerable area.

    This is especially useful when you’re reaching into dense growth rather than simply working on the outside of a plant.

    Long Gloves vs. Regular Gardening Gloves

    Think of it this way:

    Regular gardening gloves:Good for planting, weeding, soil work, and everyday garden maintenance.Long sleeve or gauntlet gloves:Better suited to pruning, thorny shrubs, brambles, roses, cactus, and jobs where your forearms are likely to contact vegetation.

    You don’t necessarily need long gloves for every gardening task. In fact, wearing a heavy gauntlet glove for delicate seed planting can be unnecessarily cumbersome.

    The advantage comes when the extra coverage matches the job.

    What to Look for in Long Sleeve Gardening Gloves

    Before buying a pair, pay attention to more than the word “thorn-proof” on the product page.

    1. Forearm Coverage

    The biggest reason to buy long sleeve gardening gloves is the extra coverage.

    Some models extend several inches beyond the wrist, while others approach the elbow.

    For rose pruning, deeper coverage is generally useful because your arm may disappear into the plant while you’re reaching for a cane.

    An elbow-length design can provide considerably more coverage than a short cuff.

    HANDLANDY, for example, describes its long pigskin pruning gloves as having an elbow-length gauntlet cuff designed to protect the hands and forearms.

    2. Material

    The material affects protection, comfort, flexibility, and durability.

    Leather

    Leather remains a popular choice for thorny garden work because it can provide a combination of durability and flexibility.

    Different types of leather can feel different, so don’t assume all leather gloves behave identically.

    Pigskin Leather

    Pigskin is used in several long gardening gloves and is marketed for its breathability and durability.

    HANDLANDY’s long pruning gloves use pigskin leather and include padded palm and fingertip protection.

    Cowhide Leather

    Cowhide is another common choice for heavier-duty work. It can be relatively robust, although thicker leather may sacrifice some dexterity.

    Synthetic Materials

    Synthetic leather and fabric can make gloves lighter or more flexible, depending on the design.

    They can work well for general garden work, but you should examine the actual construction if your primary goal is protection from sharp thorns

    Best Long Sleeve Gardening Gloves
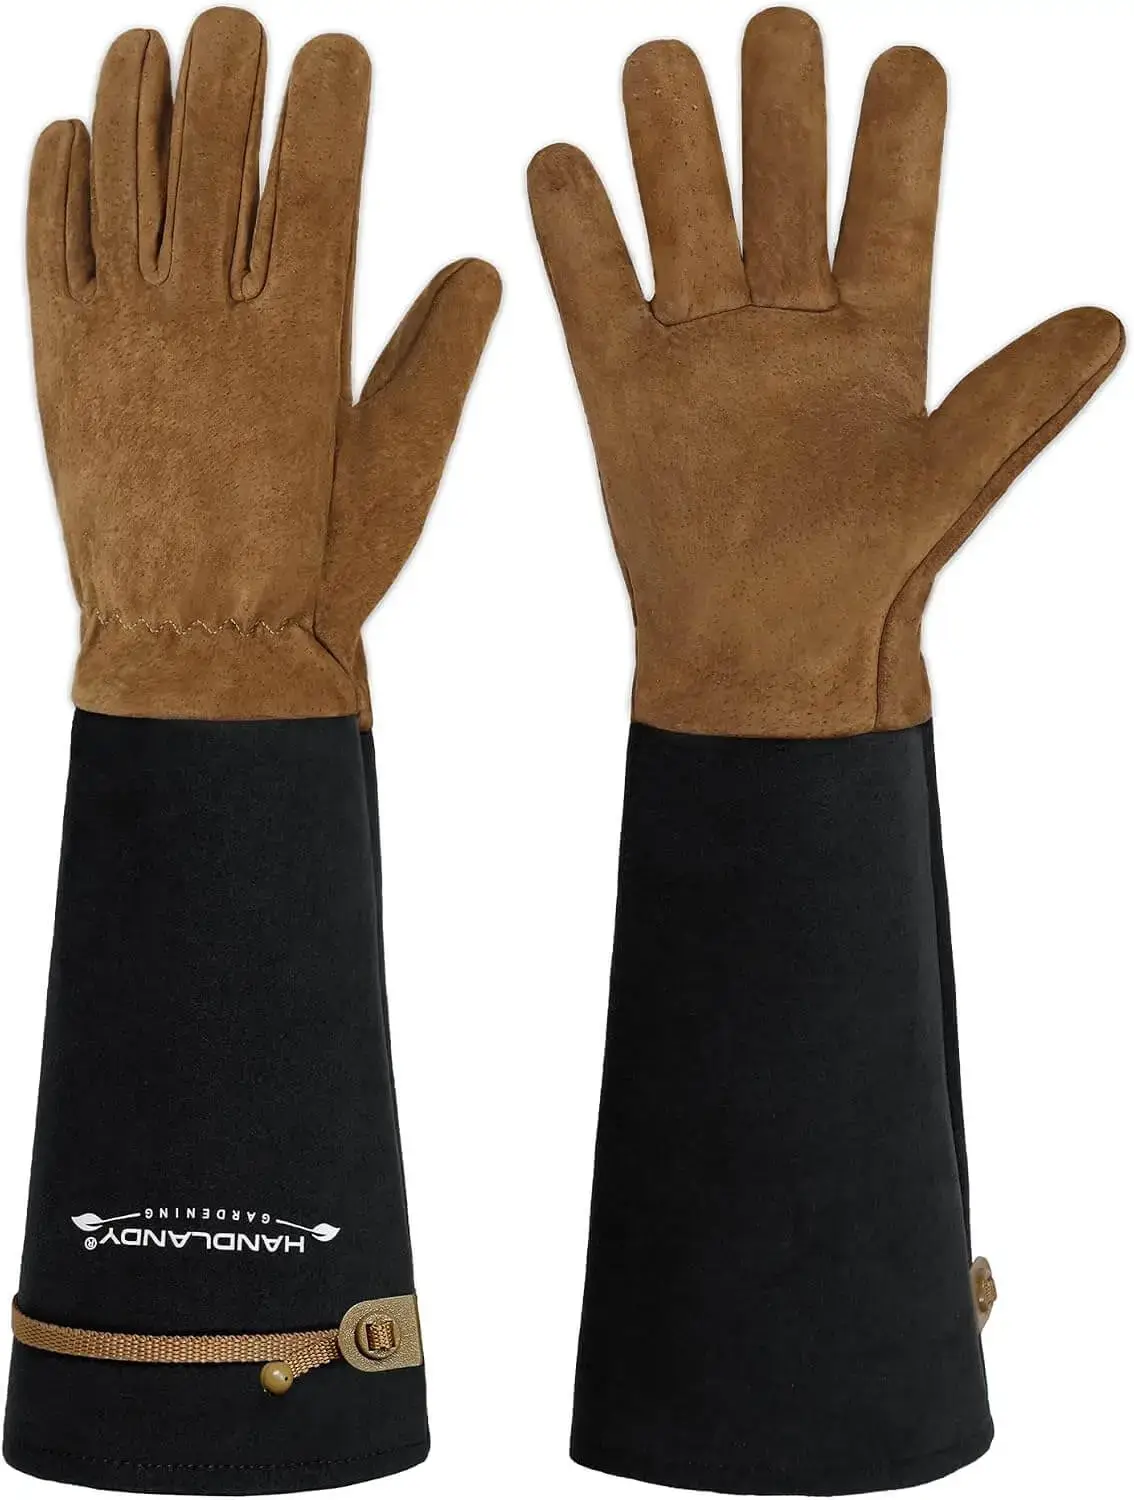
    HANDLANDY Long Pigskin Leather Gardening Gloves

    1. HANDLANDY Long Pigskin Leather Gardening Gloves

    Best for: Rose pruning, thorny shrubs, blackberry canes, and general pruning

    HANDLANDY’s long pigskin gardening gloves are one of the more straightforward options for gardeners who specifically want extended forearm coverage.

    The manufacturer describes the gloves as using natural pigskin leather, with reinforced protection around the palm and fingertips and an extended cuff reaching toward the elbow. They’re designed for roses, holly, berry bushes, cactus, and other prickly plants.

    Why consider them?

    The biggest advantage is the combination of long coverage and leather construction.

    That’s useful when pruning roses because your hand isn’t the only part of your arm that can encounter a thorn.

    The gloves are also designed with flexibility in mind, which matters when you’re using pruning shears or trying to manipulate individual branches.

    Pros

    • Extended gauntlet-style coverage

    • Pigskin leather construction

    • Reinforced palm and fingertips

    • Designed for rose and thorny plant work

    • Available in several sizes

    Cons

    • Leather can feel more substantial than lightweight fabric gloves

    • Sizing should be checked carefully

    • They aren’t a guarantee against every puncture or thorn
    Check Price on Amazon

    HANDLANDY Long Sleeve Gardening Gloves 5164

    2. HANDLANDY Long Sleeve Gardening Gloves 5164

    Best for: Heavy garden work and extended forearm protection

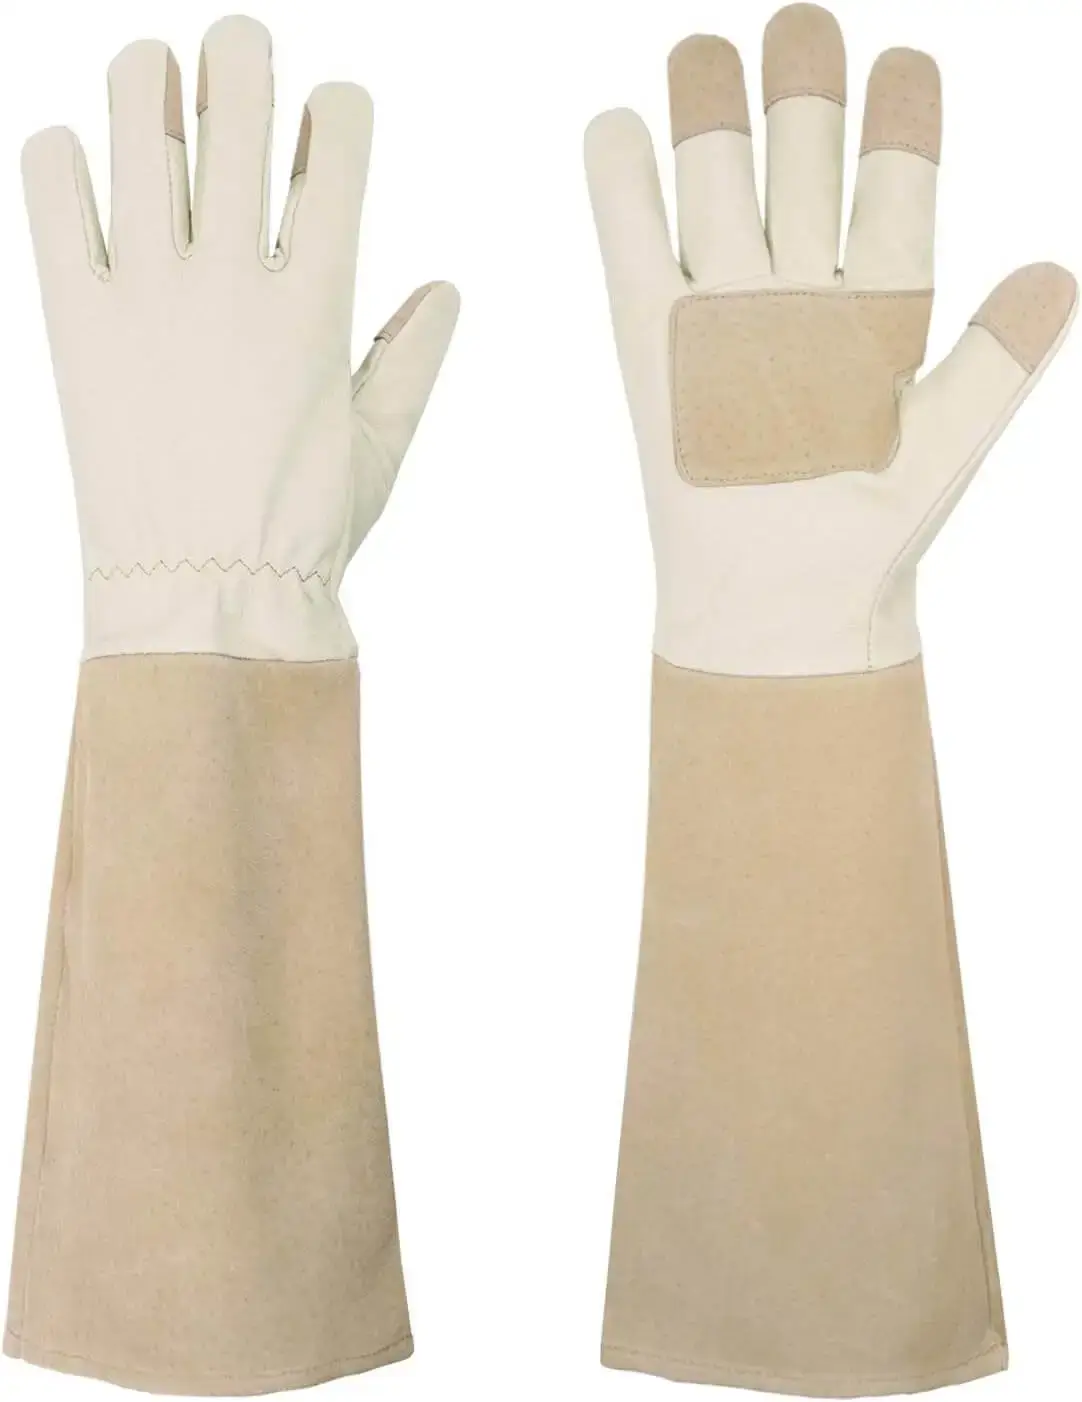
    Another HANDLANDY design combines a genuine leather palm with a long synthetic-leather gauntlet cuff.

    According to the manufacturer, the cuff is approximately 21 cm, or 8.3 inches, and is designed to provide coverage toward the elbow. The palm uses full-grain cowhide leather with reinforced areas around the palm and fingertips.

    This construction is worth considering if you want substantial palm protection but prefer a somewhat different sleeve design.

    The extended cuff can also be useful when you’re clearing shrubs or reaching through dense vegetation.

    Pros

    • Approximately 8.3-inch gauntlet cuff

    • Full-grain cowhide palm

    • Reinforced palm and fingertips

    • Designed for roses, bushes, berries, and cactus

    • Suitable for men and women

    Cons

    • The sleeve and hand section use different materials

    • More coverage can feel warm in hot weather

    • Fit should be checked before ordering

    Check Price on Amazon

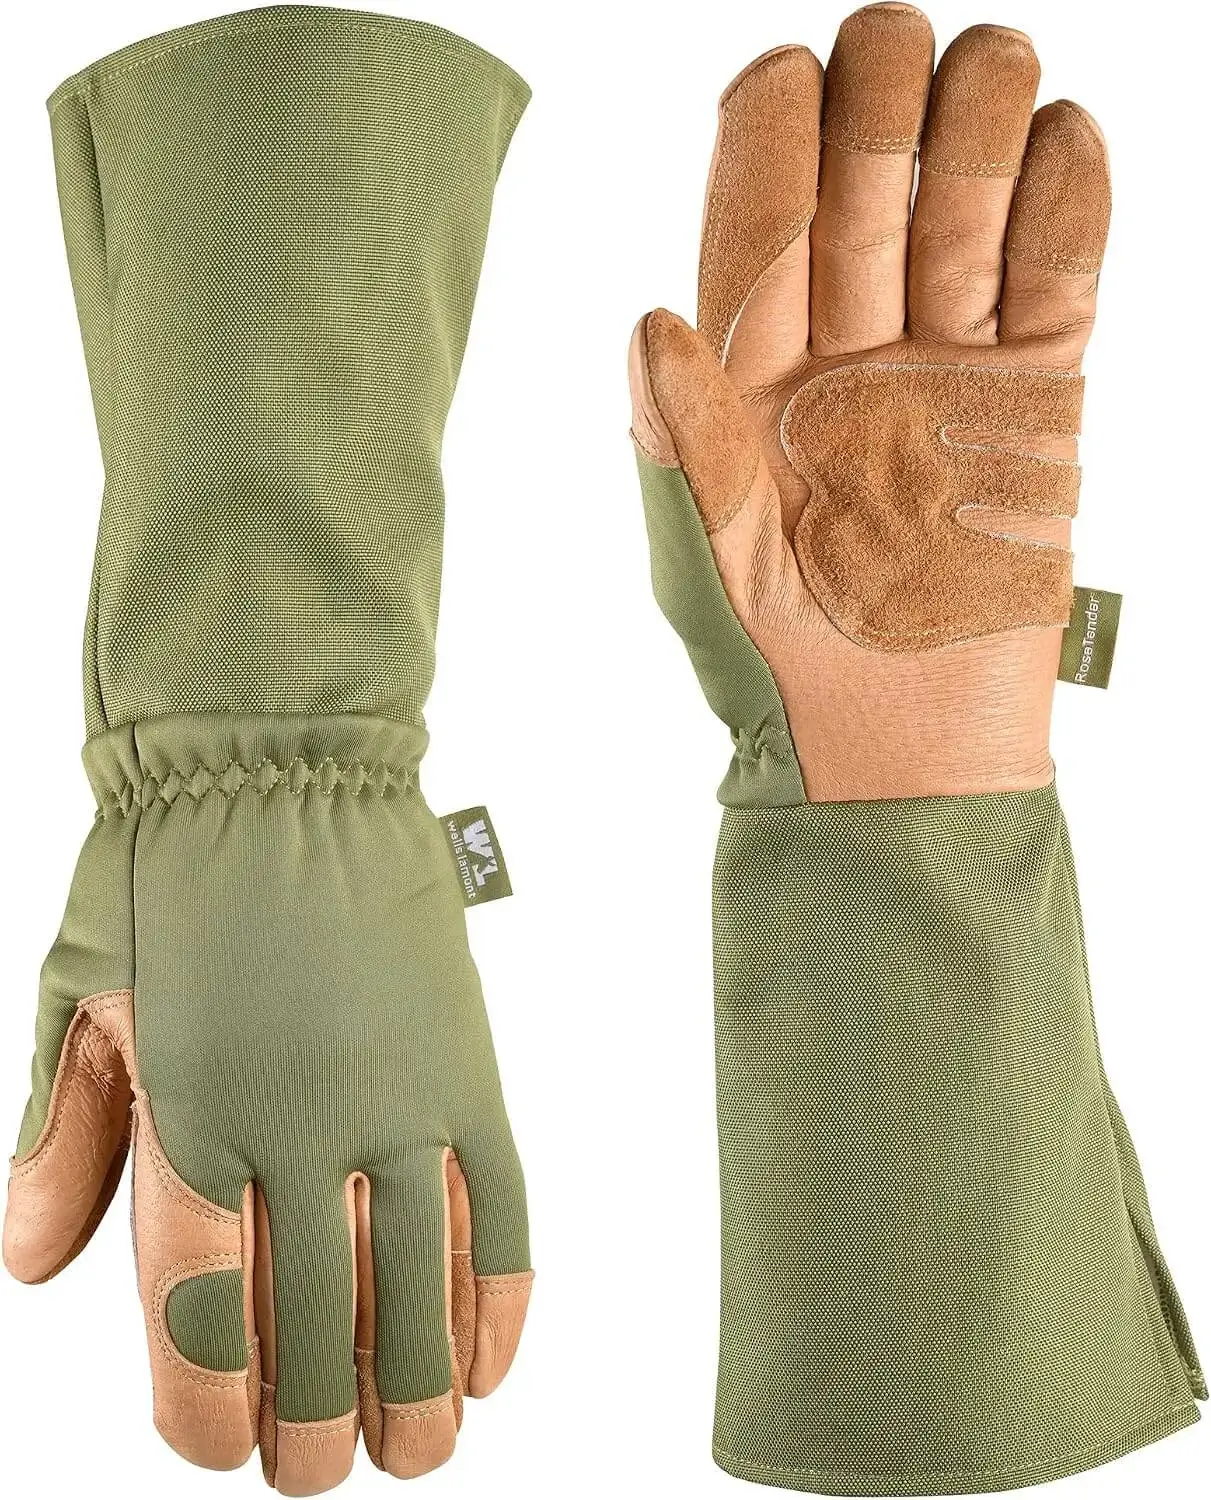
    Wells Lamont Rosetender Gardening Gloves

    3. Wells Lamont Rosetender Gardening Gloves

    Best for: Gardeners specifically looking for long gloves for rose work

    Wells Lamont is a familiar name in work and gardening gloves, and the Rosetender line is designed around the needs of rose pruning and yard work.

    The appeal of this type of glove is simple: you get more protection than you would from a standard short-cuff gardening glove while retaining the finger movement needed for pruning.

    When comparing this model with other options, pay particular attention to the cuff length, material, and sizing available at the time you purchase.

    Pros

    • Designed specifically with rose gardening in mind

    • Extended glove design

    • Suitable for pruning and yard work

    • Established work-glove manufacturer

    Cons

    • Not necessarily the best choice for every gardening task

    • Heavier protection can reduce the light feel of ordinary garden gloves

    • Check the current product specifications before buying
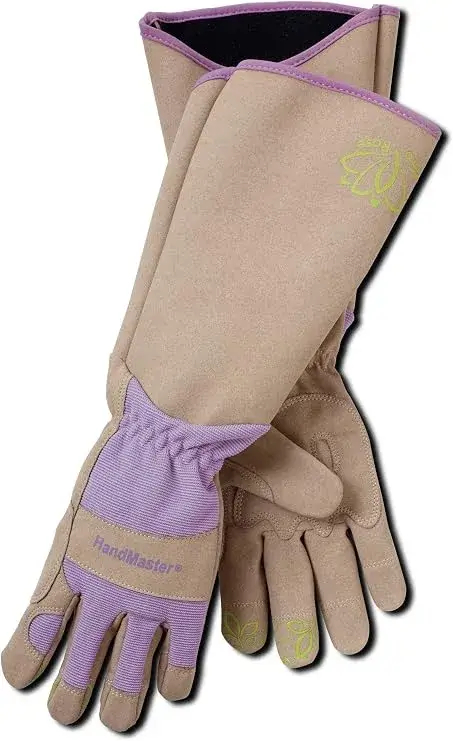
    Check Price on Amazon

    Magid Professional Rose Pruning Gloves

    4. Magid Professional Rose Pruning Gloves

    Best for: Gardeners who want a purpose-built rose-pruning glove

    Magid makes protective gloves for a range of work environments, and its professional rose-pruning designs are intended to provide extended forearm protection.

    This type of glove makes sense when rose pruning is a regular part of your gardening routine rather than an occasional task.

    The key things to compare are the protective material, cuff length, sizing, and how much finger flexibility you retain.

    Pros

    • Purpose-built for rose pruning

    • Extended forearm protection

    • Designed around thorny plant work

    • Available in different sizing options

    Cons

    • May be more protection than you need for everyday weeding

    • Fit is particularly important

    • Compare current specifications before purchasing
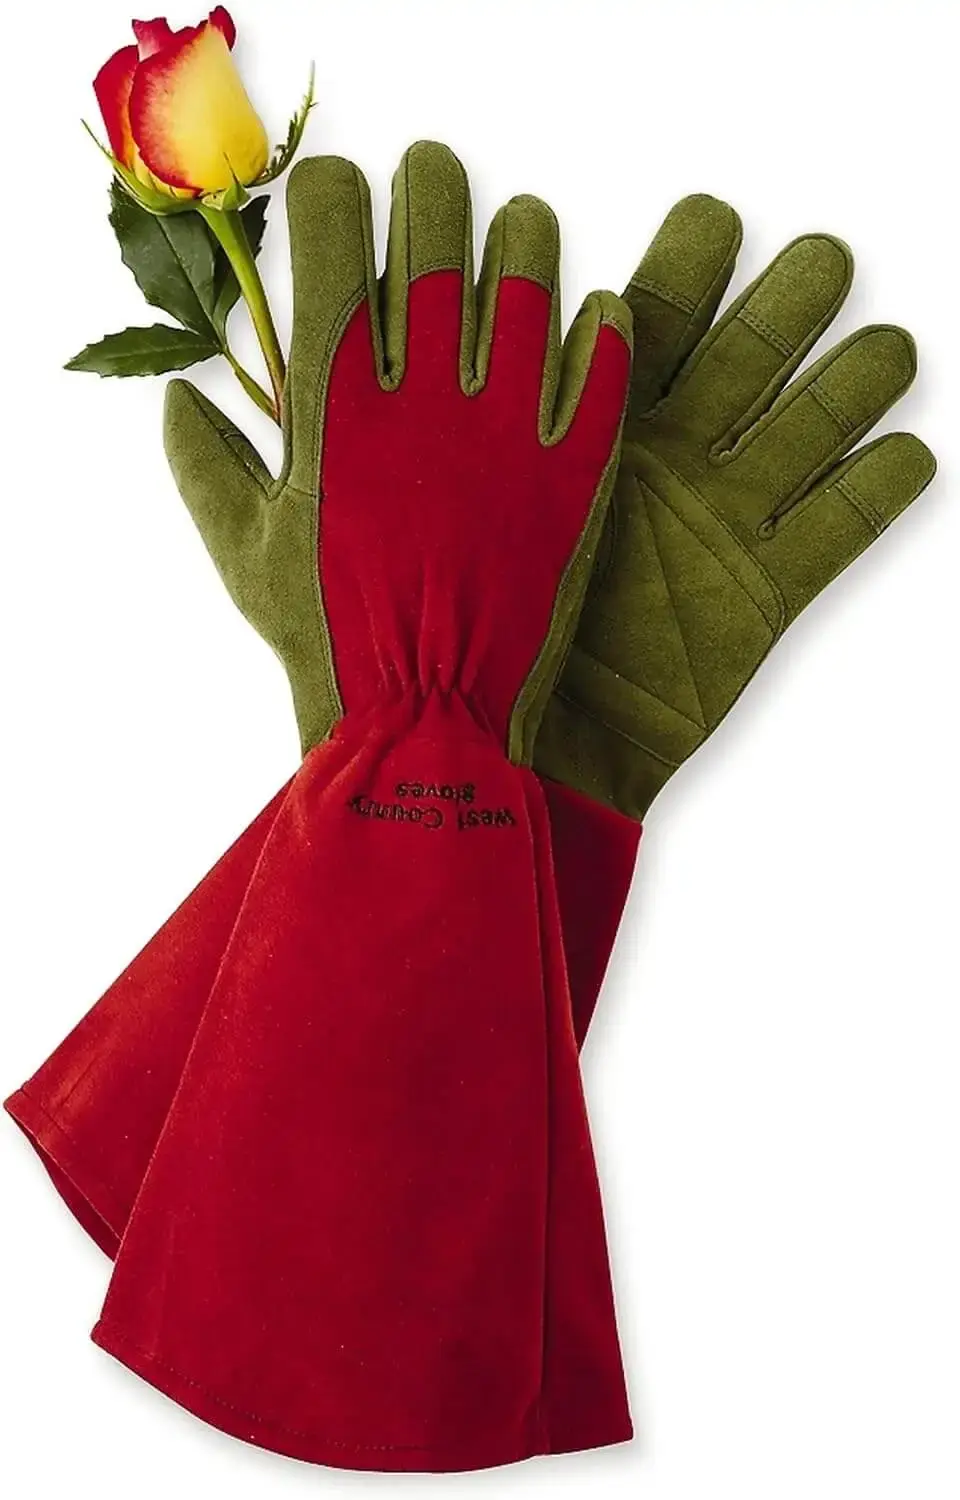
    Check Price on Amazon

    West Chester Gauntlet Rose Gardening Gloves

    5. West Chester Gauntlet Rose Gardening Gloves

    Best for: Gardeners wanting extended coverage for pruning

    A gauntlet-style rose glove is designed around a simple principle: protect beyond the wrist.

    West Chester’s rose-gardening options are worth comparing if your gardening involves roses and other plants that can scratch or prick exposed skin.

    The advantage of a gauntlet is most noticeable when you need to reach into the plant instead of simply trimming the outer branches.

    Pros

    • Extended gauntlet design

    • Useful for rose pruning

    • More forearm coverage than ordinary gloves

    • Designed for garden protection

    Cons

    • May be less comfortable than lightweight gloves during hot weather

    • More coverage can mean less freedom around the wrist

    • Check the current construction and size chart

    Check Price on Amazon

    Are Long Sleeve Gardening Gloves Worth It?

    For the right gardening job, they can be.

    If your garden contains roses, blackberry brambles, holly, thorny shrubs, or prickly plants, protecting only your hands doesn’t solve the entire problem.

    A long cuff can reduce exposed skin around the wrist and forearm.

    But there’s an important distinction: long sleeve doesn’t automatically mean thorn-proof.

    Protection depends on the material, thickness, construction, stitching, and the type of thorn you’re dealing with.

    Even a glove marketed as thorn-resistant should not be treated as completely puncture-proof.

    For that reason, don’t intentionally push your hands into sharp thorns just because you’re wearing protective gloves.

    Are Long Gardening Gloves Good for Rose Pruning?

    Yes, that’s one of their most obvious uses.

    Rose pruning often requires you to reach between canes to make a clean cut. Your forearm can brush against thorns even when your hand is protected.

    A long gauntlet can cover that exposed area.

    Look for:

    • Long cuff

    • Durable palm

    • Reinforced fingertips

    • Good grip

    • Enough flexibility for pruning shears

    • Correct sizing

    A glove that’s extremely thick but difficult to move in may not be ideal for detailed pruning.

    Protection and dexterity need to be balanced.

    What About Blackberry Bushes and Brambles?

    Blackberries and other brambles can be particularly unpleasant to handle because their thorny stems can grab clothing and skin as you pull branches away.

    For this kind of work, forearm coverage is valuable.

    Look for a glove with:

    • Long gauntlet

    • Durable leather or protective material

    • Reinforced palm

    • Secure wrist/arm fit

    • Good finger mobility

    And remember that gloves are only one part of the job. Long sleeves, eye protection when appropriate, and proper pruning tools can also make thorny vegetation easier to manage.

    What About Cactus?

    Cactus work requires extra care because different species have very different types of spines.

    A thick leather gardening glove may provide useful protection, but don’t assume it makes your hands immune to punctures.

    For cactus handling, consider:

    • Leather construction

    • Reinforced fingertips

    • Strong palm material

    • Long cuffs

    • Good grip

    HANDLANDY specifically lists cactus among the intended uses for some of its long leather gardening gloves.

    Still, use appropriate handling techniques and tools for plants with particularly fine or numerous spines.

    Long Sleeve Gardening Gloves for Poison Ivy

    Long gloves can help reduce exposed skin when you’re working around vegetation such as poison ivy, but they shouldn’t be treated as a complete protective system.

    The important point is to avoid relying on the glove alone.

    Use appropriate clothing, avoid touching your face while working, and clean contaminated clothing and equipment appropriately after exposure.

    If you know you’ve been exposed and develop a significant reaction, follow appropriate medical guidance.

    Leather vs. Synthetic Long Gardening Gloves

    There isn’t a universal winner.

    For regular rose pruning, a well-made leather gauntlet may make more sense.

    For lighter garden work, a flexible synthetic glove can be more comfortable.

    7 Mistakes to Avoid When Buying Long Sleeve Gardening Gloves

    1. Buying Only Based on the Word “Thorn-Proof”

    Marketing terminology isn’t enough.

    Look at the actual material and construction.

    2. Ignoring Cuff Length

    A glove can be marketed as “long” without providing the amount of coverage you actually need.

    Check the dimensions.

    3. Choosing Protection Over Dexterity

    If you’re doing delicate pruning, you still need to control your shears.

    A glove that makes your fingers difficult to move may become frustrating.

    4. Buying the Wrong Size

    Long gloves still need to fit your hands correctly.

    Always check the manufacturer’s sizing chart.

    5. Assuming No Thorn Can Ever Penetrate

    No gardening glove should be treated as an impenetrable barrier.

    Sharp, forceful contact can defeat protective materials.

    6. Forgetting About Heat

    Long leather gloves can become uncomfortable during hot summer gardening.

    If you garden in a warm climate, breathability deserves extra attention.

    7. Using Gardening Gloves for Jobs They Aren’t Designed For

    Gardening gloves aren’t automatically appropriate for every cutting, chemical, or mechanical hazard.

    Use specialized protective equipment when the task requires it.

    How to Choose the Right Long Sleeve Gardening Gloves

    Here’s a simple way to narrow your options.

    If You Mostly Prune Roses

    Choose a long leather gauntlet with good finger flexibility.

    If You Clear Blackberry Brambles

    Prioritize forearm coverage and durable construction.

    If You Work With Cactus

    Look for reinforced palm and fingertip protection, but don’t assume any glove is completely spine-proof.

    If You Mostly Weed

    You may not need a heavy gauntlet. A lighter glove could be more comfortable.

    If You Work in Hot Weather

    Pay particular attention to breathability and material.

    If You Need Maximum Coverage

    Look for an elbow-length or near-elbow gauntlet rather than a glove that stops just above the wrist.

    Do Long Sleeve Gardening Gloves Work in Every Climate?

    The gloves themselves don’t depend on USDA Hardiness Zones, but your gardening conditions can influence which design feels comfortable.

    The USDA Plant Hardiness Zone Map is primarily used to understand which perennial plants are likely to thrive based on average annual extreme minimum temperatures.

    For gloves, however, local temperature and humidity matter more than hardiness zone.

    A gardener working in a hot, humid summer climate may prefer breathable leather or lighter materials.

    Someone gardening during cool spring or fall weather may appreciate a more substantial glove.

    In other words, choose your gloves based on the work and weather—not simply your USDA zone.

    How Should You Care for Long Leather Gardening Gloves?

    Follow the manufacturer’s cleaning instructions because leather types and glove construction differ.

    Avoid assuming that every leather glove is machine washable.

    After gardening:

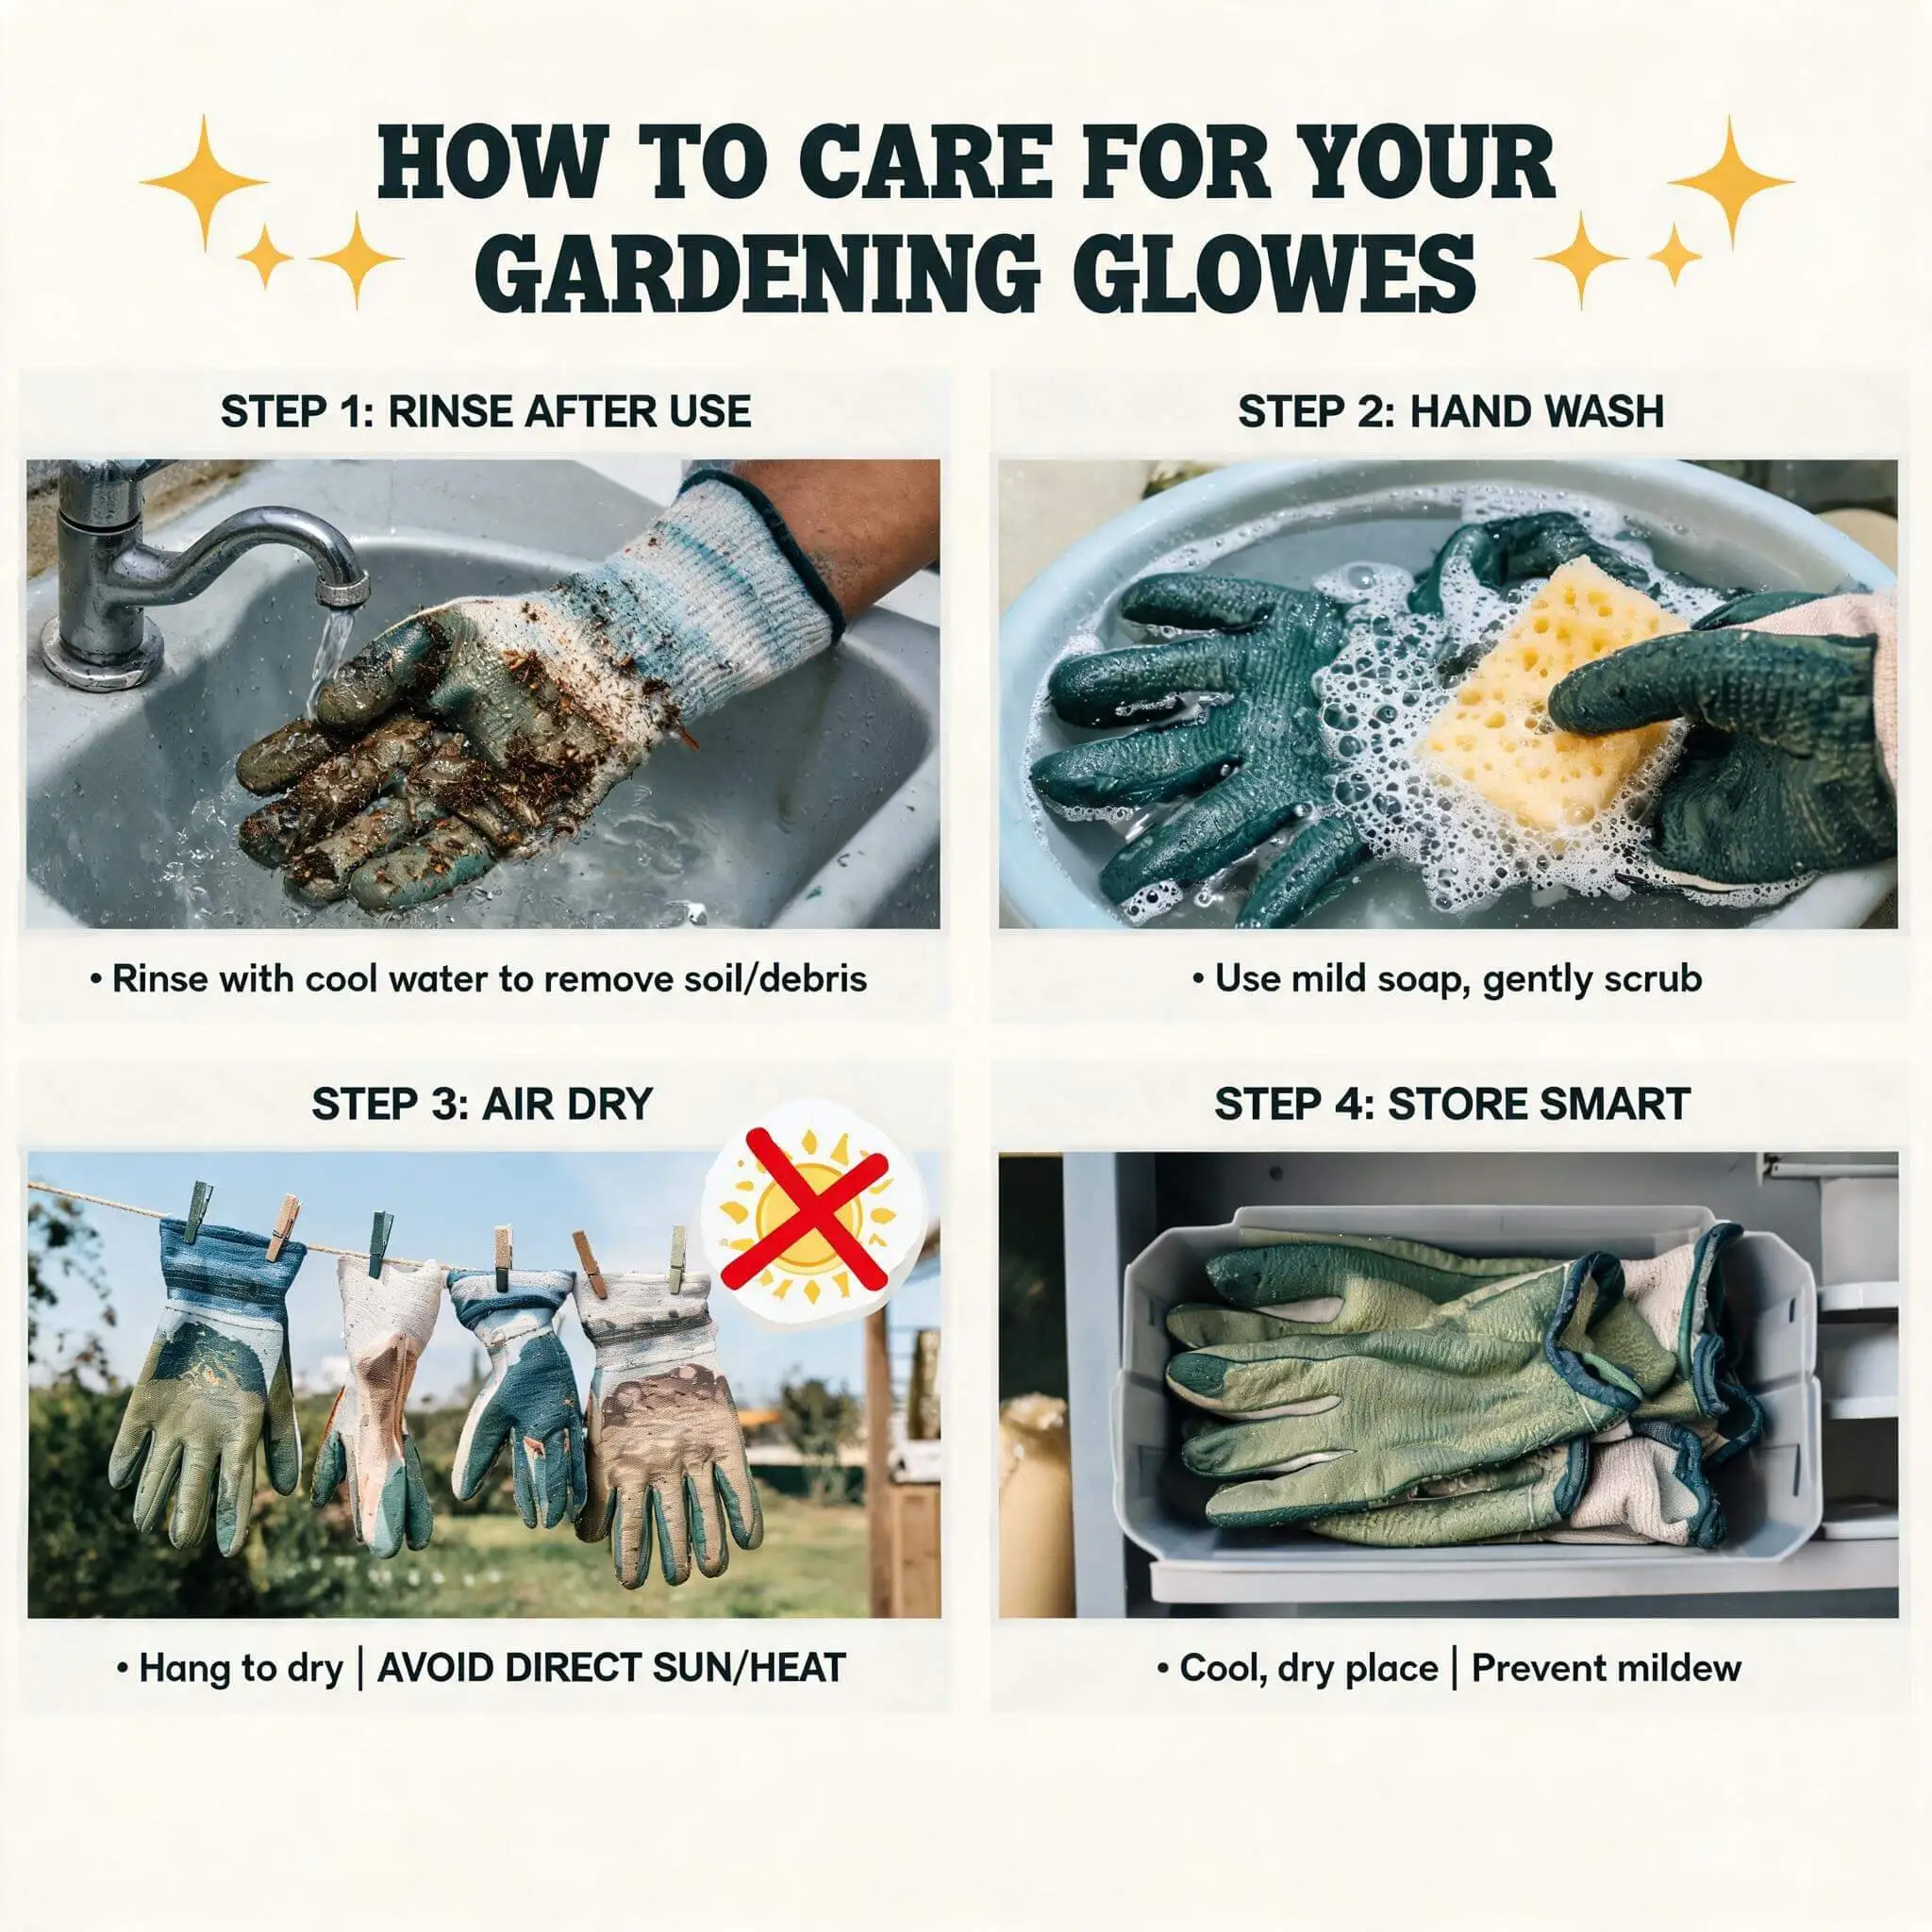
    1. Shake off loose soil and plant debris.

    2. Allow damp gloves to dry appropriately.

    3. Don’t expose leather unnecessarily to intense heat.

    4. Follow the manufacturer’s cleaning instructions.

    5. Inspect the palm, fingers, seams, and cuff periodically.

    6. Replace gloves when important protective areas become badly worn.

    A worn-out palm or damaged seam can reduce the protection you bought the gloves for in the first place.

    Frequently Asked Questions

    Are long sleeve gardening gloves worth buying?

    If you regularly work with roses, brambles, thorny shrubs, or other prickly plants, the additional forearm coverage can be useful. For basic planting and weeding, standard gloves may be sufficient.

    What are the best gloves for rose pruning?

    Look for a glove with a long gauntlet, durable material, reinforced palm and fingertips, and enough flexibility to use pruning shears. The right model depends on your priorities for protection, comfort, and dexterity.

    Do long gardening gloves protect against thorns?

    They can reduce exposure to scratches and some punctures, but no glove should be assumed to be completely thorn-proof. Protection varies by material and construction.

    Are leather gardening gloves better for thorny plants?

    Leather is a popular choice for thorny work because it can combine durability and flexibility. However, leather quality and glove construction vary, so material alone shouldn’t determine your decision.

    How long should gardening glove sleeves be?

    For light pruning, a cuff extending several inches beyond the wrist may be sufficient. For dense roses and brambles, a longer gauntlet approaching the elbow provides more coverage.

    Can I use long gardening gloves for blackberry bushes?

    Yes. Long-cuff gloves can be particularly useful for blackberry and bramble work because they cover more of the forearm. Choose a durable construction and avoid assuming the gloves are completely puncture-proof.

    Are long gardening gloves too hot for summer?

    They can be, especially if they’re heavily insulated or made from less breathable materials. If you garden during hot weather, look for breathable construction and avoid unnecessarily heavy gloves.

    How do I choose the correct size?

    Measure your hand according to the manufacturer’s instructions and compare your measurements with its sizing chart. Don’t assume your usual glove size will be identical across brands.

    Final Thoughts

    The best long sleeve gardening gloves aren’t necessarily the thickest or most expensive pair you can find.

    The better approach is to match the glove to the work.

    For rose pruning, prioritize a long gauntlet, protective leather, reinforced fingers, and good dexterity. For blackberry and bramble work, forearm coverage becomes particularly important. For light weeding, a heavy-duty gauntlet may be unnecessary.

    Among the options discussed here, the HANDLANDY long pigskin leather gloves stand out as a practical option to investigate if your main requirement is extended coverage combined with leather construction. The manufacturer specifically lists roses, berry bushes, holly, cactus, and other prickly plants among their intended uses.

    But don’t buy based on the product name alone. Check the current specifications, sizing information, cuff length, materials, and buyer feedback before ordering.

    Most importantly, remember that gardening gloves are designed to reduce risk—not eliminate it. When you’re working around serious thorns, sharp tools, or irritating plants, use the appropriate protective equipment and handle the plants carefully.

    Affiliate Disclosure: Honest Gardener may earn a commission from qualifying purchases made through links on this page. This does not affect our recommendations or the price you pay.

    Want to Know More on Gardening?

    Please Read :
    Download Free Ebook

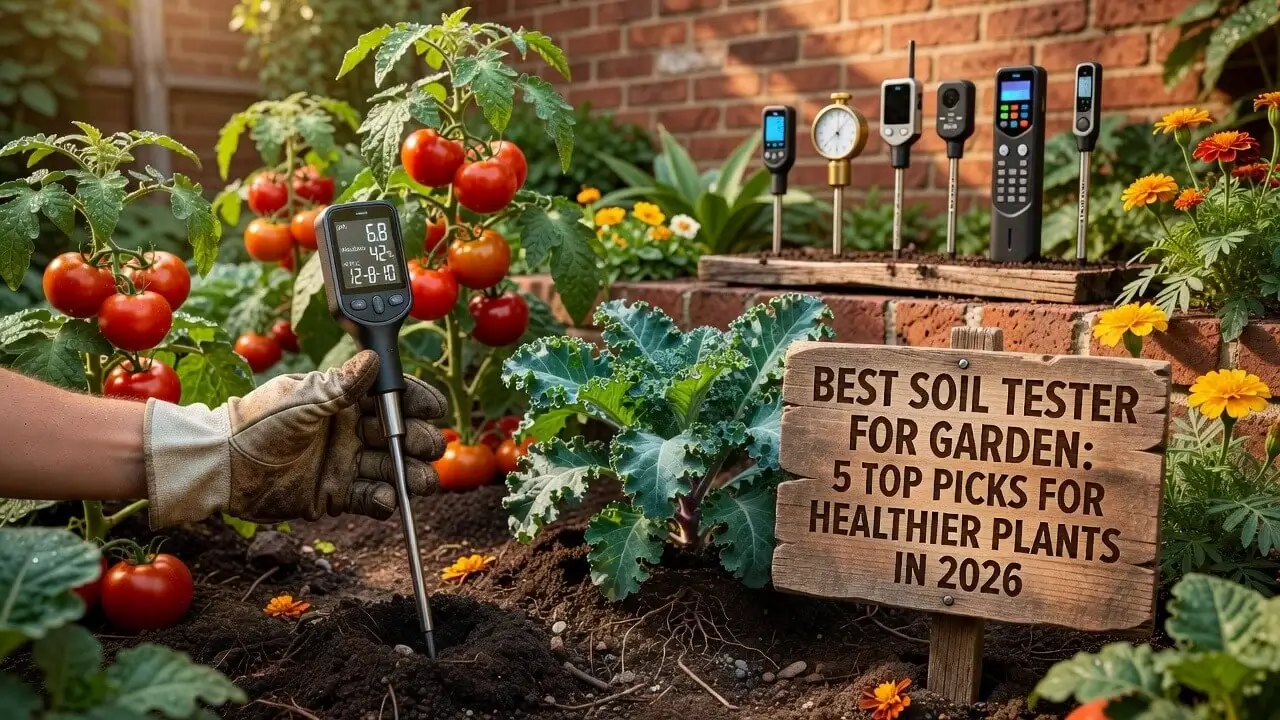
  • Best Soil Tester for Garden: 5 Top Picks for Healthier Plants in 2026

    best soil tester for garden

    You water your tomatoes regularly. You add compost. You fertilize when the leaves start looking pale. Yet somehow, your plants still don’t look happy.

    Sound familiar?

    Sometimes the problem isn’t your watering routine or the amount of fertilizer you’re using. The answer may be hiding just below the surface—in your soil.

    Soil pH, nutrient levels, moisture, and other soil conditions can have a major effect on how well plants grow. The right soil tester can help you stop guessing and start making better gardening decisions.

    In this guide, we’ll look at the best soil tester for garden use, compare five popular options, explain what each type can and cannot tell you, and show you how to test your soil correctly—even if you’re a complete beginner.

    Quick Answer: What Is the Best Soil Tester for Garden Use?

    If you want the simplest answer, MySoil Soil Test Kit is one of the strongest choices for gardeners who want a detailed analysis rather than just a quick pH reading.

    For gardeners who mainly want to monitor pH, moisture, or light, a digital or analog probe can be more convenient.

    Here’s our quick comparison:

    A major advantage of laboratory kits is that they can tell you much more than a basic probe. In 2026 testing by Bob Vila, MySoil was selected as the best overall among the kits they tested, while professional accredited laboratories were recommended when maximum reliability is important.

    Why You Should Test Your Garden Soil

    Imagine planting a dozen tomato plants and watching them struggle despite plenty of water and fertilizer.

    Your first reaction might be to add even more fertilizer.

    That can actually make things worse.

    Soil testing gives you information about what is already present in the soil before you start adding amendments. It can help you understand whether your soil is too acidic, too alkaline, lacking certain nutrients, or simply too wet or dry.

    The USDA notes that soil sampling should account for differences in soil type, landscape position, management, crops, and plant growth. For a small area such as a raised bed, taking several samples and combining them can provide a better representation of the area.

    In other words, don’t treat your entire yard as if it has identical soil.

    Your vegetable bed might have completely different conditions from the soil underneath your lawn.

    What Should the Best Soil Tester for Garden Actually Measure?

    Not every soil tester does the same job.

    Before buying one, decide what information you actually need.

    1. Soil pH

    pH tells you how acidic or alkaline your soil is.

    The scale runs from 0 to 14, with 7 considered neutral. Many common garden plants perform well in slightly acidic to near-neutral soil, although the ideal range varies by plant.

    For example:

    • Blueberries prefer acidic soil.

    • Many vegetables prefer mildly acidic soil.

    • Some plants tolerate or prefer more alkaline conditions.

    If your soil pH is unsuitable, certain nutrients may become less available to plants.

    That’s one reason adding more fertilizer doesn’t always solve a nutrient problem.

    2. Nutrients

    A comprehensive soil nutrient test kit for plants may measure nutrients such as:

    • Nitrogen

    • Phosphorus

    • Potassium

    • Calcium

    • Magnesium

    • Sulfur

    • Other micronutrients

    Laboratory testing is particularly useful when you’re preparing a new vegetable garden or trying to diagnose persistent growth problems.

    3. Soil Moisture

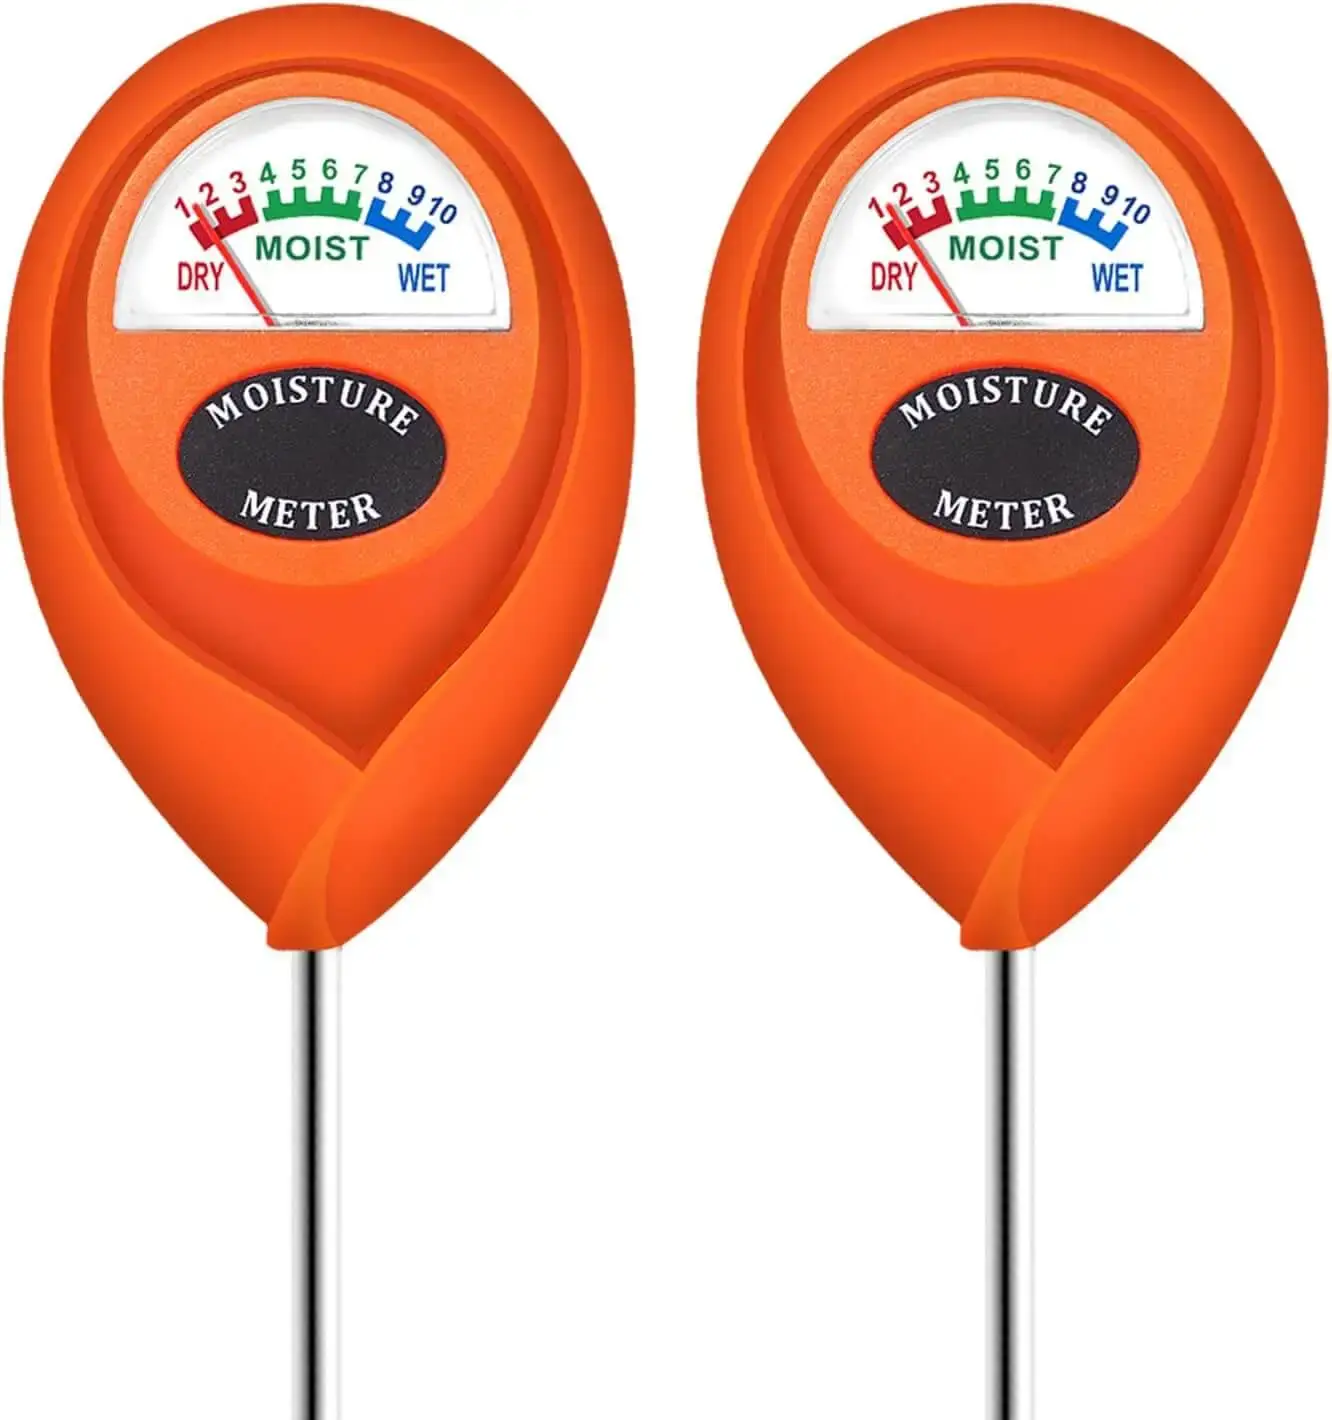
    A soil moisture meter for plants is useful when you’re unsure whether your plants actually need water.

    The surface can look dry while the root zone remains moist.

    This is particularly helpful for:

    • Container gardens

    • Raised beds

    • Houseplants

    • Newly planted shrubs

    • Drought-sensitive plants

    However, moisture meters should not be confused with comprehensive soil analysis. A moisture reading tells you about water conditions—not your complete soil fertility.

    4. Light

    Some inexpensive multi-function meters also measure light.

    That can be useful when deciding whether a particular location is suitable for vegetables, herbs, flowers, or houseplants.

    But if your primary goal is understanding soil fertility, prioritize pH and nutrient testing over extra features.

    Best Soil Testers for Garden Use

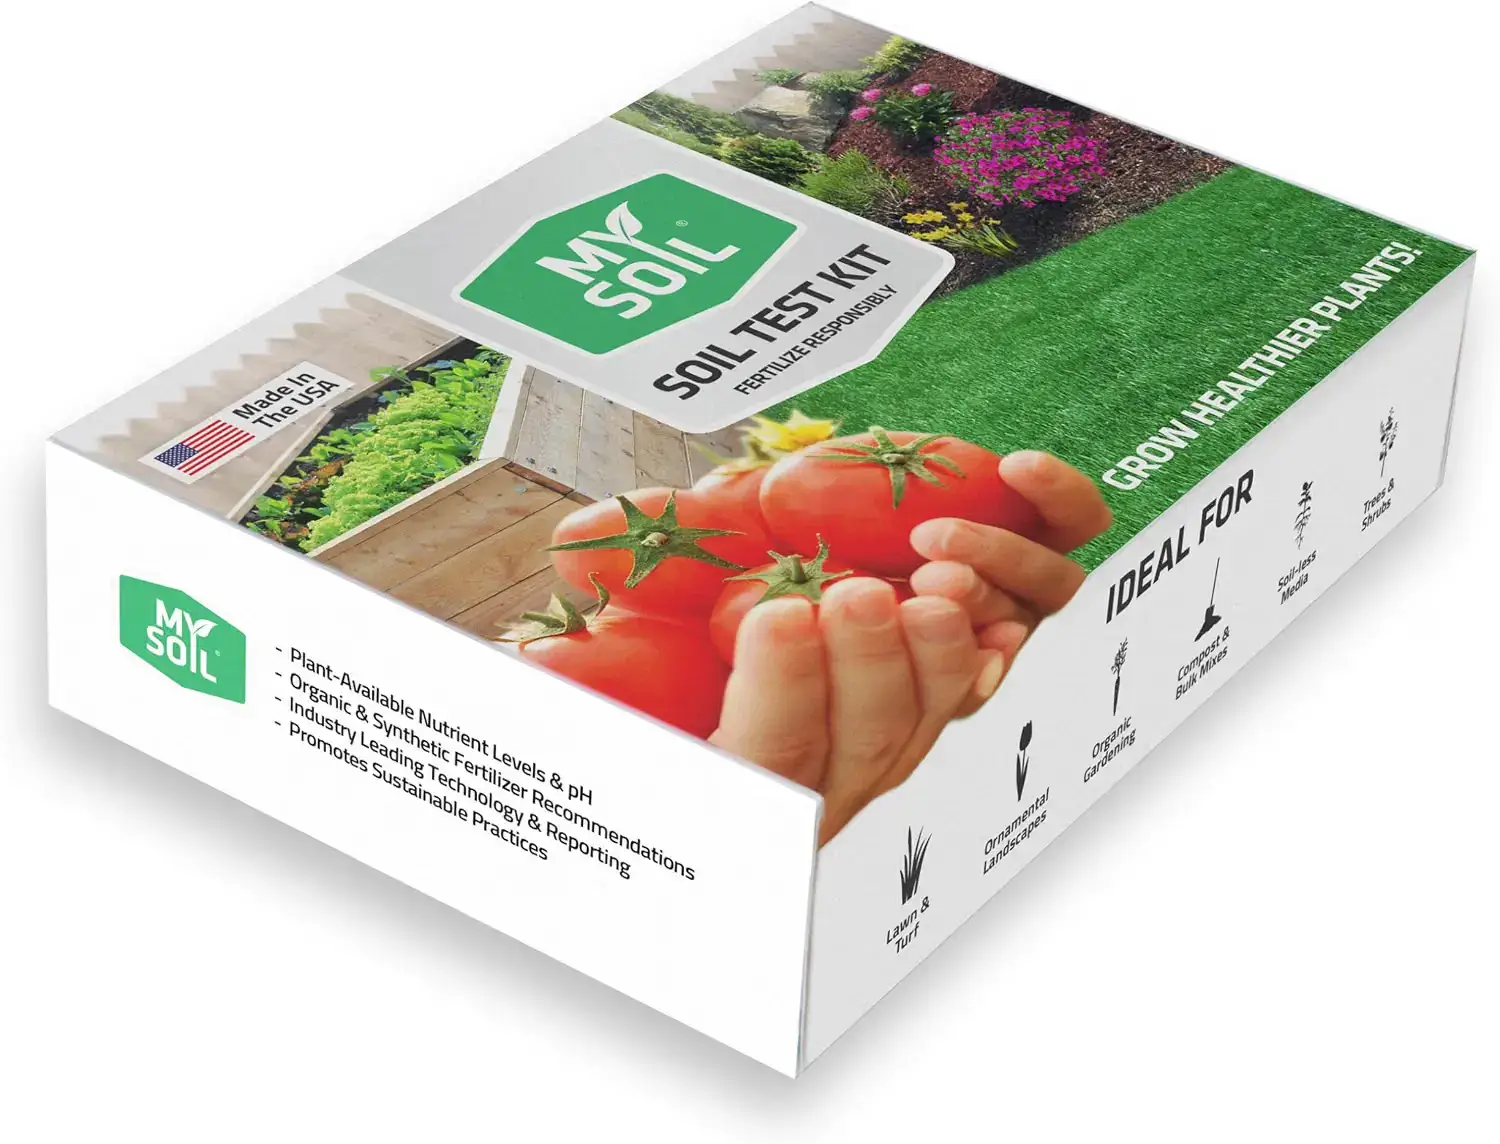
    MySoil Soil Test Kit — Best Overall for Detailed Testing

    1. MySoil Soil Test Kit — Best Overall for Detailed Testing

    If you’re looking for a garden soil testing kit that provides more information than a simple pH meter, MySoil is an excellent option to consider.

    Instead of simply inserting a probe into the ground, you collect a soil sample and send it to a laboratory.

    The resulting analysis provides pH and numerous plant-available nutrients, along with recommendations intended to help gardeners decide what amendments or fertilizers may be appropriate.

    Bob Vila selected MySoil as its best overall soil test kit after comparing home-testing products against laboratory results.

    Pros

    • Detailed laboratory analysis

    • Tests pH and multiple nutrients

    • Easy sample collection

    • Useful fertilizer recommendations

    • Better suited to serious gardeners

    Cons

    • Results aren’t instant

    • More expensive than simple pH strips

    • Requires mailing a soil sample

    Best for: Vegetable gardeners, new garden beds, and gardeners who want detailed information.

    Check Price on Amazon

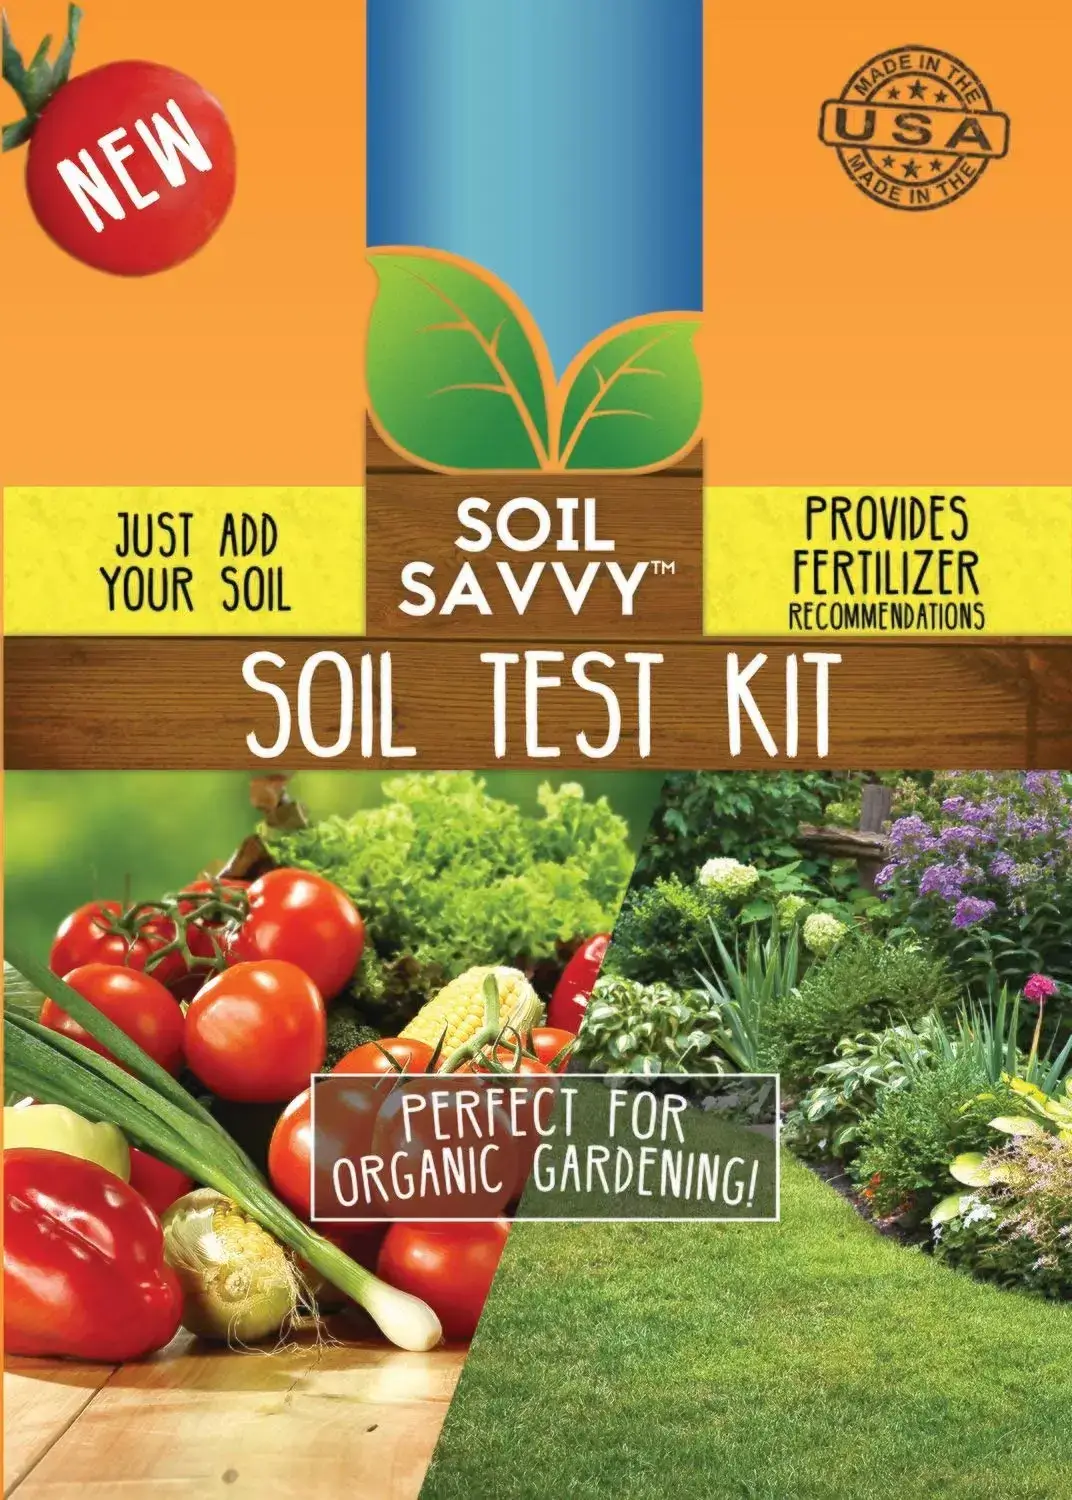
    Soil Savvy Soil Test Kit — Best for Nutrient Analysis

    2. Soil Savvy Soil Test Kit — Best for Nutrient Analysis

    Soil Savvy takes another laboratory-based approach.

    You collect soil from your garden, send the sample to the lab, and receive a report covering pH and a broad range of nutrients.

    This makes it particularly useful if you’re preparing a serious vegetable garden and don’t want to rely entirely on an inexpensive probe.

    Current product comparisons report that Soil Savvy provides pH and nutrient information along with fertilizer recommendations.

    Pros

    • Laboratory analysis

    • Detailed nutrient information

    • Helpful recommendations

    • Good choice for vegetable gardens

    • More informative than basic meters

    Cons

    • Takes several days to receive results

    • Costs more than simple DIY tests

    • Requires sending a sample

    Best for: Gardeners who want professional-style soil information without complicated testing at home.

    Check Price on Amazon

    Garden Tutor Soil pH Test Strips — Best Budget pH Tester

    3. Garden Tutor Soil pH Test Strips — Best Budget pH Tester

    Sometimes you don’t need a complete laboratory report.

    Maybe you’re simply wondering:

    “Is my soil acidic or alkaline?”

    That’s where pH strips can be useful.

    Garden Tutor’s kit uses strips that change color when exposed to a soil sample solution. Bob Vila’s testing found the strips quick and easy to use, with results available in seconds.

    Pros

    • Affordable

    • Fast results

    • Easy for beginners

    • No batteries required

    • Useful for repeated pH checks

    Cons

    • Primarily tests pH

    • Doesn’t provide a complete nutrient analysis

    • Strips need proper storage

    • Color matching can require some judgment

    Best for: Beginners who want an inexpensive way to check garden soil pH.

    Check Price on Amazon

    4. Luster Leaf 1662 Soil Test Kit — Best DIY Chemical Kit

    If you prefer testing soil yourself rather than mailing a sample to a laboratory, the Luster Leaf 1662 is worth considering.

    It uses chemical testing to check pH, nitrogen, phosphorus, and potassium.

    This makes it a useful middle ground between simple pH strips and professional laboratory analysis.

    Pros

    • Tests several important soil factors

    • Immediate results

    • No laboratory mailing

    • Useful for home vegetable gardens

    • Good for gardeners who enjoy DIY testing

    Cons

    • Results require following instructions carefully

    • Less comprehensive than a laboratory analysis

    • Color comparison can be subjective

    Best for: DIY gardeners who want more than a pH reading.

    Check Price on Amazon

    Bluelab Soil pH Pen — Best Premium pH Meter

    5. Bluelab Soil pH Pen — Best Premium pH Meter

    If you regularly monitor soil pH and want a dedicated digital instrument, the Bluelab Soil pH Pen is a premium option.

    Unlike inexpensive analog meters, a dedicated digital pH meter is designed specifically around pH measurement and can be calibrated for more controlled readings.

    It is particularly interesting for gardeners who frequently work with plants where pH management is important.

    Pros

    • Fast digital readings

    • Designed for pH monitoring

    • Useful for frequent testing

    • Premium construction

    • Suitable for serious growers

    Cons

    • Much more expensive than basic meters

    • Requires maintenance

    • Not designed to replace a full nutrient analysis

    Best for: Experienced gardeners who regularly monitor pH.

    Check Price on Amazon

    Best Soil Tester Comparison Table

    Our recommendation: If you want to understand the overall fertility of a garden bed, choose a laboratory-style kit. If you simply want fast pH information, a pH strip or dedicated meter may be enough.

    How to Test Garden Soil Correctly

    How to Test Garden Soil Correctly

    Buying the best soil tester for garden use is only half the job.

    The sample matters just as much as the tester.

    Follow these steps.

    Step 1: Divide Your Garden Into Areas

    Don’t automatically mix soil from your entire property.

    Separate areas that have different:

    • Plants

    • Soil types

    • Fertilizer histories

    • Compost applications

    • Drainage

    • Growth problems

    The USDA recommends separately considering areas expected to have different soil characteristics or management histories.

    Step 2: Collect Several Small Samples

    For a raised bed, collect soil from multiple locations rather than taking one scoop from the corner.

    A USDA soil-testing guide recommends multiple cores from an area, with roughly 10–15 cores commonly used for a composite sample and at least 4–6 for a very small area such as a single raised bed.

    Step 3: Mix the Samples

    Combine the samples from the same area in a clean container.

    Remove:

    • Stones

    • Large roots

    • Leaves

    • Mulch

    • Other debris

    Mix the soil thoroughly.

    Step 4: Follow Your Tester’s Instructions

    This part is important.

    Don’t assume every tester works the same way.

    A pH strip may require mixing soil with water, while a probe may need to be inserted directly into moist soil. A laboratory kit will have its own sample collection instructions.

    Follow the manufacturer’s directions exactly.

    Step 5: Record the Results

    Write down your results.

    For example:

    Tomato Bed – Spring 2026

    • pH: 6.4

    • Nitrogen: adequate

    • Phosphorus: high

    • Potassium: adequate

    Now you have something useful to compare with future tests.

    Beginner Mistakes to Avoid

    Don’t Test Only One Spot

    Soil can vary significantly within the same yard.

    Testing only the healthiest-looking corner may give you a misleading picture.

    Don’t Add Lime Without Testing

    Lime can raise soil pH.

    If your soil is already sufficiently alkaline, adding more may create a new problem.

    Test first, amend second.

    Don’t Assume Yellow Leaves Always Mean Nitrogen Deficiency

    Yellow leaves can have several causes, including watering problems, root stress, pests, disease, nutrient availability, or unsuitable pH.

    That’s why soil testing should be part of the diagnosis—not the entire diagnosis.

    Don’t Over-Fertilize

    More fertilizer isn’t automatically better.

    A soil test can help prevent unnecessary applications and make your garden-care routine more targeted.

    Soil pH and USDA Hardiness Zones: What Gardeners Should Know

    USDA Hardiness Zones are extremely useful, but they answer a different question from soil testing.

    The USDA Plant Hardiness Zone Map is based primarily on average annual extreme minimum winter temperatures and helps gardeners determine which perennial plants are likely to survive winter in a particular area.

    Your USDA zone can help you choose plants.

    Your soil test helps you understand the growing environment underneath them.

    For example, a gardener in USDA Zone 6 and a gardener in Zone 9 might both grow tomatoes, but their planting schedules and winter conditions will differ.

    Likewise, two gardens in the same USDA zone can have completely different soil pH and nutrient levels.

    Zone information + soil information = better plant decisions.

    When Should You Test Garden Soil?

    For most gardeners, soil testing is especially useful:

    • Before creating a new garden bed

    • Before planting a vegetable garden

    • When plants repeatedly perform poorly

    • Before applying major soil amendments

    • After several seasons of intensive gardening

    • When changing from lawn to garden

    • When growing plants with specific pH requirements

    If your garden is performing well, you don’t necessarily need to test constantly.

    A thoughtful periodic test is generally more useful than repeatedly testing without changing your management.

    Real-Life Example: A Struggling Tomato Bed

    Imagine a gardener in Pennsylvania plants tomatoes in a new raised bed.

    The plants grow slowly and develop pale leaves.

    The gardener assumes the soil needs more fertilizer.

    Instead of immediately adding fertilizer, they use a best soil test kit for vegetable garden applications and discover that the soil already contains adequate phosphorus and potassium, while the pH is outside the preferred range for their crops.

    Now the gardener has information.

    Rather than throwing several bags of fertilizer into the bed, they can make a more targeted soil-management decision.

    That’s the real value of soil testing:

    It replaces guessing with information.

    Internal Gardening Resources

    If you’re building a healthier garden from the ground up, explore more gardening guides on HonestGardener.com, including practical advice on soil, garden tools, planting, and vegetable gardening.

    A soil test becomes even more useful when combined with good watering, mulching, composting, and plant-selection practices.

    Frequently Asked Questions

    What is the best soil tester for garden use?

    For detailed information about pH and nutrients, a laboratory-based product such as MySoil is a strong choice. For simple pH monitoring, pH strips or a dedicated digital pH meter may be more appropriate.

    Are cheap soil pH meters accurate?

    Some inexpensive meters can be useful for general monitoring, but accuracy can vary. If an important gardening decision depends on the result, consider confirming it with a quality test kit or accredited soil laboratory.

    What is the best soil pH tester for garden beds?

    For inexpensive testing, pH strips are convenient. For frequent, more controlled pH measurements, a dedicated digital pH meter is a better choice.

    Can a soil moisture meter replace a soil test?

    No.

    A moisture meter primarily tells you about moisture conditions. It does not replace a comprehensive test for pH and nutrients.

    How often should I test my garden soil?

    There isn’t one schedule that fits every garden. Testing before establishing a new garden and periodically afterward can be useful, especially when growing crops intensively or applying amendments.

    What soil pH is best for vegetables?

    Many common vegetables perform well in mildly acidic to near-neutral soil, but the ideal range varies by crop. Always check the requirements of the specific vegetable you’re growing.

    Should I test soil before adding fertilizer?

    Yes, whenever practical.

    Testing can help you avoid applying nutrients your soil already contains in sufficient amounts.

    Is a laboratory soil test better than a home soil tester?

    For detailed nutrient information and higher confidence, an accredited laboratory test is generally preferable. Home testers are convenient for quick monitoring and basic checks.

    Affiliate Disclosure

    Affiliate Disclosure: This article may contain affiliate links. If you purchase a product through one of our links, HonestGardener.com may earn a small commission at no additional cost to you. We only recommend products that we believe may be useful to our readers. Product prices and availability can change, so always check the retailer’s current listing before purchasing.

    Final Verdict: Which Soil Tester Should You Buy?

    There isn’t one perfect tester for every gardener.

    The best soil tester for garden use depends on the question you’re trying to answer.

    If you want a detailed picture of your soil’s fertility, choose a laboratory-based soil test such as MySoil or Soil Savvy.

    If you only need a quick pH check, Garden Tutor pH strips are inexpensive and beginner-friendly.

    If you want to perform multiple DIY tests at home, Luster Leaf 1662 offers a useful combination of pH and major nutrients.

    And if you’re a serious grower who frequently monitors pH, the Bluelab Soil pH Pen is a premium option worth considering.

    Key Takeaways

    • Test before adding major amendments.

    • Don’t assume yellow leaves automatically mean nitrogen deficiency.

    • Test different garden areas separately when their conditions differ.

    • Laboratory tests provide more detailed nutrient information.

    • pH meters and strips are convenient for quick checks.

    • Moisture meters are useful for watering decisions but aren’t comprehensive soil tests.

    • Your USDA Hardiness Zone helps with plant selection, while soil testing helps you understand your soil.

    Most importantly, don’t treat your garden like a guessing game.

    Test the soil, understand the results, and then give your plants what they actually need.

    Ready to improve your garden?

    Start with one bed or planting area. Test the soil, record your results, and make your next amendment based on evidence rather than guesswork.

    A small soil test today can save you money, fertilizer, and frustration later—and give your plants a much better chance to thrive.

    Want to Know More on Gardening?

    Please Read :
    Download Free Ebook

    best soil tester for garden

  • Best Weeding Tool: 5 Top Garden Weeders for Easy, Root-Free Weed Removal in 2026

    best weeding tool

    You spend hours preparing your garden, planting vegetables, watering flowers, and improving the soil.

    Then, almost overnight, weeds appear.

    A few dandelions become dozens. Tiny weeds pop up between your vegetables. Crabgrass creeps along the edge of the flower bed. Before long, you’re on your knees pulling weeds by hand—and wondering why gardening suddenly feels like hard labor.

    The good news?

    You don’t need to fight weeds with your bare hands.

    The right best weeding tool can make the job considerably faster and easier. Whether you’re dealing with dandelions in the lawn, weeds in raised beds, or unwanted plants growing between flowers, choosing the right tool can help you remove weeds more efficiently while disturbing less soil.

    In this guide, we’ll compare five popular weeding tools, explain which type works best for different situations, and show you how to use them correctly.

    You’ll also learn how to combine mechanical weeding with mulching and other preventive strategies so you’re not constantly fighting the same weeds.

    Affiliate Disclosure: HonestGardener.com may earn a commission when you purchase products through links on this page, at no additional cost to you. We recommend products based on their usefulness for gardeners, not simply because they are available through affiliate programs.

    Why You Need the Right Weeding Tool

    Weeds aren’t just unattractive.

    They compete with desirable plants for water, nutrients, sunlight, and growing space. University of Minnesota Extension also notes that weeds can harbor insects and diseases and spread through seeds, roots, rhizomes, or stolons.

    That’s why removing weeds while they’re still small is usually much easier than waiting until they’ve become established.

    The right tool can help you:

    • Remove weeds with less bending

    • Pull taproots more effectively

    • Reach weeds between plants

    • Work around vegetables without damaging them

    • Reduce hand and wrist fatigue

    • Weed larger areas more efficiently

    • Avoid unnecessary herbicide use in appropriate situations

    But there’s an important point:

    There is no single perfect weeding tool for every garden.

    A stand-up weed puller may be excellent for dandelions in a lawn but awkward between closely spaced carrots. A narrow hand weeder may be perfect for a raised bed but exhausting if you’re clearing hundreds of weeds from a large yard.

    The best choice depends on where the weeds are growing and what kind of roots they have.

    Quick Comparison: Best Weeding Tools

    Recent testing from HGTV selected the Fiskars 4-Claw Stand-Up Weeder as its best overall stand-up weeder, while Bob Vila’s testing highlighted the CobraHead as a versatile hand tool and Grampa’s Weeder as a strong stand-up option.

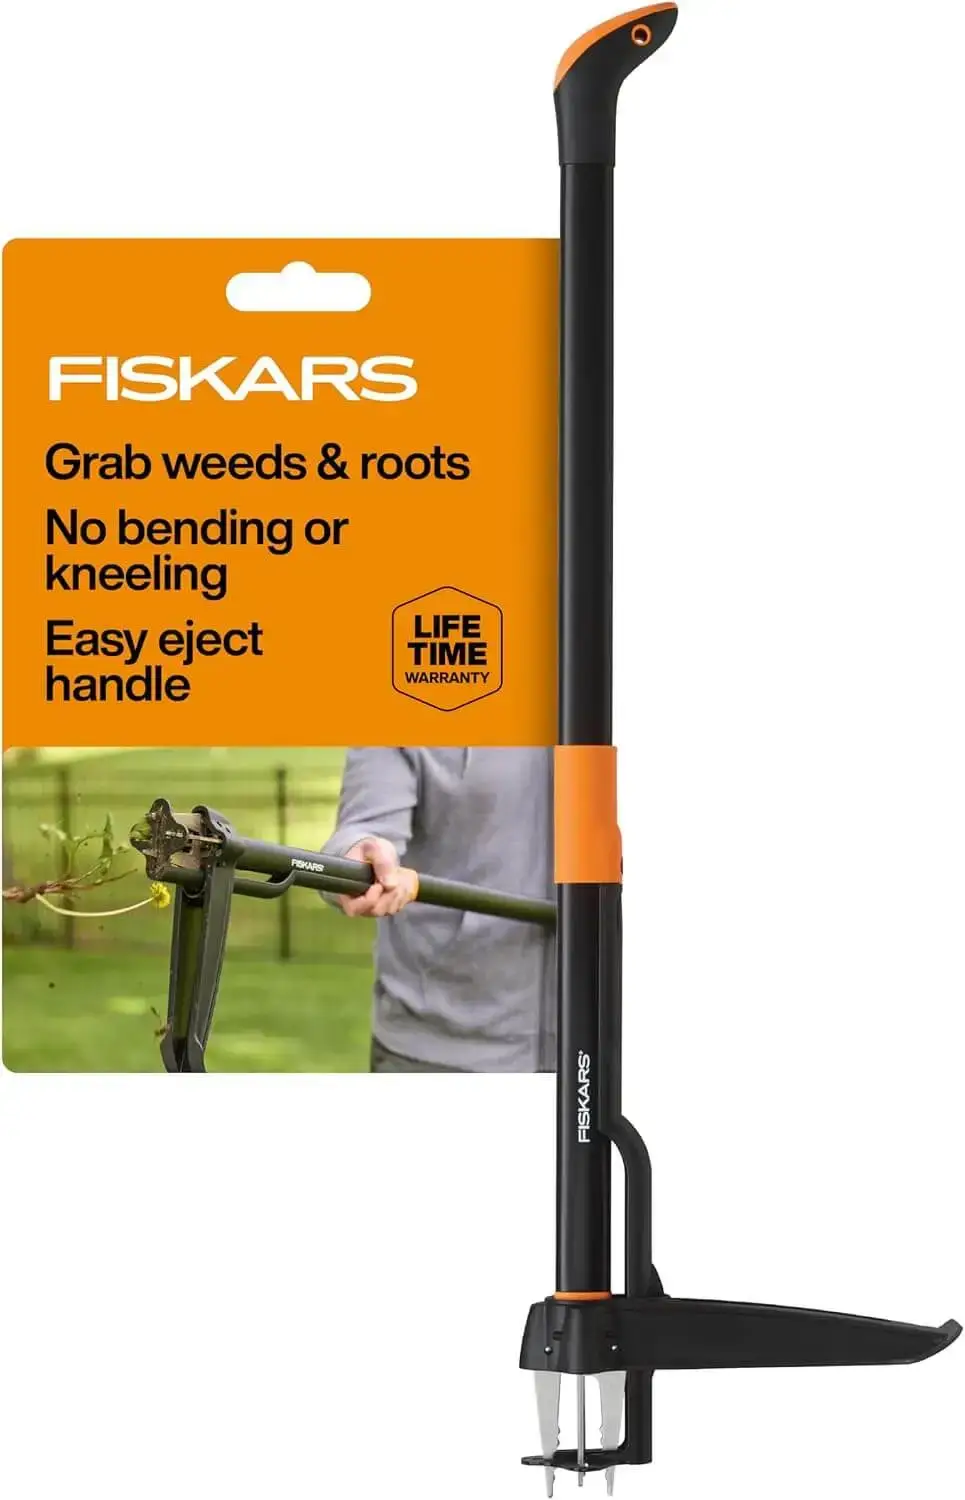
    Fiskars 4-Claw Stand-Up Weeder

    1. Fiskars 4-Claw Stand-Up Weeder

    Best for: Dandelions, taproot weeds, lawns, and gardeners who want to avoid kneeling

    If you have a lawn full of dandelions, the Fiskars 4-Claw Stand-Up Weeder is one of the first tools I’d consider.

    Its long handle allows you to position the claw head over the weed, push the claws into the soil, grip the root, and pull upward without repeatedly bending over.

    HGTV’s recent testing named it its best overall stand-up weeder and highlighted the four stainless-steel claws, easy-eject mechanism, and design intended to reduce back and knee strain.

    Bob Vila’s testing similarly found it effective for small- to medium-sized weeds, particularly dandelions, while noting that hard clay soil and large weeds can be more challenging.

    Pros

    • Excellent for taproot weeds

    • Long handle reduces bending

    • Four-claw design grips roots

    • Easy-eject mechanism

    • Good for lawns

    • Useful for gardeners with limited mobility

    Cons

    • Not ideal for tightly planted vegetable beds

    • Can struggle in hard, dry soil

    • Removes one weed at a time

    • More expensive than basic hand weeders

    Best choice for: Homeowners dealing with dandelions and similar weeds across lawns or open beds.

    Check Price on Amazon

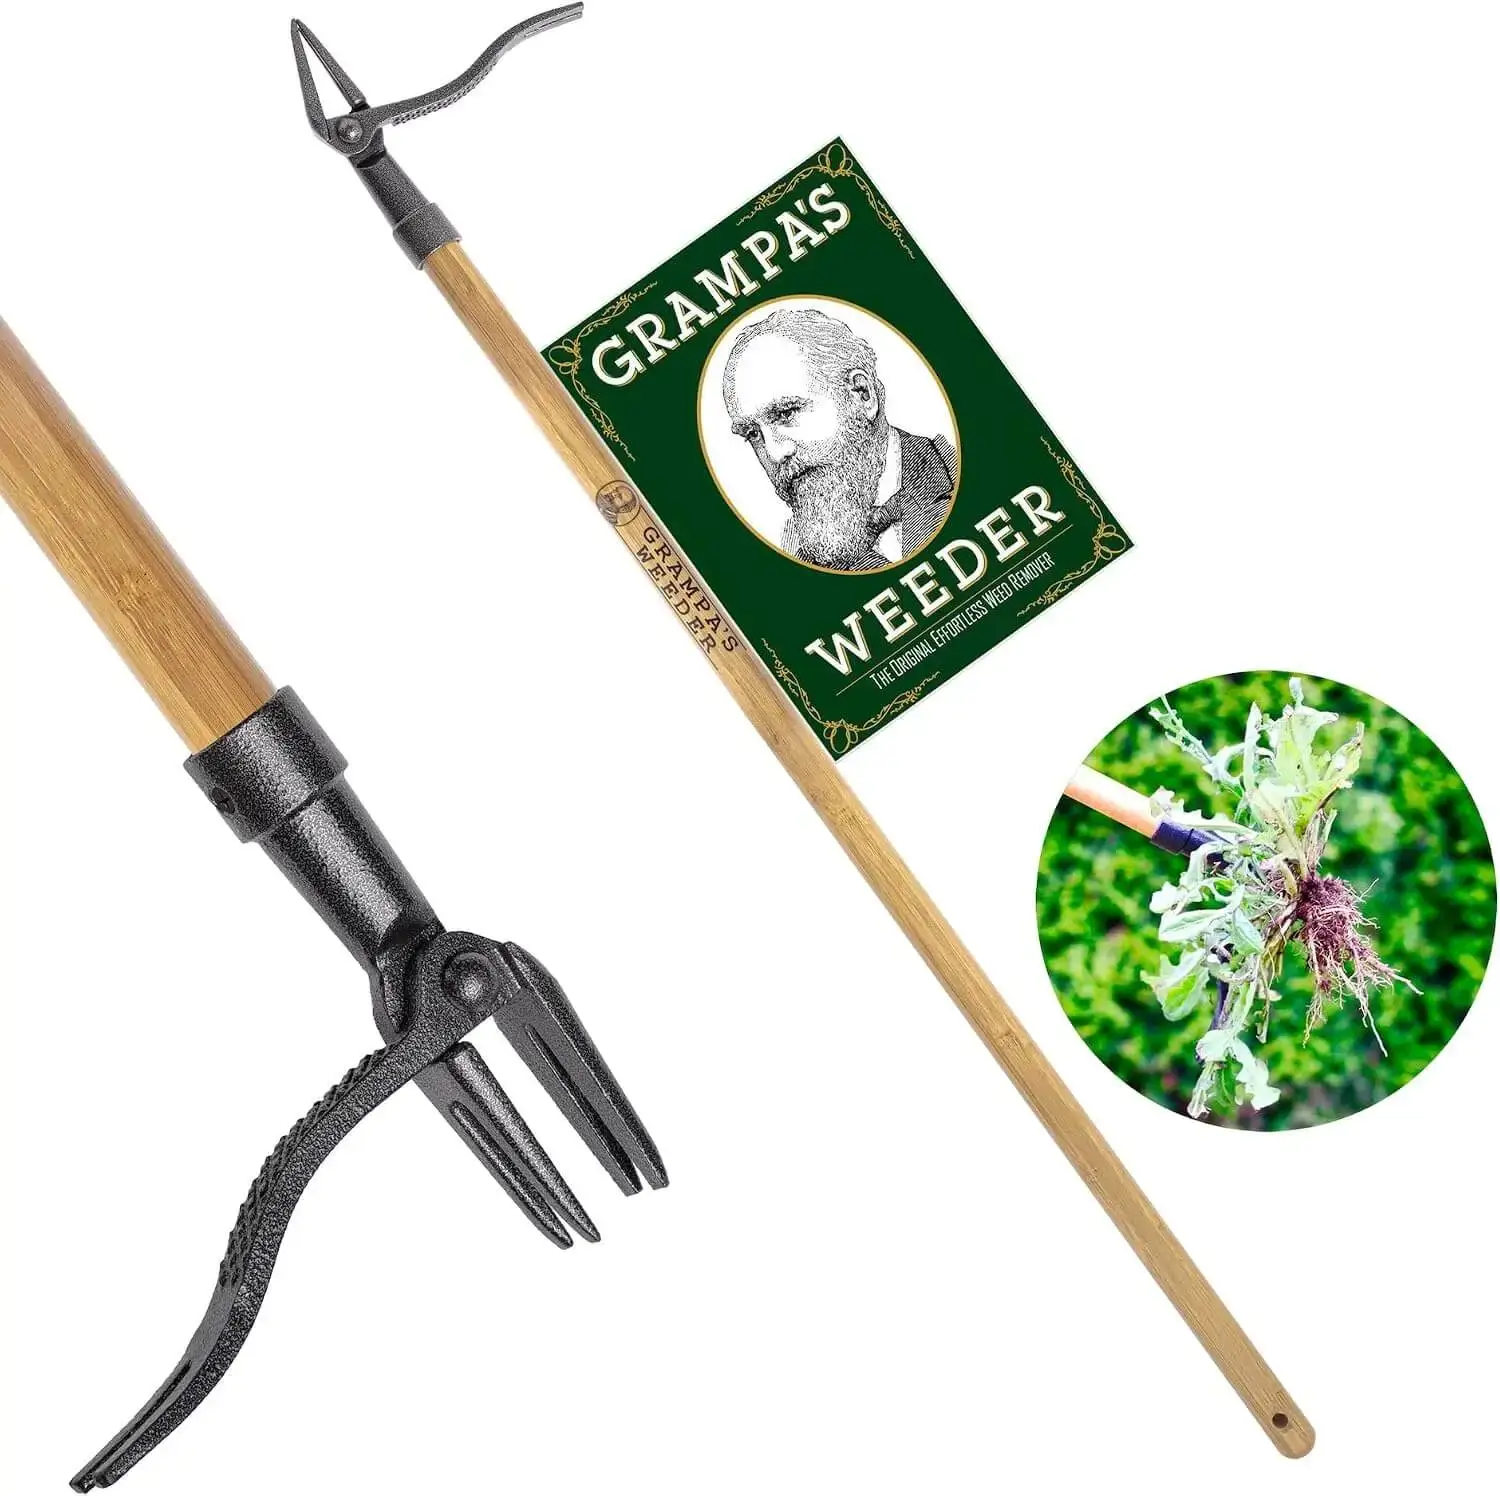
    Grampa's Weeder

    2. Grampa’s Weeder

    Best for: Traditional stand-up weed removal

    Sometimes the simplest tools are the most satisfying.

    Grampa’s Weeder uses a long handle and four-claw mechanism to remove weeds while you remain standing.

    The design has been around since 1913, and current testing continues to highlight it as an effective option for dandelions and other fleshy-rooted weeds.

    One advantage is its straightforward operation. There are no complicated settings or batteries.

    You simply position the claws, step down, pull, and remove the weed.

    Pros

    • Simple mechanical design

    • Long handle

    • Good for dandelions

    • Reduces bending and kneeling

    • Durable construction

    • No batteries or chemicals required

    Cons

    • Less effective in hard or rocky soil

    • Not ideal for dense vegetable beds

    • Requires some practice

    • Weed removal is slower when roots are difficult to grip

    Bob Vila found Grampa’s Weeder particularly effective when the soil was moist rather than extremely dry or excessively wet.

    Best choice for: Traditionalists and homeowners with lawn or flower-bed weeds that have substantial roots.

    Check Price on Amazon

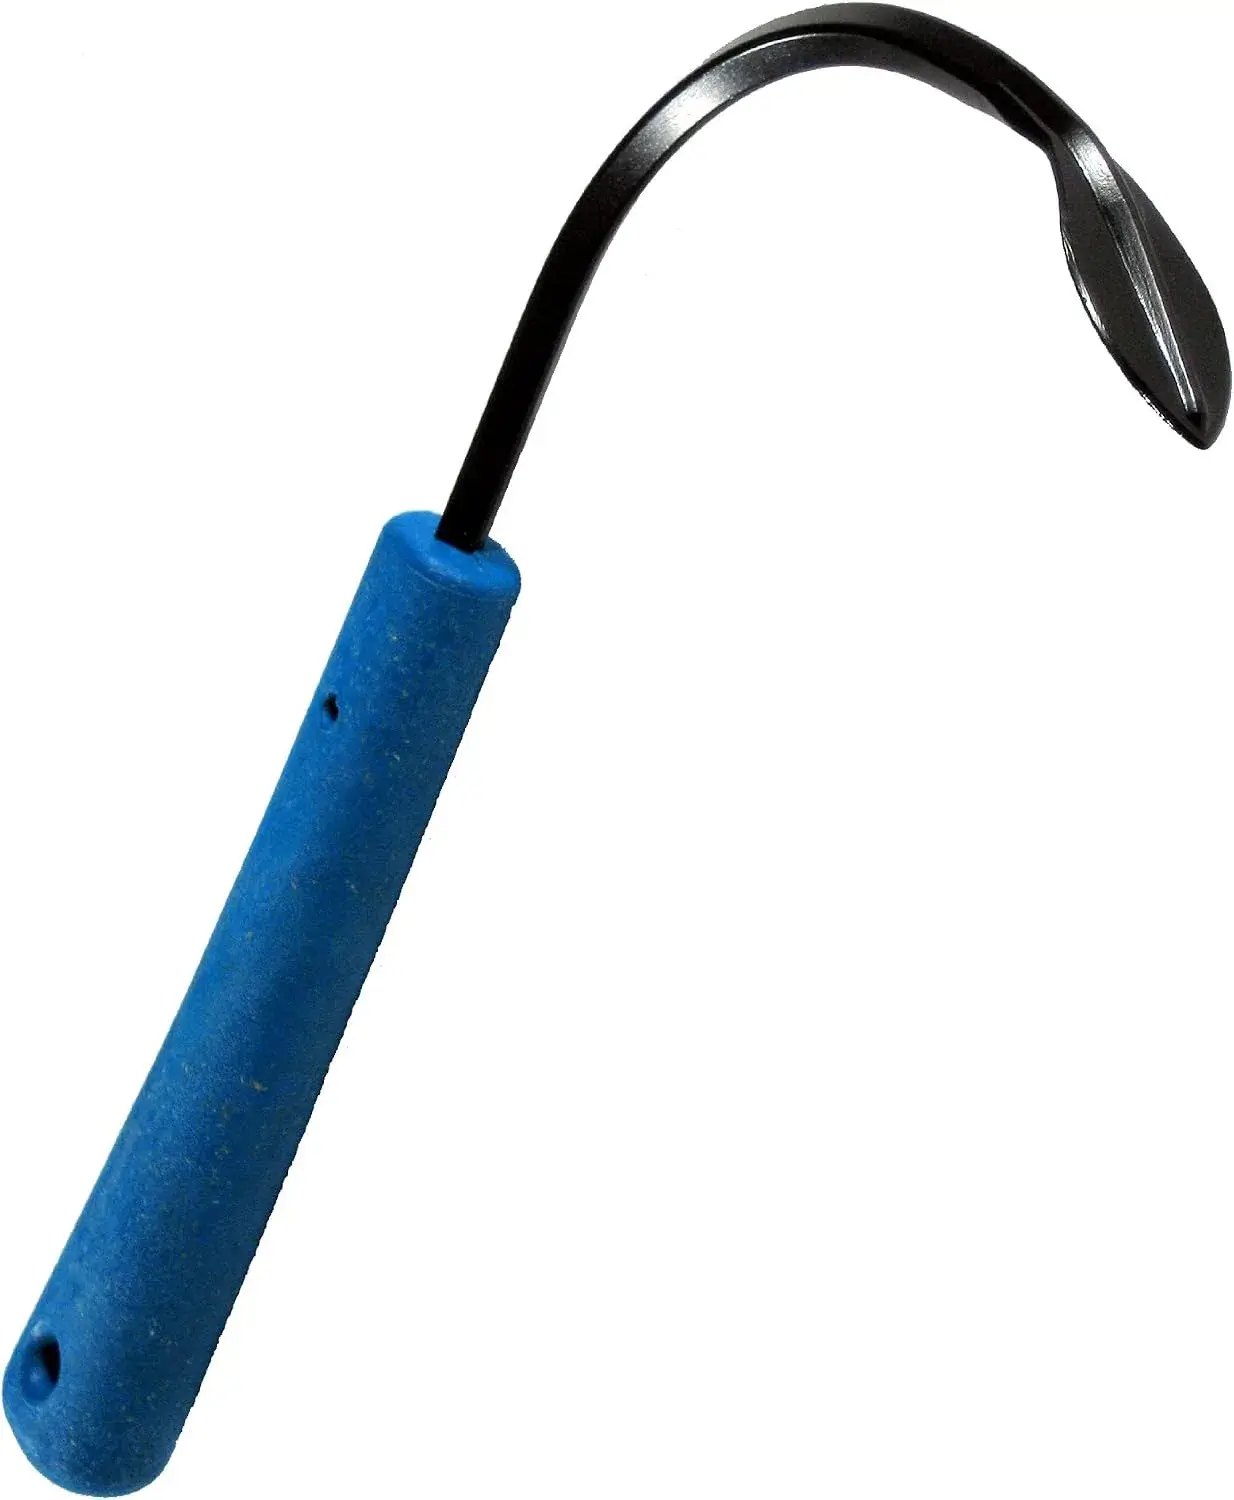
    CobraHead Original Weeder & Cultivator

    3. CobraHead Original Weeder & Cultivator

    Best for: Raised beds, vegetable gardens, and precision hand weeding

    If you’re looking for the best hand weeder for garden beds, a narrow, curved tool can be more useful than a stand-up weed puller.

    The CobraHead Original is designed as a multipurpose hand tool for digging, cutting, cultivating, and weeding.

    Bob Vila selected the CobraHead as its best overall weeding tool in one of its comprehensive evaluations, emphasizing its versatile tempered-steel head.

    The narrow head lets you work close to plants without disturbing a huge area of soil.

    Pros

    • Excellent for garden beds

    • Versatile

    • Durable steel head

    • Useful for cultivating as well as weeding

    • Good around established plants

    • Compact enough for raised beds

    Cons

    • Requires bending or kneeling

    • Not ideal for large lawns

    • Less convenient for gardeners with mobility limitations

    • Takes some practice for precision work

    Best choice for: Vegetable gardeners who want one compact tool that can weed and cultivate.

    Check Price on Amazon

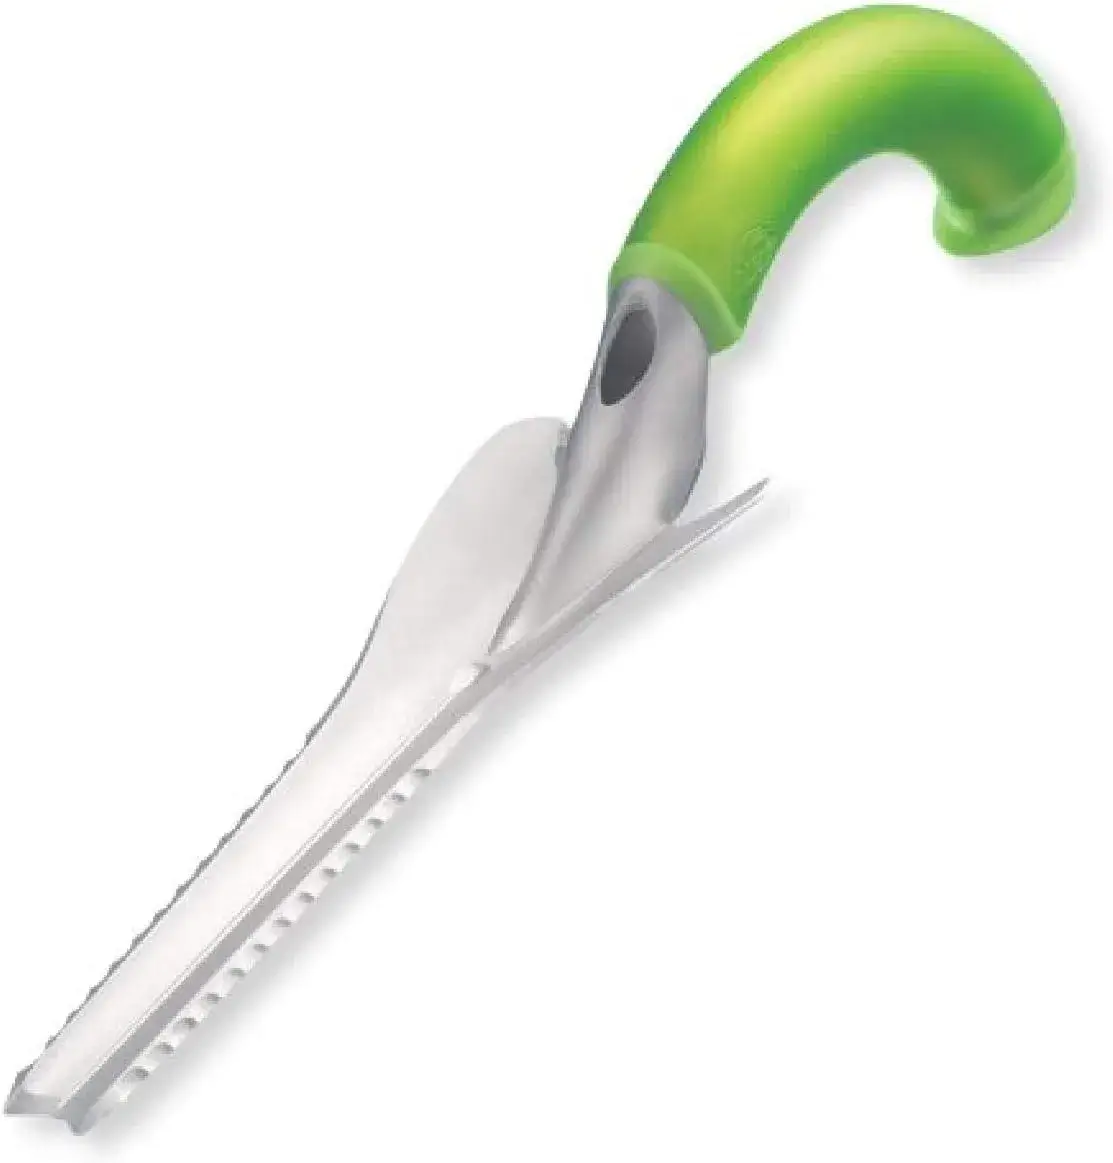
    Radius Garden Ergonomic Weeder

    4. Radius Garden Ergonomic Weeder

    Best for: Raised beds and gardeners who prioritize hand comfort

    Hand weeding can become uncomfortable when you repeatedly squeeze a small handle or twist your wrist.

    An ergonomic weeder can make the difference between enjoying a 30-minute garden session and giving up after ten minutes.

    Radius Garden’s ergonomic tools are designed around hand comfort and leverage, making this type of tool worth considering for raised beds, flower borders, and smaller gardens.

    Pros

    • Comfortable ergonomic grip

    • Good leverage

    • Useful in raised beds

    • Lightweight compared with long-handled tools

    • Precise control

    Cons

    • Requires kneeling or bending

    • Less efficient for large lawns

    • May not remove every type of deep-rooted weed equally well

    Best choice for: Gardeners who need precision but want to reduce hand strain.

    Check Price on Amazon

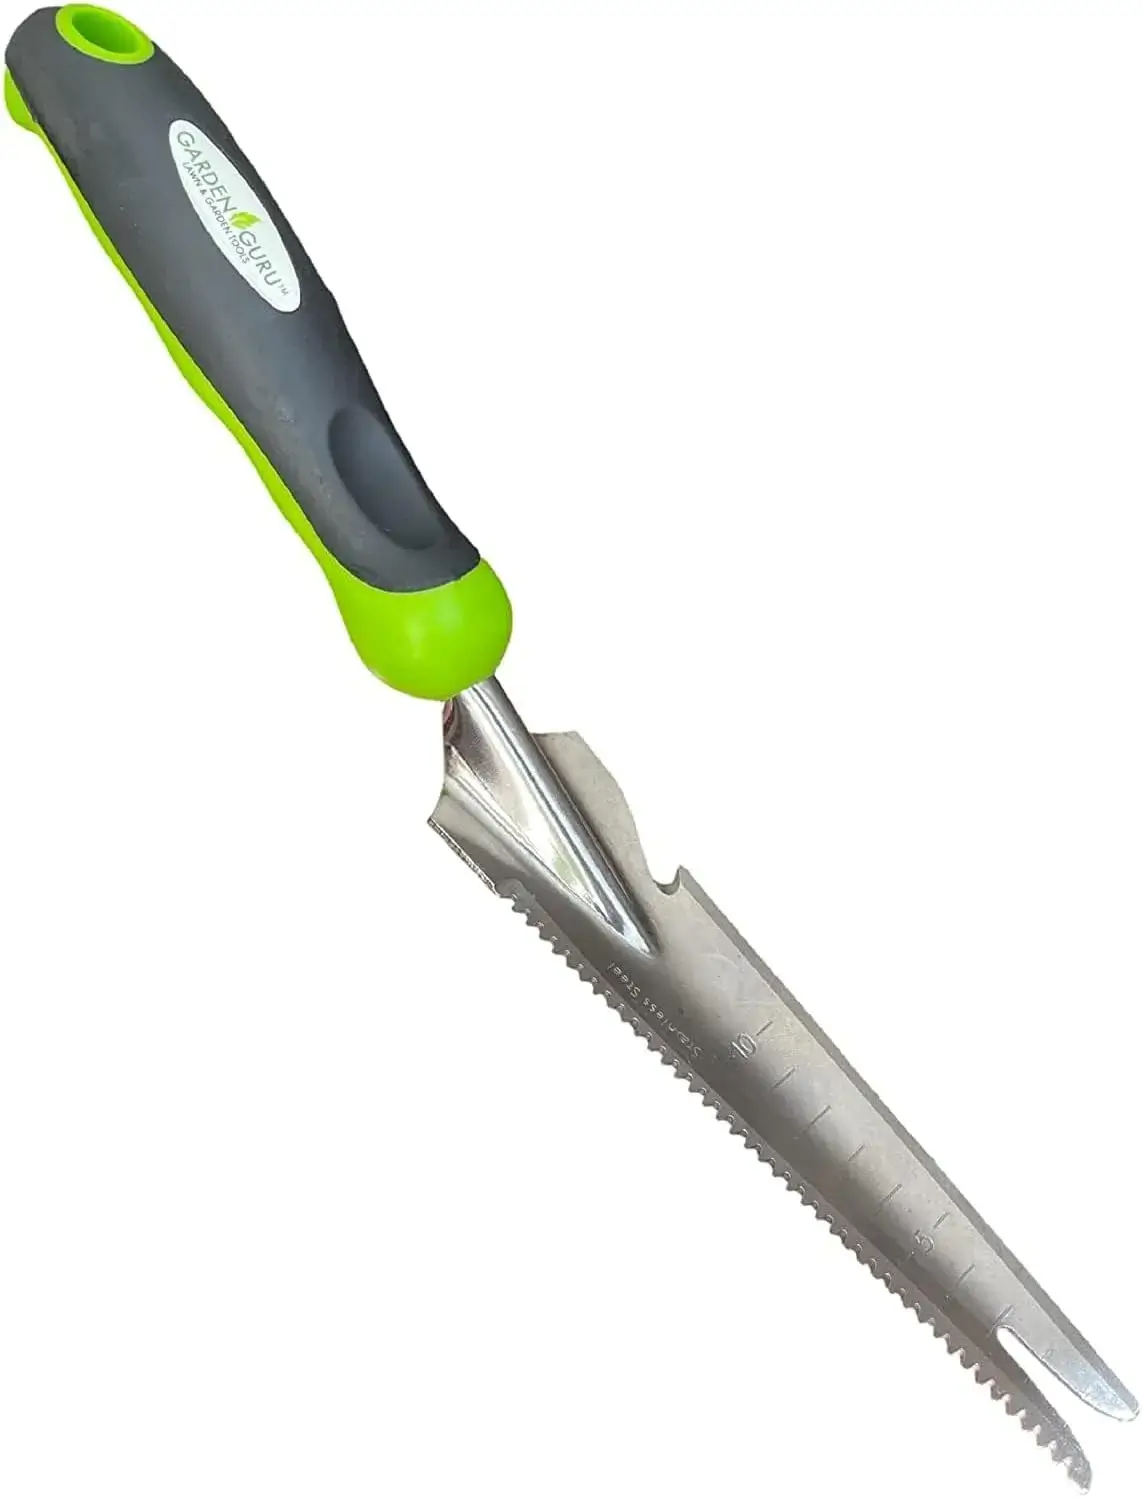
    Garden Guru Hand Weeder

    5. Garden Guru Hand Weeder

    Best for: Flower beds, borders, and individual weeds

    Sometimes the weed you’re trying to remove is growing directly beside a plant you actually want to keep.

    That’s where a small hand weeder shines.

    Instead of attacking the entire area, you can position the narrow tool directly beside the weed and loosen the surrounding soil.

    Pros

    • Excellent precision

    • Easy to carry

    • Useful around flowers

    • Good for individual weeds

    • Suitable for container gardens

    • Simple for beginners

    Cons

    • Requires bending or kneeling

    • Not ideal for large areas

    • Limited leverage compared with stand-up weeders

    Best choice for: Small gardens, flower beds, containers, and precision weeding.

    Check Price on Amazon

    What Is the Best Tool for Pulling Weeds by the Root?

    If your goal is to remove the entire root, you need to think about the weed rather than simply the tool.

    For dandelions

    A stand-up four-claw weeder is particularly useful.

    Dandelions have a deep taproot, and UMN Extension recommends removing as much of the root as possible when hand-removing individual plants or small patches to reduce regrowth.

    For shallow annual weeds

    A hoe or hand cultivator may be faster.

    For weeds growing between vegetables

    A narrow hand weeder is safer because you can work close to the crop.

    For creeping weeds

    Repeated removal may be necessary because some weeds spread through underground stems or rhizomes.

    The best weeding tool is therefore the one that matches the weed’s growth habit.

    How to Choose the Best Weeding Tool

    Before purchasing, consider these six factors.

    1. Weed Type

    Do you mainly have:

    • Dandelions?

    • Crabgrass?

    • Clover?

    • Plantain?

    • Thistle?

    • Creeping weeds?

    • Small annual seedlings?

    Deep taproots favor different tools than shallow-rooted weeds.

    2. Soil Type

    Soil condition can dramatically affect performance.

    A stand-up claw weeder may work beautifully after rainfall when the soil is soft.

    In hard, compacted clay, however, inserting claws can require considerably more effort.

    Beginner tip: If your soil is extremely dry, water the area and wait until it is workable—not saturated—before pulling difficult weeds.

    3. Garden Size

    For a small raised bed, a hand weeder may be all you need.

    For a large lawn, a stand-up tool can save significant bending.

    For several acres, hand tools may not be practical at all.

    4. Your Physical Comfort

    This is often overlooked.

    If bending and kneeling are uncomfortable, choose a long handle weeder for back pain rather than forcing yourself to use a short hand tool.

    Stand-up weeders aren’t magic, but they can substantially reduce the amount of time you spend bent over.

    5. Root Removal

    If the main problem is dandelions, plantain, or other taproot weeds, choose a tool designed to grip or loosen roots.

    If you’re mostly removing tiny seedlings, a hoe may actually be faster.

    6. Durability

    Look for:

    • Hardened or stainless steel heads

    • Strong handle connections

    • Comfortable grips

    • Corrosion-resistant components

    • Replacement parts when available

    A durable tool costs more initially but can be a better long-term value.

    How to Use a Stand-Up Weeder

    Here’s a simple process for beginners.

    Step 1: Find the Weed

    Identify the target weed before inserting the tool.

    Avoid placing the claws too close to desirable plants.

    Step 2: Position the Tool

    Place the claw head directly over the weed’s base.

    Step 3: Push Down

    Step on the footplate or press the tool into the soil according to the manufacturer’s instructions.

    Step 4: Twist or Pull

    Engage the claws around the root and pull upward.

    Step 5: Eject the Weed

    If your tool has an eject mechanism, release the weed directly into your bucket.

    Step 6: Check the Root

    Look at what you’ve removed.

    If most of the root is still underground, the weed may return.

    How to Use a Hand Weeder in a Vegetable Garden

    Hand tools require more precision.

    Step 1: Weed When Plants Are Small

    Small weeds are much easier to remove.

    UMN Extension recommends making weeding part of your regular interaction with the garden and removing weeds before they flower and set seed.

    Step 2: Loosen the Soil

    Insert the tool beside the weed rather than directly through the center of a desirable plant’s root zone.

    Step 3: Lift the Root

    Use the tool as a lever.

    Step 4: Remove the Weed

    Pull gently rather than snapping the stem.

    Step 5: Fill the Hole

    For larger weeds, smooth the soil afterward.

    Step 6: Mulch

    Add an appropriate layer of mulch to reduce future weed emergence.

    Don’t Make This Common Weeding Mistake

    One of the biggest beginner mistakes is digging too deeply.

    You may think deeper is better because you’re trying to reach every root.

    But excessive cultivation can disturb desirable plant roots and bring buried weed seeds toward the surface.

    UMN Extension specifically recommends shallow cultivation around garden plants and warns against digging deeply enough to damage vegetable roots.

    The goal isn’t to turn your garden bed upside down.

    The goal is to remove the weed while disturbing as little soil as practical.

    Mulching: Your Second Line of Defense

    The best weeding strategy isn’t simply removing weeds.

    It’s preventing new ones from appearing.

    Mulch can help by blocking light at the soil surface and making it harder for weed seedlings to establish.

    University of Minnesota Extension notes that mulch can suppress weeds, conserve moisture, regulate soil temperature, and improve soil over time depending on the material used.

    Penn State Extension also recommends mulch as an important mechanical weed-management strategy.

    Common mulch options include:

    • Shredded bark

    • Straw

    • Compost

    • Grass clippings

    • Leaves

    • Wood chips

    Choose the material according to your crop and garden situation.

    Important: Avoid piling mulch directly against plant stems or tree trunks.

    A Simple Weekly Weed-Control Routine

    You don’t need to spend your entire weekend weeding.

    Try this approach:

    Monday: 5-minute inspection

    Walk through your garden and identify new weeds.

    Wednesday: Remove young weeds

    Use a hand weeder or hoe while they’re still small.

    Saturday: Deep-root cleanup

    Use your best weeding tool to tackle established weeds.

    Afterward: Mulch

    Cover appropriate bare soil to reduce new weed emergence.

    This routine can prevent a small weed problem from becoming a major one.

    Real-Life Scenario: Choosing the Right Tool

    Imagine you have a 20 × 30-foot vegetable garden.

    You grow:

    • Tomatoes

    • Peppers

    • Beans

    • Lettuce

    • Carrots

    You also have a lawn containing dandelions.

    Buying only one weeding tool isn’t necessarily the smartest solution.

    For the lawn, a Fiskars 4-Claw or Grampa’s stand-up weeder makes sense.

    For the vegetable beds, a CobraHead-style hand weeder gives you better control between plants.

    For tiny weeds around lettuce seedlings, a small hand cultivator or hoe may be even faster.

    This combination lets each tool do what it’s designed to do.

    USDA Hardiness Zones and Weed Management

    USDA Hardiness Zones don’t tell you which weeding tool to buy, but they can help you understand your local growing conditions and seasonal garden timing.

    The USDA Plant Hardiness Zone Map is based on average annual extreme minimum winter temperatures and divides the United States into 10°F zones with 5°F half-zone increments.

    You can check your USDA Plant Hardiness Zone by ZIP code.

    Why does this matter for weeds?

    Your climate affects:

    • When weeds emerge

    • How quickly they grow

    • Whether winter annual weeds survive

    • How long your garden remains active

    • When mulch should be applied

    • How often you’ll need to weed

    For example, a gardener in Zone 8 may deal with weeds during a longer growing season than someone gardening in Zone 4.

    Don’t wait for the weeds to become large simply because your vegetables are still young. Weed pressure can begin well before your main crops reach maturity.

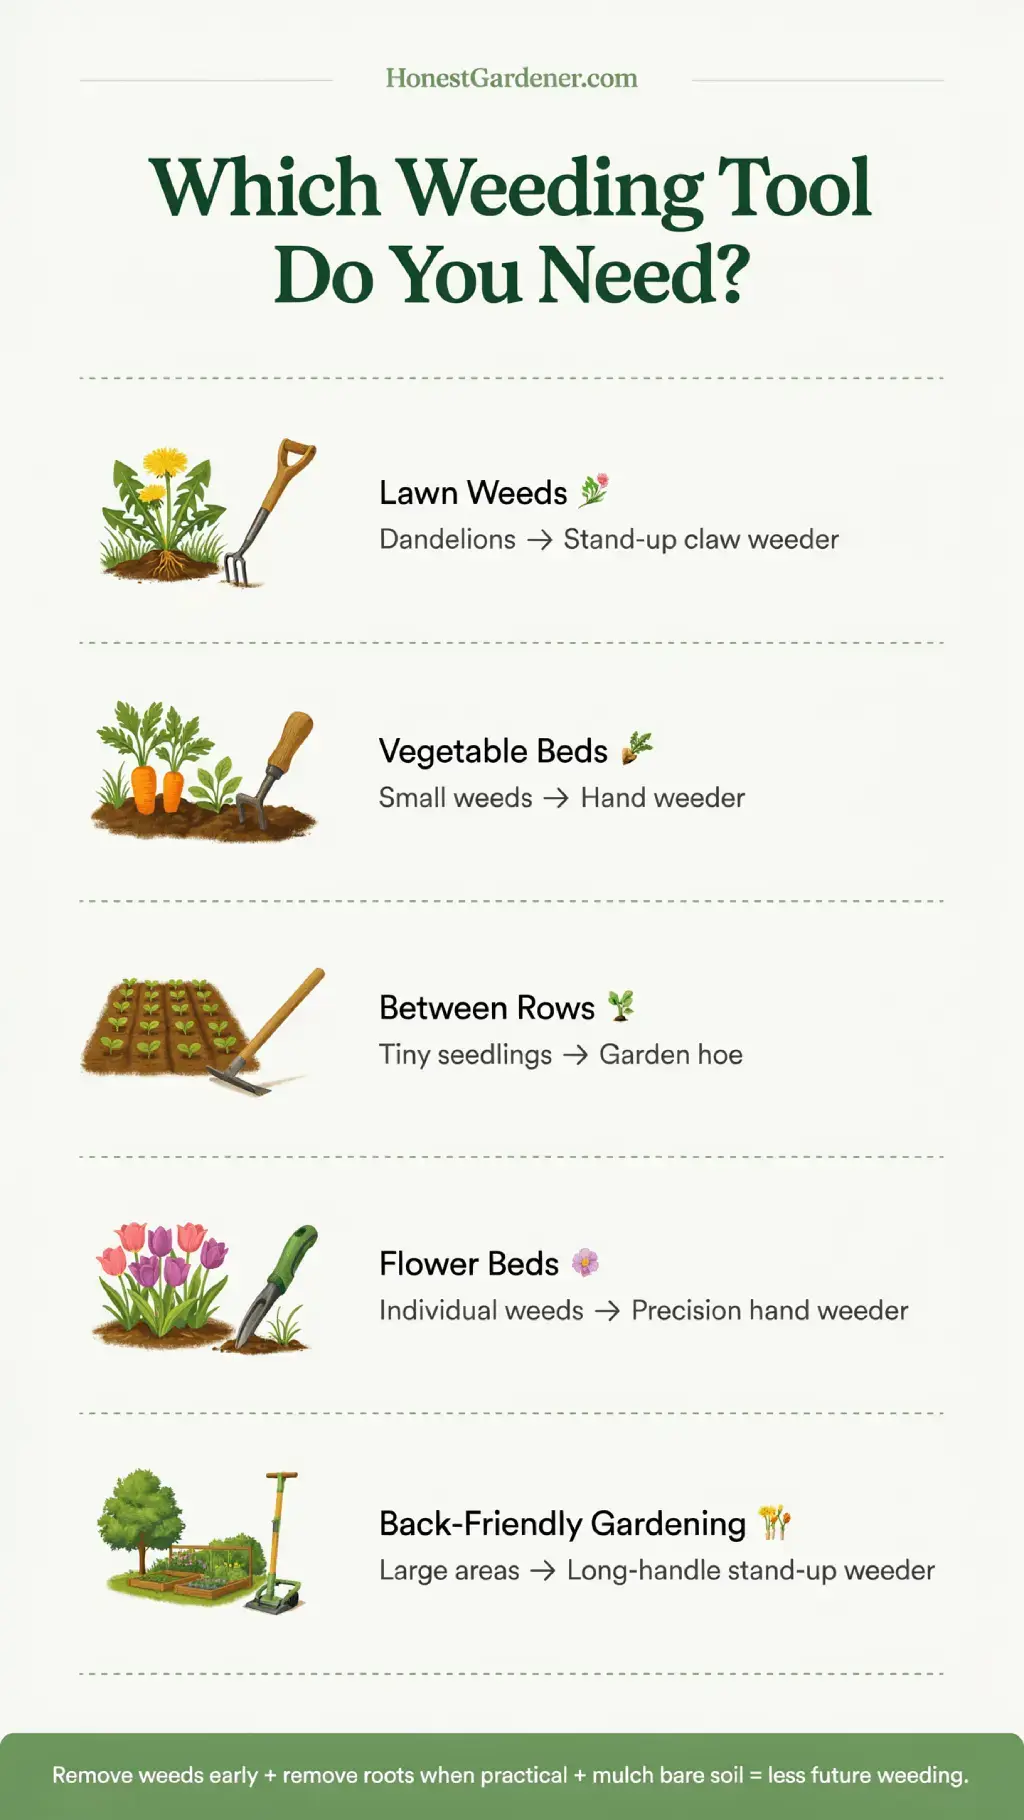
    Best Weeding Tool by Garden Situation

    Beginner Weeding Tips

    Weed early

    Small weeds are easier to remove than mature plants.

    Weed after rain

    Moist soil can make root removal easier, especially for taproot weeds.

    Don’t let weeds go to seed

    One mature weed can create a much larger problem next season.

    Carry a bucket

    Don’t leave pulled weeds lying in the garden.

    Protect your hands

    Wear appropriate gardening gloves when handling thorny, irritating, or unknown plants.

    Identify unfamiliar weeds

    Don’t blindly grab a plant you can’t identify. Some plants can cause skin irritation or allergic reactions.

    Keep tools clean

    Remove soil and plant debris after use and dry the tool before storage.

    Frequently Asked Questions

    What is the best weeding tool?

    For most homeowners with lawn dandelions and other taproot weeds, a stand-up four-claw weeder is an excellent option. For vegetable gardens, a narrow hand weeder can provide better precision.

    What is the best tool for removing dandelions?

    A four-claw stand-up weeder is particularly useful for dandelions because it can grip around the plant’s root and remove it while you remain standing. UMN Extension also recommends removing as much of the dandelion root as possible when hand-removing individual plants.

    What is the best hand weeder for garden beds?

    A narrow, durable hand weeder such as the CobraHead is useful for vegetable and flower beds because it provides precision and can perform multiple tasks.

    Is a long-handle weeder better for your back?

    A long-handle stand-up weeder can reduce the need for repeated bending and kneeling. It can be particularly useful for gardeners who find ground-level weeding uncomfortable.

    Should I weed before or after rain?

    Moist soil often makes pulling rooted weeds easier. However, avoid working soil when it is excessively wet because you can damage soil structure.

    Does pulling weeds remove them permanently?

    Not always. Some perennial weeds can regrow from roots or rhizomes if portions remain underground. Repeated removal and preventing flowering and seed production are important parts of long-term weed management.

    Does mulch stop weeds completely?

    No. Mulch can significantly suppress weed emergence but doesn’t guarantee a weed-free garden. Weeds can still emerge through gaps, edges, or decomposing mulch.

    Is hand weeding better than herbicides?

    It depends on the situation. Hand and mechanical removal can be highly effective for individual weeds and small garden areas. Larger infestations may require a broader integrated management strategy. Always follow pesticide labels and local guidance if herbicides are used.

    Key Takeaways

    The best weeding tool isn’t necessarily the most expensive tool on the shelf.

    Choose based on your weed type, soil, garden size, physical comfort, and desired level of precision.

    Our quick recommendations:

    🏆 Best overall for lawns: Fiskars 4-Claw Stand-Up Weeder

    🌱 Best traditional stand-up option: Grampa’s Weeder

    🥕 Best for vegetable gardens: CobraHead Original Weeder

    🌸 Best for precision flower-bed work: Radius Garden-style ergonomic hand weeder

    🪴 Best for small spaces: Compact hand weeder

    Remember these simple rules:

    • Remove weeds while they’re young.

    • Get as much root as practical for deep-rooted weeds.

    • Don’t cultivate unnecessarily deep.

    • Use mulch to suppress new weeds.

    • Match the tool to the job.

    • Keep your tools clean and dry.

    Final Verdict: Which Weeding Tool Should You Buy?

    If you’re tired of kneeling in your garden every weekend, a stand-up weeder is probably the first tool I’d add to your collection.

    For lawns filled with dandelions, the Fiskars 4-Claw Stand-Up Weeder is a particularly compelling option because its long handle and claw mechanism let you work from a standing position. Recent independent testing has also rated it highly for effectiveness and ease of use.

    If your main problem is weeds growing between vegetables, flowers, or herbs, choose a precision hand weeder such as the CobraHead.

    And if you’re dealing with lots of tiny annual weeds, don’t overlook a simple garden hoe. Sometimes the least complicated tool is the fastest.

    Ultimately, the smartest approach is not to search endlessly for one magical product.

    Use the right tool for the right weed, remove weeds early, and prevent new growth with good garden practices.

    For more practical gardening guides, product recommendations, and beginner-friendly growing advice, visit HonestGardener.com.

    Ready to make weeding easier? Choose the tool that matches your garden, spend a few minutes removing weeds while they’re small, and you’ll have more time to enjoy the plants you actually wanted to grow.

    Happy gardening! 🌱

    Want to Know More on Gardening?

    Please Read :
    Download Free Ebook

    best weeding tool

  • Best Garden Scissors: 5 Top Picks for Pruning, Harvesting & Flowers in 2026

    best garden scissors

    Have you ever tried trimming a basil plant with an old pair of household scissors?

    The first few cuts seem fine. Then the blades start sticking, the stems get crushed instead of cleanly cut, and you’re left wondering why such a simple gardening job suddenly became frustrating.

    That’s exactly where a good pair of garden scissors earns its place in your tool shed.

    Unlike ordinary household scissors, purpose-built garden snips are designed for repetitive cutting of stems, leaves, flowers, herbs, and small branches. The right pair can make harvesting faster, pruning more precise, and everyday garden maintenance much easier.

    In this guide, we’ll look at the best garden scissors for different gardening jobs, compare five popular options, explain which features actually matter, and show you how to choose the right pair for your garden.

    Whether you’re maintaining a vegetable garden, cutting flowers for a vase, harvesting herbs, or trimming houseplants, there’s a garden scissor here worth considering.

    Affiliate Disclosure: HonestGardener.com may earn a commission when you purchase products through links on this page, at no additional cost to you. Our recommendations are intended to help readers find useful gardening products.

    Why Garden Scissors Are Worth Having

    Garden scissors are one of those tools you may not appreciate until you start using a good pair.

    A sharp, appropriately sized blade lets you make controlled cuts without reaching for large pruning shears every time you need to remove a small stem.

    They’re particularly useful for:

    • Harvesting herbs

    • Cutting flowers

    • Deadheading

    • Removing small stems

    • Trimming houseplants

    • Harvesting vegetables

    • Cutting soft plant growth

    • Removing damaged leaves

    • Light pruning

    • Taking plant cuttings

    Professional and experienced gardeners also use pruning tools because clean cuts can be preferable to jagged or crushed cuts. Recent gardening guidance notes that clean pruning cuts can help plants recover properly and may reduce opportunities for pests and diseases to exploit damaged tissue.

    best garden scissors

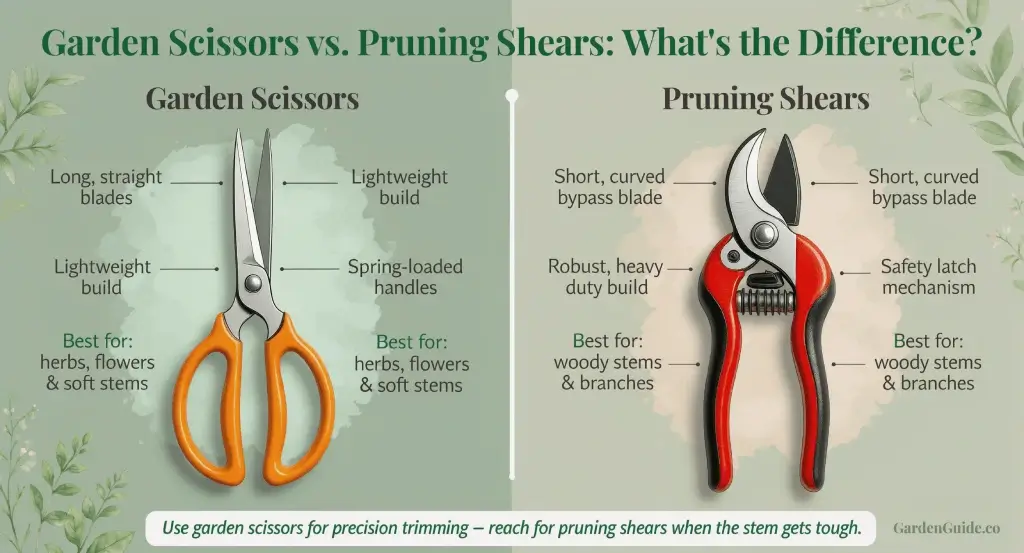
    Garden Scissors vs. Pruning Shears: What’s the Difference?

    The terms are sometimes used interchangeably, but there’s an important practical difference.

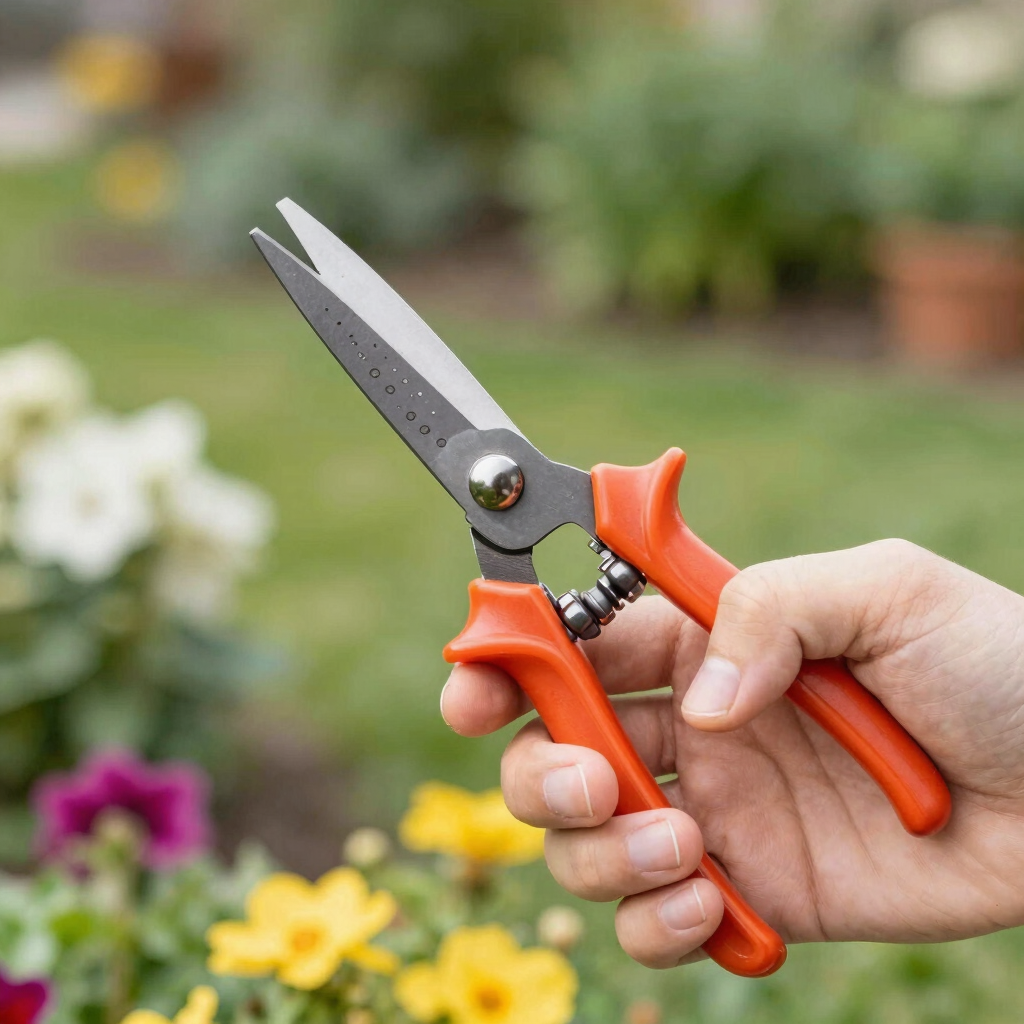
    Garden Scissors

    Garden scissors or snips usually have:

    • Shorter blades

    • Smaller handles

    • High precision

    • Excellent finger control

    • Lightweight construction

    They’re ideal for small stems and delicate plant material.

    Pruning Shears

    Pruning shears generally have:

    • Larger blades

    • Stronger handles

    • More cutting leverage

    • Greater capacity for woody stems

    They’re better for branches and tougher growth.

    Simple rule

    Use garden scissors for precision. Use pruning shears for power.

    If you’re cutting basil, deadheading marigolds, harvesting parsley, or trimming small houseplant stems, garden scissors are often more convenient.

    For thicker woody stems, switch to appropriate pruning shears.

    Quick Comparison: Best Garden Scissors

    Best overall for precision: Fiskars Micro-Tip

    Best for everyday use: VIVOSUN

    Best for flowers: FloraCraft Floral Shears

    Best for harvesting: A lightweight precision snip such as Fiskars or Gardener’s Friend

    Fiskars Micro-Tip Pruning Snip

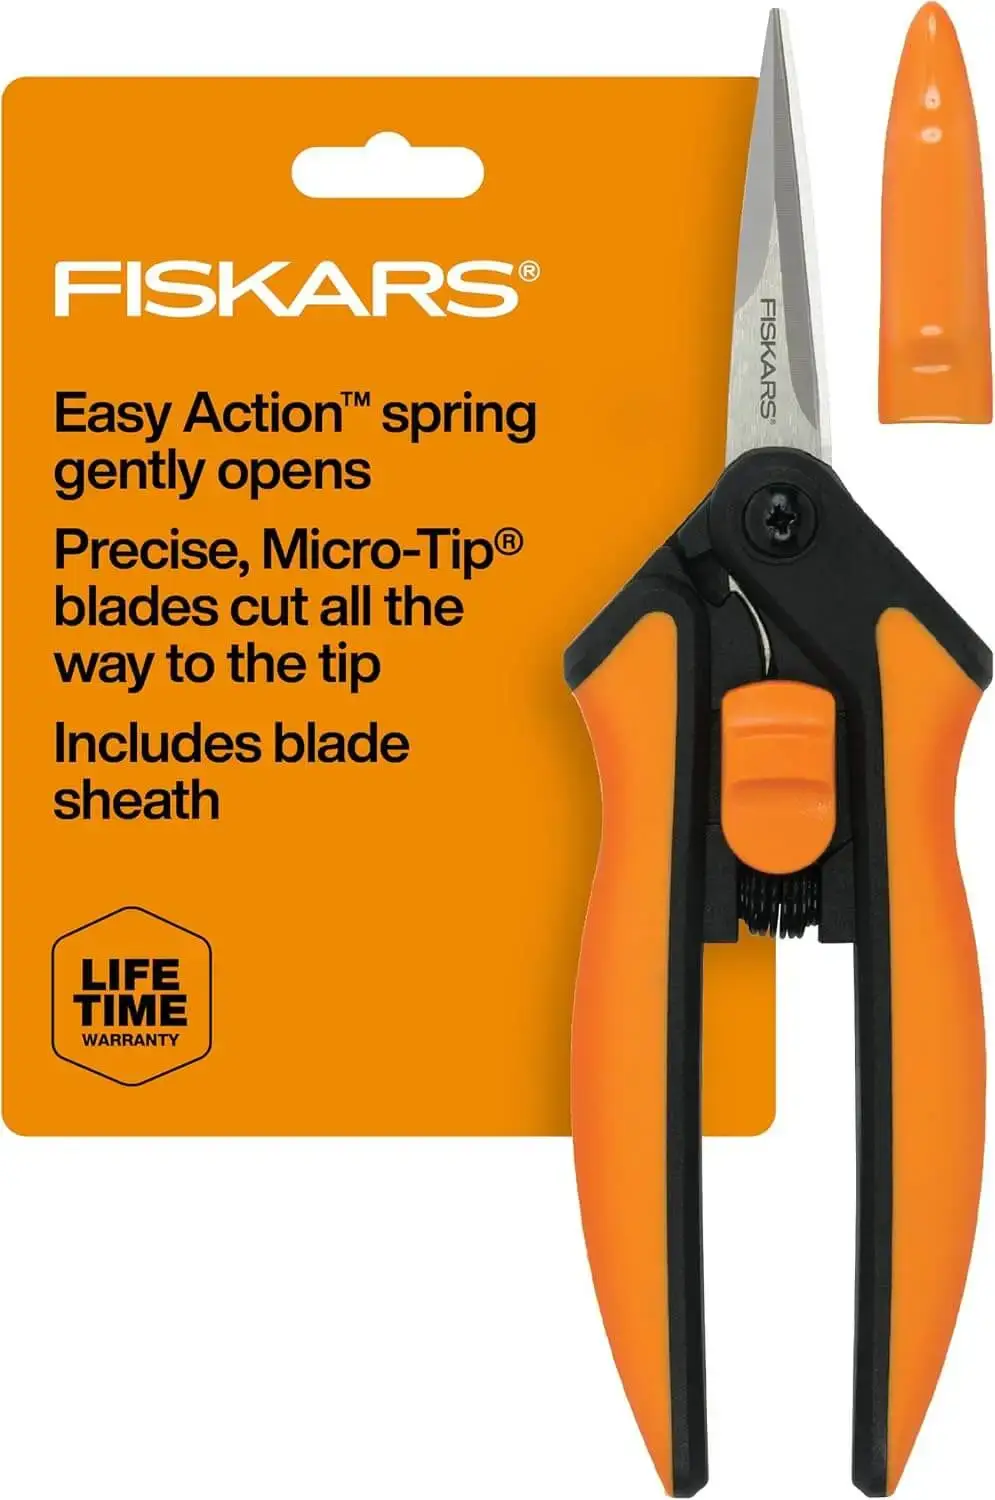
    1. Fiskars Micro-Tip Pruning Snip

    Best for: Precision pruning, deadheading, herbs, and small plants

    If you want one pair of scissors that can handle delicate garden work, Fiskars Micro-Tip-style pruning snips are an excellent place to start.

    The narrow tip makes it easier to reach between leaves and stems without accidentally cutting neighboring growth.

    That makes them particularly useful for gardeners who grow herbs, flowers, seedlings, and indoor plants.

    Why gardeners like them

    The small blade is designed for controlled cuts rather than brute force.

    Imagine you’re harvesting basil.

    Instead of grabbing a large pair of bypass pruners, you can position the narrow blade exactly where you want the cut.

    Pros

    • Excellent precision

    • Compact design

    • Easy to control

    • Useful for herbs and flowers

    • Great for deadheading

    • Good for indoor plants

    Cons

    • Not intended for thick woody branches

    • Small handles may be less comfortable for very large hands

    • Not a substitute for heavy-duty pruning shears

    Best for: Gardeners who regularly perform detailed trimming.

    Check Price on Amazon

    VIVOSUN Gardening Hand Pruner

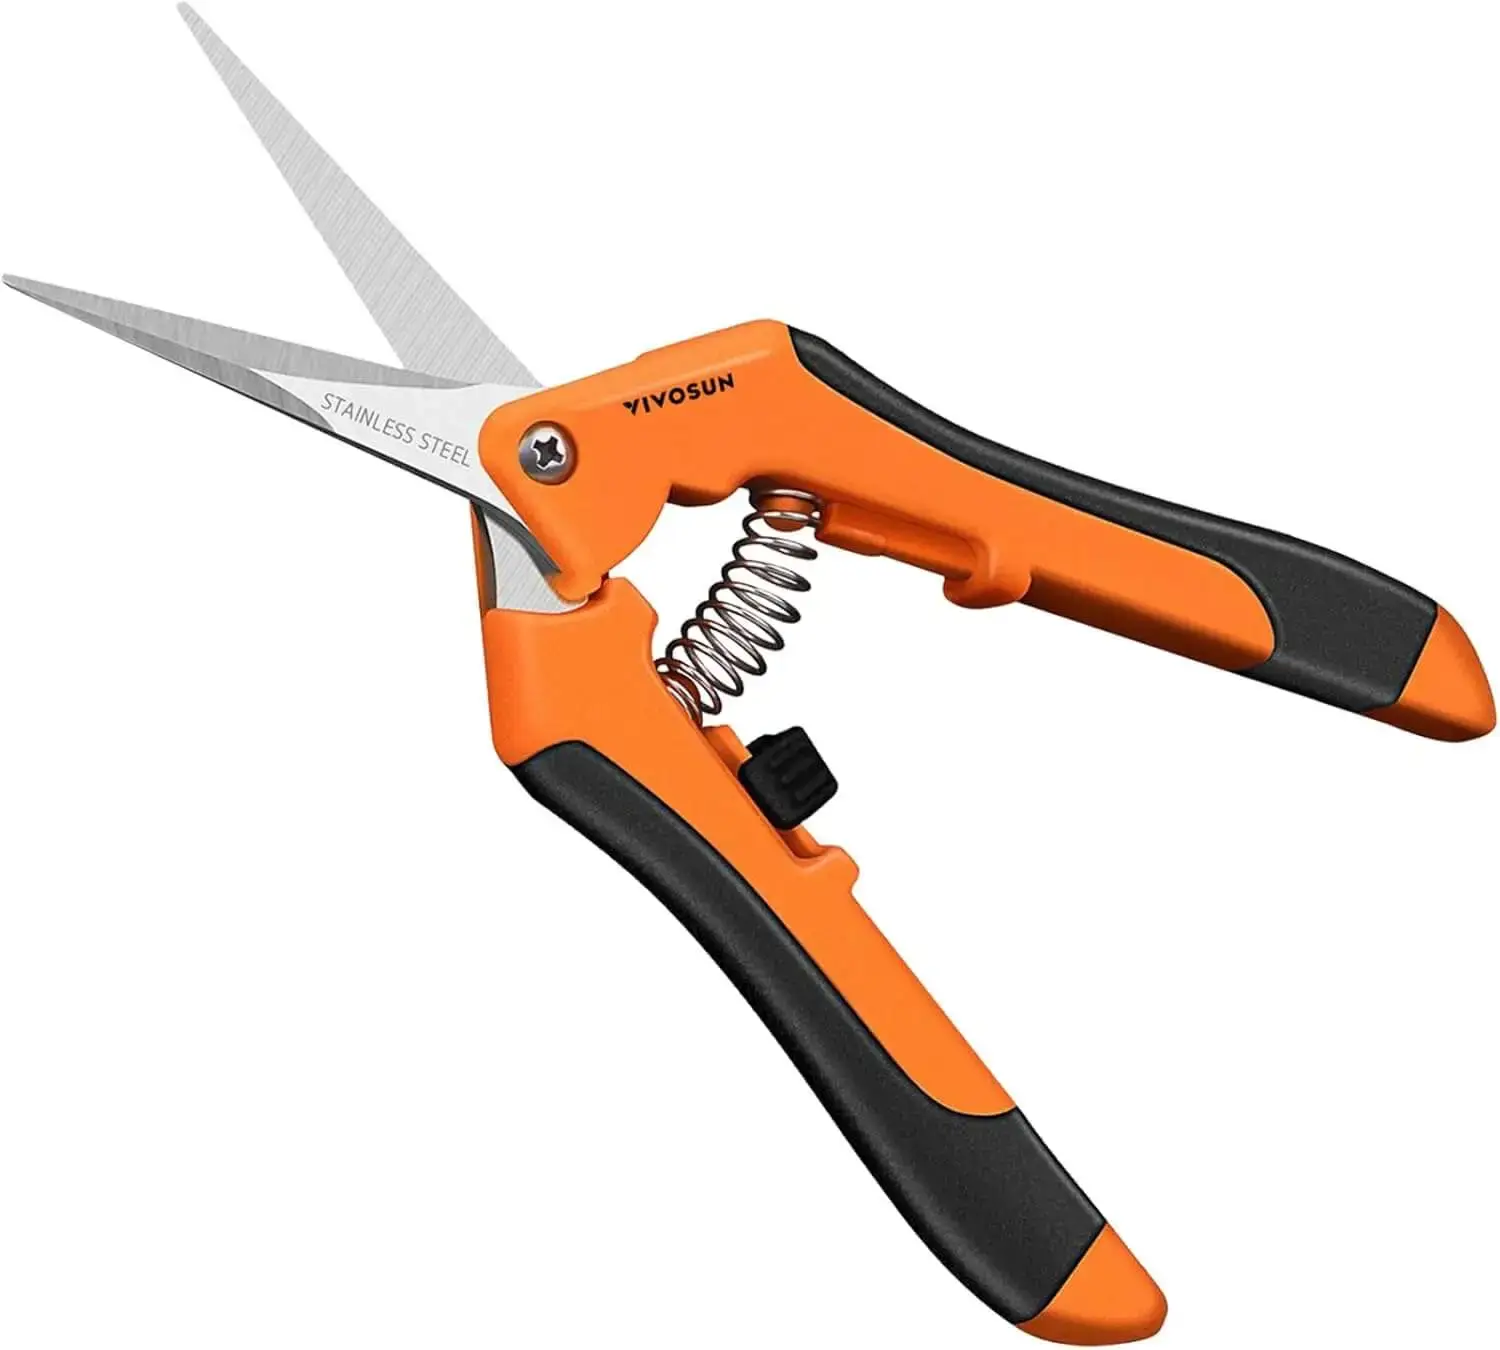
    2. VIVOSUN Gardening Hand Pruner

    Best for: Everyday pruning and general garden maintenance

    VIVOSUN offers compact gardening hand pruners with stainless-steel blades and spring-loaded designs.

    The company’s current product information specifically highlights comfortable grip handles and spring-loaded snips intended to reduce hand fatigue during extended use.

    That makes this type of tool interesting for gardeners who spend a lot of time trimming plants.

    Pros

    • Stainless-steel cutting blades

    • Comfortable grip

    • Spring-assisted opening

    • Useful for repetitive trimming

    • Lightweight

    • Budget-friendly option

    Cons

    • Better suited to small and medium stems than thick branches

    • Not as specialized for extremely delicate floral work

    • Blade maintenance is still necessary

    Best for: Everyday gardeners who want an affordable multi-purpose cutting tool.

    Check Price on Amazon

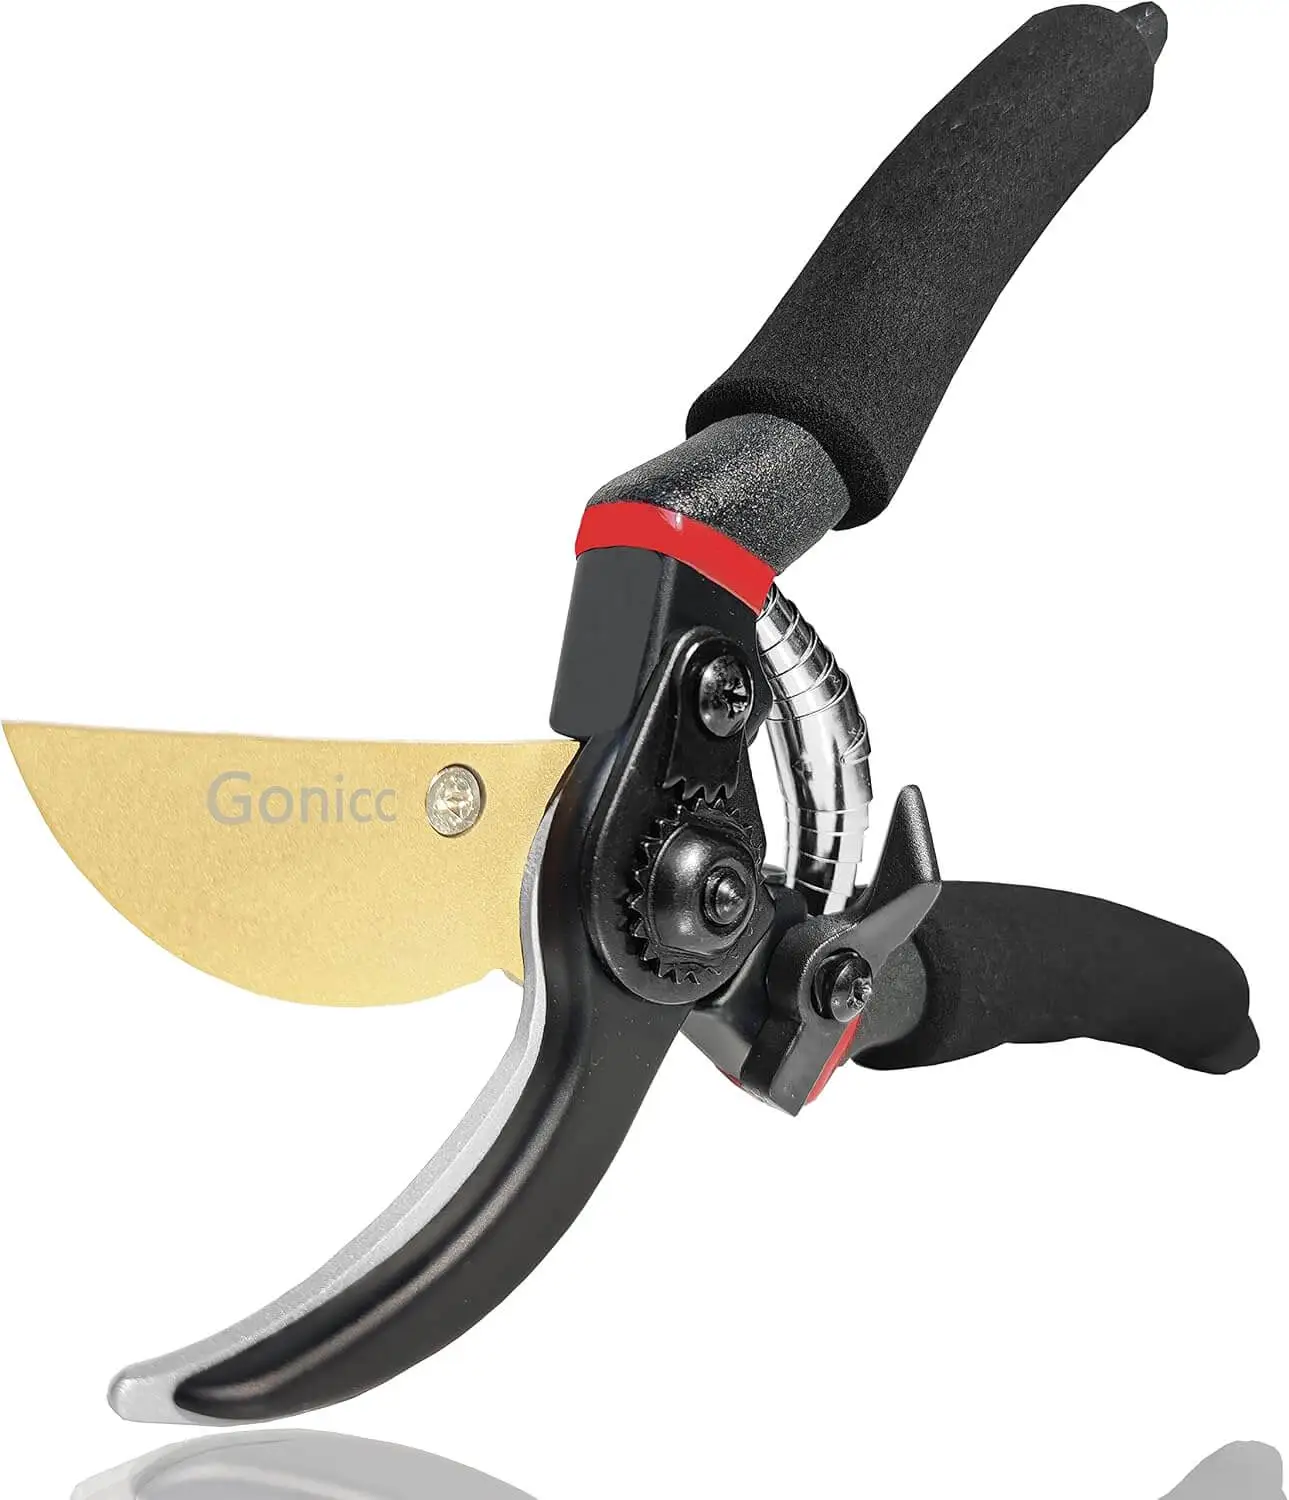
    Gonicc Garden Pruning Shears

    3. Gonicc Garden Pruning Shears

    Best for: Gardeners who want something between tiny snips and heavy-duty loppers

    Gonicc is a popular name in gardening tools, particularly for hand pruners and compact pruning equipment.

    A general-purpose pruning shear can be a better choice if you frequently move between delicate stems and somewhat tougher growth.

    Pros

    • Versatile

    • Good option for general pruning

    • Comfortable ergonomic-style handles

    • Useful for flowers and shrubs

    • More cutting power than tiny snips

    Cons

    • Larger than precision garden scissors

    • Not ideal for extremely delicate cuts

    • Can be unnecessary for simple herb harvesting

    Best for: Gardeners who want one compact cutting tool for several pruning jobs.

    Check Price on Amazon

    FloraCraft Floral Shears

    4. FloraCraft Floral Shears

    Best for: Flowers, floral arrangements, and cutting fresh stems

    If you’re growing a cutting garden, specialized floral shears deserve consideration.

    FloraCraft’s current Floral Shears use heavy-duty steel blades with serrated 2.5-inch cutting edges. The company says the design includes a notch intended to help cut fresh floral stems without crushing them.

    They’re also designed to handle vines, decorative mesh, and wired ribbons, making them useful beyond the garden.

    Pros

    • Heavy-duty steel construction

    • Serrated blade

    • Designed for fresh flower stems

    • Useful for floral arrangements

    • Multi-purpose design

    • Stem-cutting notch

    Cons

    • Less compact than tiny pruning snips

    • Serrated blades aren’t necessary for every garden task

    • Better suited to stems and flowers than delicate seedling work

    Best for: Flower gardeners and anyone who frequently brings cut flowers indoors.

    Check Price on Amazon

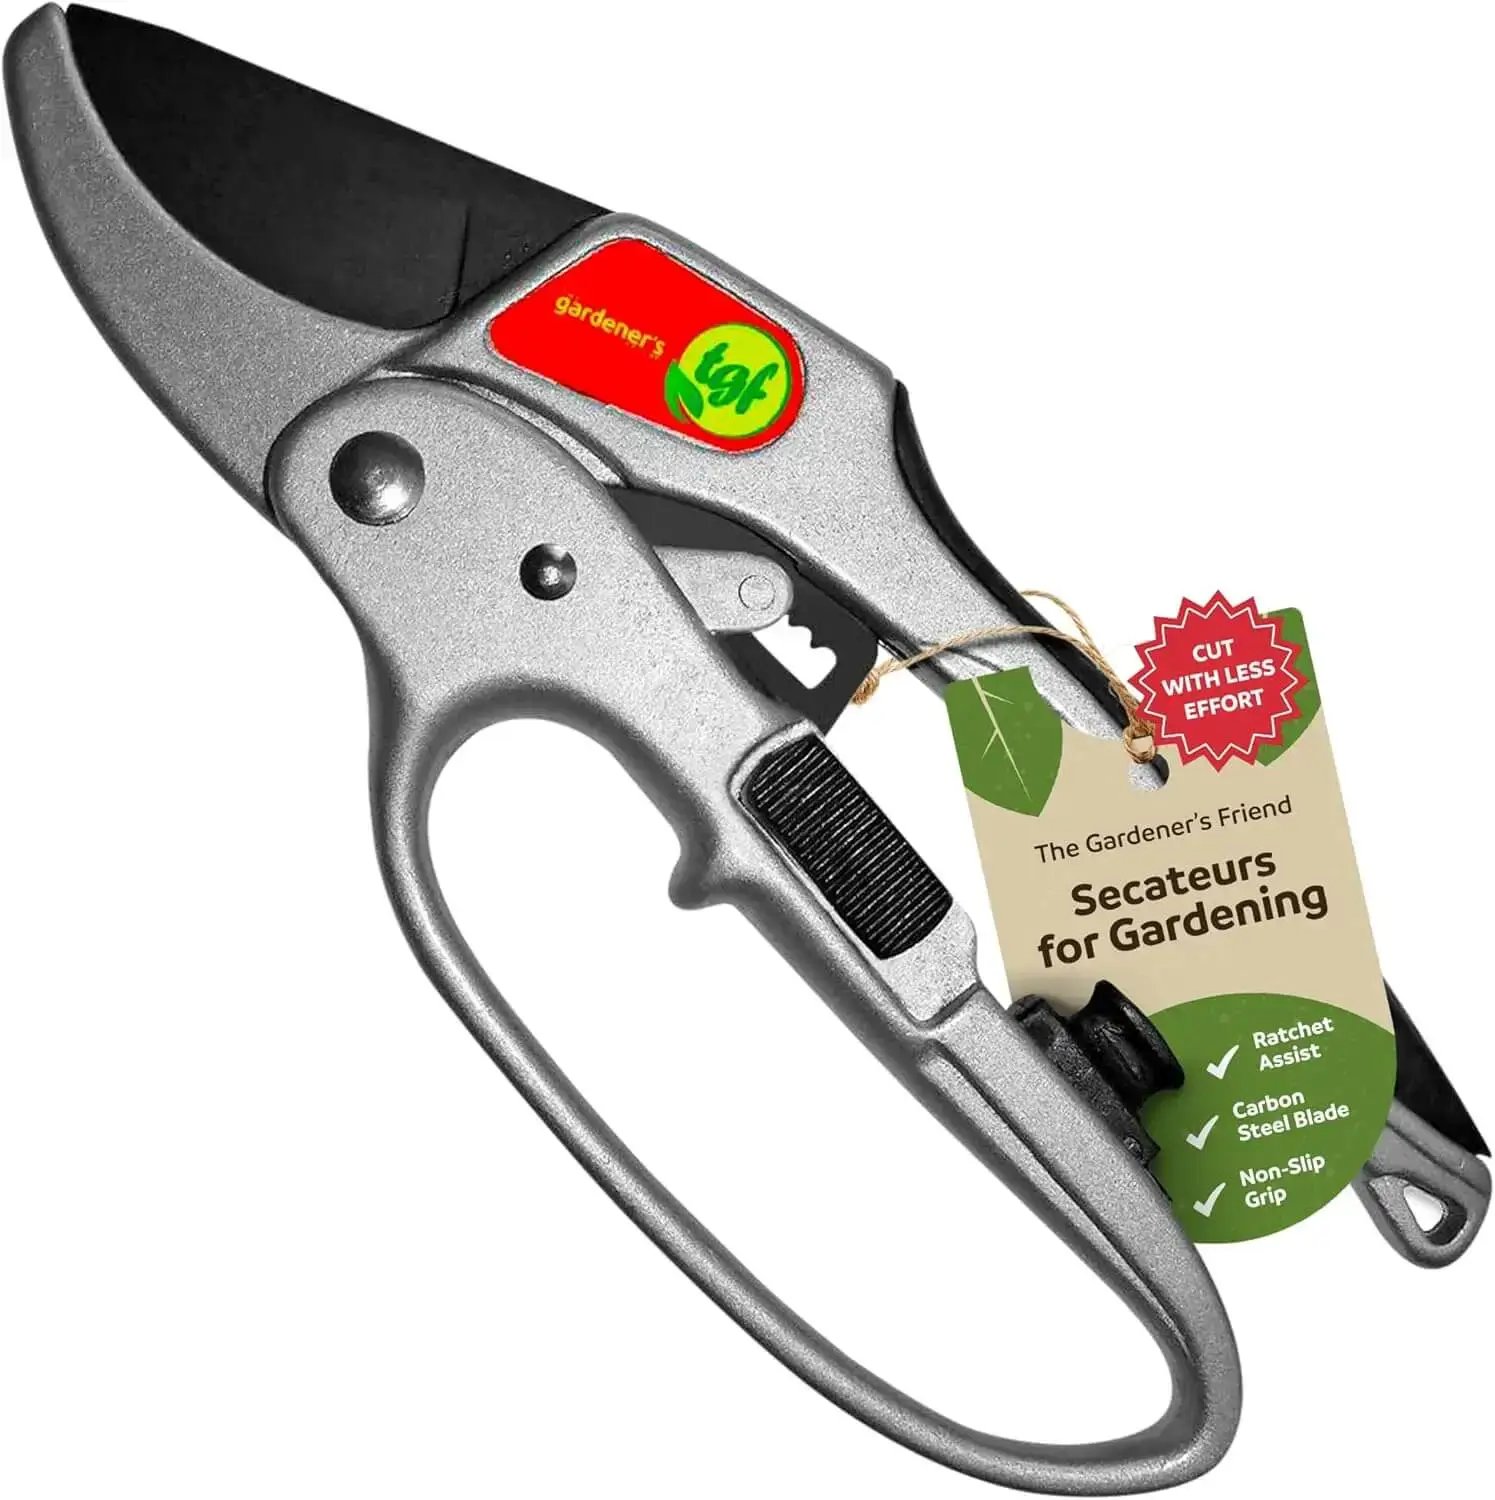
    Gardener's Friend Garden Snips

    5. Gardener’s Friend Garden Snips

    Best for: Herbs, vegetables, deadheading, and precision cutting

    Compact garden snips are especially useful when you’re harvesting frequently.

    Think about a summer morning when your vegetable garden is producing more basil, parsley, cilantro, and green beans than you can eat at once.

    A small precision snip can make harvesting quick and controlled.

    Pros

    • Compact

    • Easy to carry

    • Excellent for harvesting

    • Good finger control

    • Useful for flowers and herbs

    • Convenient for container gardens

    Cons

    • Limited capacity for thick stems

    • Not suitable for woody branches

    • Small cutting area requires more precision

    Best for: Vegetable gardeners, herb growers, and container gardeners.

    Check Price on Amazon

    What to Look for in the Best Garden Scissors

    Buying garden scissors isn’t simply about finding the sharpest blade.

    Several small details determine whether you’ll actually enjoy using them.

    1. Blade Sharpness

    Sharp blades produce cleaner cuts with less effort.

    A dull blade can crush plant tissue, require additional pressure, and make precise pruning frustrating.

    Recent expert guidance emphasizes the importance of clean cuts when pruning because poorly executed cuts can leave damaged plant tissue.

    Look for: Stainless steel or high-quality hardened steel blades.

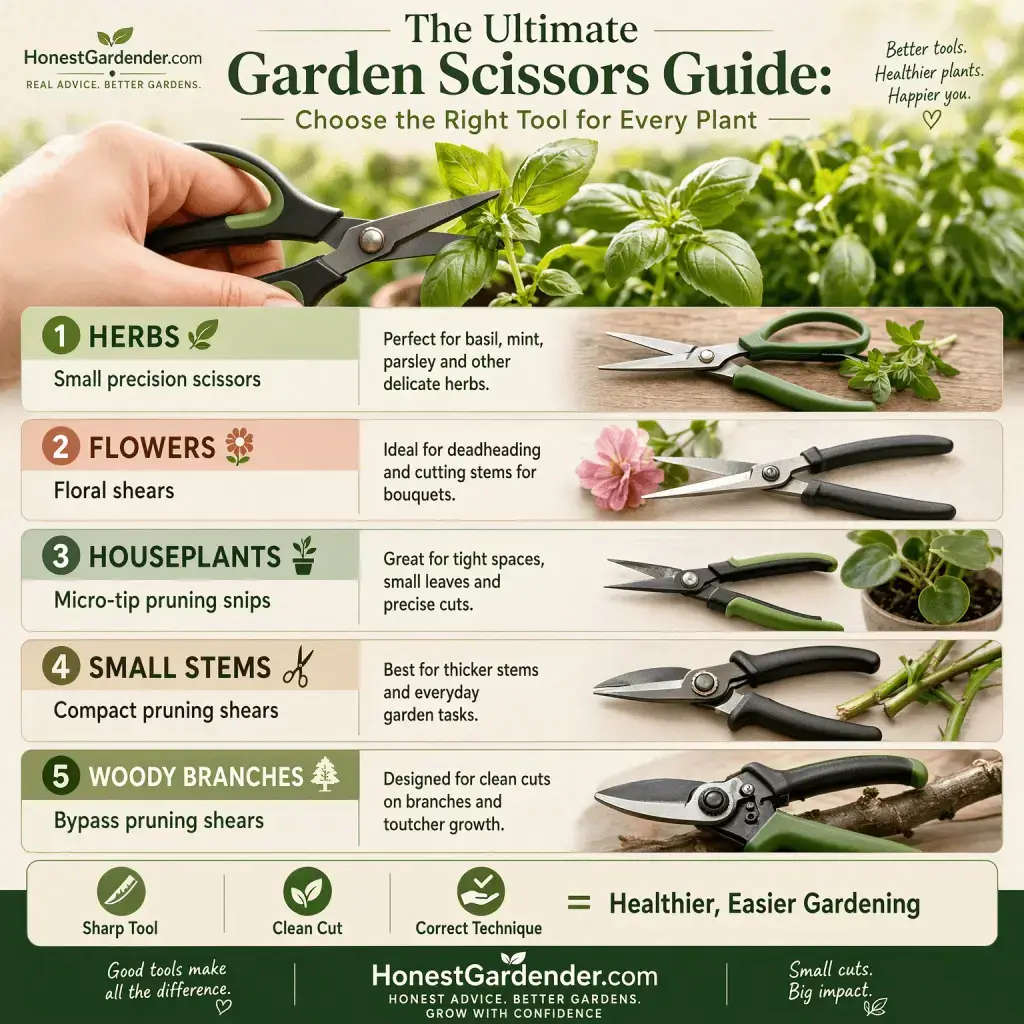
    2. Blade Size

    Small blades are excellent for precision.

    Large blades provide more cutting capacity.

    For:

    • Basil → small scissors

    • Herbs → small scissors

    • Flowers → floral shears

    • Seedlings → precision snips

    • Small stems → pruning snips

    • Woody branches → bypass pruners

    Don’t buy oversized scissors simply because they look stronger.

    3. Ergonomic Handle

    If you spend an hour harvesting or deadheading, handle comfort matters.

    Look for:

    • Non-slip grip

    • Spring-assisted opening

    • Comfortable finger loops

    • Lightweight construction

    • Smooth action

    A tool that feels good in your hand is more likely to get used regularly.

    4. Locking Mechanism

    Some garden scissors and pruning snips include a locking mechanism.

    This is useful when storing the tool or carrying it around the garden.

    A lock can also help keep the blades closed when the scissors aren’t being used.

    Never leave sharp garden tools lying open in a garden bed.

    5. Corrosion Resistance

    Garden tools frequently encounter:

    • Water

    • Plant sap

    • Humidity

    • Fertilizer

    • Soil

    Stainless steel can be a practical choice because it offers good corrosion resistance, although no metal is completely maintenance-free.

    Wipe blades after use and keep the tool dry when possible.

    Best Garden Scissors for Different Jobs

    How to Use Garden Scissors Correctly

    Even the best garden scissors won’t help much if you’re using them incorrectly.

    Follow this simple process.

    Step 1: Identify What You’re Cutting

    Look closely at the stem.

    Is it soft and green?

    Or is it woody and thick?

    Use scissors for soft growth and appropriately sized pruners for thicker material.

    Step 2: Find the Correct Cutting Point

    For many plants, you can make a cut just above a healthy leaf node.

    This encourages the plant to continue producing new growth.

    However, pruning technique varies by plant, so don’t assume every species should be cut in exactly the same place.

    Step 3: Make One Clean Cut

    Avoid repeatedly crushing or sawing through a small stem.

    Position the blade and make a controlled cut.

    Step 4: Remove Damaged Material

    If you’re pruning diseased or visibly damaged tissue, remove affected material carefully and clean the tool afterward.

    Tool sanitation is particularly important when moving between plants that may have disease problems.

    Step 5: Clean the Scissors

    After gardening:

    1. Wipe away plant residue.

    2. Remove dirt.

    3. Dry the blades.

    4. Sanitize when appropriate.

    5. Store them in a dry place.

    How to Clean and Maintain Garden Scissors

    Proper maintenance can make an inexpensive pair of garden scissors last much longer.

    After every gardening session

    Step 1: Wipe the blades.

    Step 2: Remove sticky sap.

    Step 3: Dry thoroughly.

    Step 4: Inspect the cutting edge.

    Step 5: Apply a suitable light lubricant to moving parts when recommended by the manufacturer.

    For disease prevention

    If you’re cutting potentially infected plant material, clean and disinfect your tools before moving to another healthy plant.

    Don’t assume wiping the blade on your shirt or garden glove is enough.

    Garden Scissors and USDA Hardiness Zones

    You might wonder what USDA Hardiness Zones have to do with garden scissors.

    The answer is: not much directly—but your gardening calendar can influence how you use them.

    The USDA Plant Hardiness Zone Map divides the United States into zones based on average annual extreme minimum winter temperatures. The current map uses 10°F zones with 5°F half-zone divisions.

    Check Your USDA Hardiness Zone

    For example, a gardener in a colder Zone 4 or 5 region may spend a lot of time harvesting and cutting plants before the first fall freeze.

    A gardener in warmer Zones 8–10 may have a longer period for pruning, harvesting herbs, and maintaining flowering plants.

    Your zone doesn’t determine which scissors you need. Your plants and gardening tasks do.

    Real-Life Example: Why One Pair Isn’t Always Enough

    Let’s imagine you’re growing a backyard garden in Georgia.

    You have:

    • Tomatoes

    • Basil

    • Roses

    • Zinnias

    • Rosemary

    • Pepper plants

    You could technically use one pair of scissors for everything.

    But that isn’t necessarily the best approach.

    For basil and herbs, you want a small precision snip.

    For roses, you’ll want stronger pruning shears.

    For zinnias and other flowers, floral scissors can make harvesting convenient.

    This is why experienced gardeners often have several cutting tools rather than one “perfect” pair.

    Beginner Tips for Buying Garden Scissors

    If you’re new to gardening, don’t spend a fortune immediately.

    Start with one good precision pair.

    Choose garden scissors with:

    • Sharp stainless-steel blades

    • Comfortable handles

    • A compact design

    • Easy cleaning

    • A secure locking mechanism

    • A reputable manufacturer

    Then add heavier pruning tools as your garden expands.

    One more tip

    Don’t use your garden scissors to cut wire, plastic, or household materials unless the manufacturer specifically says they’re designed for it.

    Doing so can quickly damage the cutting edge.

    Garden Scissors vs. Household Scissors

    A pair of kitchen or craft scissors might work for an emergency harvest, but a dedicated garden tool is usually the better long-term choice.

    best garden scissors

    Frequently Asked Questions

    What are the best garden scissors?

    The best garden scissors depend on the job. For delicate trimming and herbs, compact micro-tip snips are excellent. For flowers, floral shears work well. For thicker stems, use pruning shears instead.

    Can I use garden scissors to prune roses?

    You can use small garden scissors for very soft rose growth, but bypass pruning shears are generally more appropriate for thicker rose stems.

    What are the best scissors for harvesting herbs?

    Look for lightweight scissors with sharp, narrow blades and comfortable handles. Precision snips are particularly useful for basil, parsley, cilantro, chives, and similar herbs.

    Are stainless-steel garden scissors better?

    Stainless steel is a popular choice because it offers good corrosion resistance and durability. However, blade geometry, sharpness, handle comfort, and overall construction are equally important.

    How often should I sharpen garden scissors?

    It depends on how frequently you use them and what you’re cutting. If the blades begin requiring noticeably more pressure or produce crushed rather than clean cuts, it’s time to inspect and sharpen or replace them.

    Can garden scissors cut thick branches?

    Usually, no.

    Garden scissors are designed primarily for smaller, softer plant material. For thick or woody branches, use bypass pruners, loppers, or an appropriate pruning saw.

    How do I disinfect garden scissors?

    First remove soil and plant residue, then use an appropriate disinfecting method recommended for gardening tools and the plants you’re working with. Allow the blades to dry before storage.

    Are garden scissors useful for indoor plants?

    Absolutely. Small precision scissors are excellent for trimming houseplants, removing dead leaves, propagating cuttings, and maintaining compact plants.

    Key Takeaways

    The best garden scissors should make gardening easier—not more complicated.

    Before buying, think about what you’ll actually cut.

    For herbs and seedlings: Choose compact precision snips.

    For flowers: Consider dedicated floral shears.

    For houseplants: Micro-tip scissors offer excellent control.

    For general pruning: Choose a compact pruning shear.

    For thick branches: Move up to bypass pruners or loppers.

    Most importantly, look for sharp blades, comfortable handles, appropriate cutting capacity, corrosion resistance, and easy maintenance.

    And remember: a garden scissor is a precision tool, not a miniature chainsaw.

    Final Verdict: Which Garden Scissors Should You Buy?

    After considering precision, comfort, versatility, and the type of gardening work involved, here’s our simple recommendation:

    🏆 Best for Precision

    Fiskars Micro-Tip Pruning Snip

    Ideal for herbs, houseplants, flowers, and delicate trimming.

    🌿 Best for Everyday Gardening

    VIVOSUN Gardening Hand Pruner

    A practical option for general trimming and repetitive garden work. VIVOSUN’s current product information emphasizes its spring-assisted design and comfortable grip.

    🌸 Best for Flowers

    FloraCraft Floral Shears

    The serrated steel blade and stem-cutting design make it particularly interesting for flower gardeners.

    ✂️ Best Versatile Pruning Option

    Gonicc Garden Pruning Shears

    A good choice when you need more cutting power than small garden snips provide.

    🌱 Best for Harvesting

    Compact precision garden snips

    Choose a lightweight pair that lets you harvest herbs and vegetables without damaging nearby stems.

    The Bottom Line

    You don’t need a huge collection of expensive gardening tools to maintain a beautiful garden.

    A sharp, comfortable pair of garden scissors can handle dozens of small jobs and quickly become one of the tools you reach for most often.

    Choose your scissors based on your plants, your hand comfort, and the type of cutting you’ll be doing.

    And if you’re building your gardening toolkit from scratch, start with one quality precision pair and add heavier pruning tools only when your garden demands them.

    For more practical gardening advice, product guides, and beginner-friendly growing tips, visit HonestGardener.com.

    Ready to make your garden maintenance easier? Pick the right pair of garden scissors, keep the blades clean and sharp, and enjoy more precise cuts with less effort.

    Happy gardening! 🌱✂️

    Want to Know More on Gardening?

    Please Read :
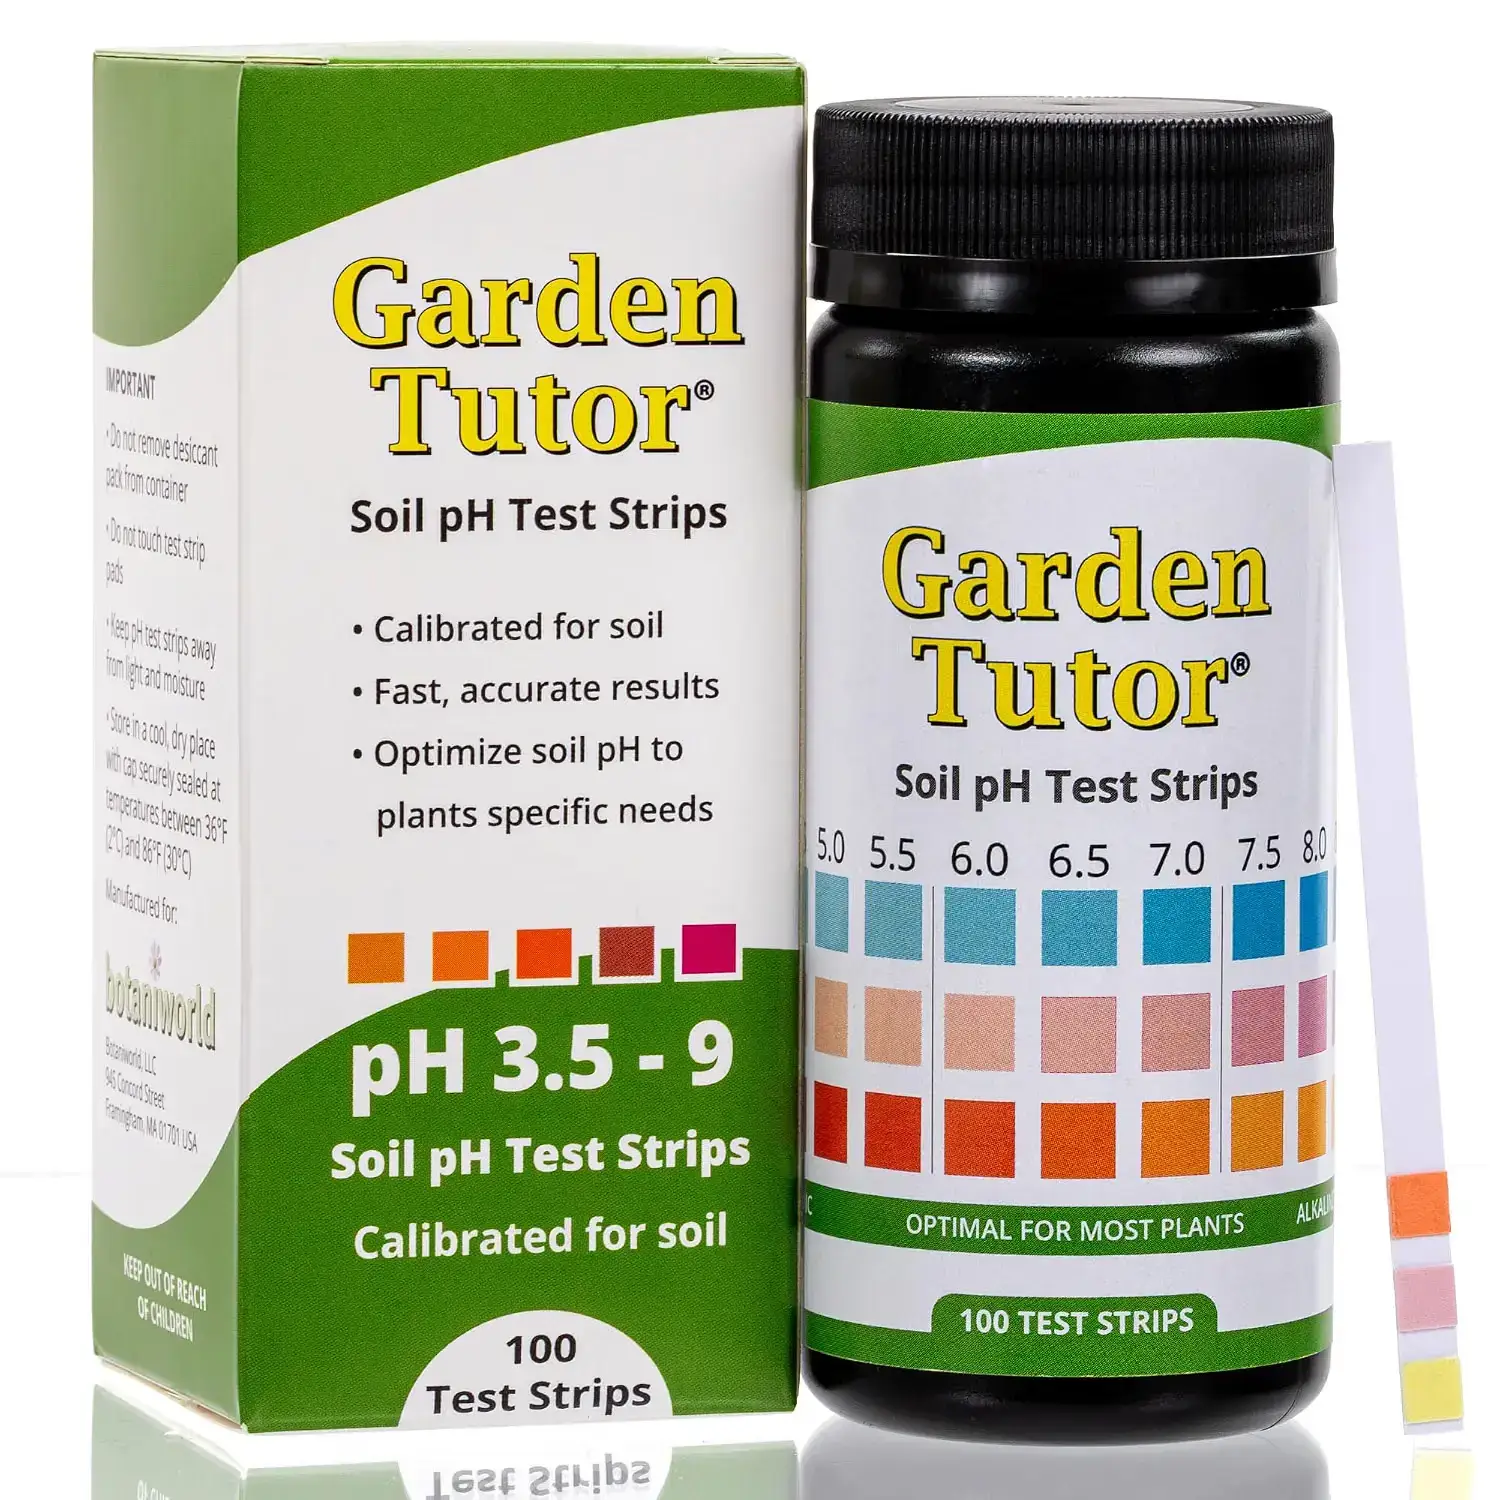
    Download Free Ebook

  • Best Gardening Gloves for Women: 5 Comfortable, Durable & Protective Picks

    Best Gardening Gloves for Women

    Have you ever spent an enjoyable afternoon planting flowers or pulling weeds, only to finish with scratched fingers, dirty fingernails, sore palms, or a painful rose thorn?

    The right gardening gloves can make a surprisingly big difference.

    But finding the best gardening gloves for women isn’t simply about choosing the prettiest pair or the one with the highest number of reviews. A good glove needs to fit your hand properly while providing the right balance of comfort, grip, dexterity, breathability, and protection.

    Women’s gardening gloves are available in lightweight nitrile, synthetic leather, goatskin leather, cotton blends, and heavy-duty thorn-resistant designs. The best choice depends on what you actually do in your garden.

    In this guide, we’ll compare five popular options, explain which gloves work best for specific gardening jobs, and show you exactly what to look for before buying.

    Affiliate Disclosure: HonestGardener.com may earn a commission when you purchase products through links on this page, at no additional cost to you. Our recommendations are intended to help readers choose useful gardening products.

    Why Do You Need Good Gardening Gloves?

    Gardening may look gentle, but your hands deal with surprisingly rough conditions.

    You’re digging through soil, pulling weeds, handling rough tools, pruning branches, moving mulch, and sometimes reaching into plants covered with thorns.

    A quality pair of gloves can help protect your hands from:

    • Dirt and mud

    • Minor scratches

    • Splinters

    • Rough garden tools

    • Rose thorns

    • Dry or wet soil

    • Blisters from repetitive work

    • Abrasion from branches and garden materials

    Gardening gloves can also improve your grip on hand tools, especially when the handles are wet or muddy.

    Testing and expert reviews consistently emphasize matching glove construction to the job. Leather generally provides stronger protection against thorns and abrasion, while thin nitrile-coated gloves tend to offer better dexterity and wet grip.

    Quick Comparison: Best Gardening Gloves for Women

    Quick verdict: For most women who want one versatile pair, a well-fitting synthetic-leather or leather hybrid glove is a strong starting point. For delicate planting, choose lightweight nitrile. For roses and thorny shrubs, move up to leather or a dedicated gauntlet-style glove.

    Wells Lamont Women's High Dexterity Gardening Gloves

    1. Wells Lamont Women’s High Dexterity Gardening Gloves

    Best for: Everyday planting, weeding, digging, and general yard work

    The Wells Lamont Women’s High Dexterity gloves are a strong all-around option when you want protection without feeling like you’re wearing bulky work gloves.

    The synthetic-leather palm provides grip and durability, while the stretch material on the back allows your fingers to move naturally. Current reviews highlight the adjustable wrist closure and reinforced construction as useful features for routine garden work.

    Pros

    • Excellent finger flexibility

    • Good everyday durability

    • Reinforced fingertips

    • Adjustable wrist closure

    • Comfortable for repetitive tasks

    • Good balance of protection and dexterity

    Cons

    • Not the first choice for heavy thorn protection

    • Synthetic leather isn’t as breathable as some thin knit gloves

    • Sizing varies between brands, so check the manufacturer’s chart

    Best for: Gardeners who want one pair for most ordinary jobs.

    Check Price on Amazon

    Vgo Women's Goatskin Leather Gardening Gloves

    2. Vgo Women’s Goatskin Leather Gardening Gloves

    Best for: Thorny plants, pruning, digging, and heavier garden work

    If your garden contains roses, blackberry bushes, or other prickly plants, leather becomes much more attractive.

    Goatskin is naturally flexible compared with many heavier leather gloves, making it a useful material when you need both protection and hand movement. Current product comparisons highlight Vgo’s goatskin design, pre-curved fingers, and reinforced areas as advantages for thorny gardening.

    Pros

    • Strong abrasion protection

    • Good choice for thorny plants

    • Flexible goatskin leather

    • Reinforced palm and finger areas

    • Useful for pruning and heavier work

    • Some models offer touchscreen-compatible fingertips

    Cons

    • More expensive than basic knit gloves

    • Can feel warmer than lightweight nitrile

    • Requires more care than washable synthetic gloves

    Best for: Rose gardeners and anyone who frequently handles thorny plants.

    Check Price on Amazon

    Wells Lamont Women's ComfortHyde Gardening Gloves

    3. Wells Lamont Women’s ComfortHyde Gardening Gloves

    Best for: Comfort and premium everyday gardening

    If you’re the type of gardener who spends several hours outdoors at a time, comfort becomes just as important as protection.

    The Women’s ComfortHyde line combines leather with flexible material to provide a more comfortable fit than many stiff heavy-duty gloves. Current product roundups identify this type of construction as a strong option for gardeners who want leather protection without excessive bulk.

    Pros

    • Soft leather feel

    • Excellent flexibility

    • Comfortable for extended use

    • Good grip

    • Breathable construction

    • Suitable for many garden tasks

    Cons

    • Higher price than basic gloves

    • Not designed specifically as a full-arm thorn gauntlet

    • Leather requires proper care

    Best for: Gardeners who prioritize comfort but still want durable protection.

    Check Price on Amazon

    LANON Nitrile-Coated Gardening Gloves

    4. LANON Nitrile-Coated Gardening Gloves

    Best for: Planting, weeding, harvesting, and warm-weather gardening

    For delicate jobs, you don’t necessarily want thick leather.

    Sometimes the best gardening gloves for women are the ones that feel almost like a second skin.

    Nitrile-coated gloves are lightweight and provide excellent grip while allowing considerable finger movement. Current comparisons describe LANON’s nitrile gloves as particularly useful for warm-weather planting and tasks where dexterity is more important than heavy thorn protection.

    Pros

    • Lightweight

    • Excellent dexterity

    • Good grip

    • Comfortable in warm weather

    • Easy to put on and remove

    • Useful for planting and harvesting

    Cons

    • Limited protection from large thorns

    • Not ideal for heavy pruning

    • Thin construction may wear faster during rough work

    Best for: Vegetable gardens, raised beds, seedling work, and everyday weeding.

    Check Price on Amazon

    COOLJOB Women's Thorn-Proof Gardening Gloves

    5. COOLJOB Women’s Thorn-Proof Gardening Gloves

    Best for: Roses, cactus, blackberry bushes, and prickly plants

    If your garden has a serious thorn problem, lightweight planting gloves aren’t enough.

    A thorn-resistant synthetic-leather glove with reinforced palms can provide a useful middle ground between flexible everyday gloves and heavier leather gauntlets.

    Current reviews describe COOLJOB women’s gloves as having padded palms and synthetic-leather construction designed for thorny garden tasks.

    Pros

    • Good thorn protection

    • Reinforced palm

    • Flexible construction

    • Comfortable for pruning

    • Attractive designs available

    • Useful for rose gardening

    Cons

    • Bulkier than nitrile gloves

    • Not completely puncture-proof

    • May feel warm during very hot weather

    Best for: Gardeners who regularly work around roses and prickly shrubs.

    Check Price on Amazon

    What Makes the Best Gardening Gloves for Women?

    Choosing garden gloves shouldn’t be complicated.

    Focus on these six features.

    1. Proper Fit

    Fit is probably the most important factor.

    A glove that’s too large can bunch up at the fingertips and make it difficult to handle seeds, pruning shears, or small plants.

    A glove that’s too tight can restrict movement and become uncomfortable during longer gardening sessions.

    As a general rule, your fingertips should reach close to the end of the glove without being cramped. One recent glove evaluation recommends no more than roughly ¼ inch of extra space at the fingertips.

    Always check the manufacturer’s individual size chart rather than assuming a “Medium” will fit the same across brands.

    2. Material

    Different materials solve different gardening problems.

    Leather

    Best for: Thorns, pruning, digging, rough materials

    Leather generally provides stronger abrasion and puncture protection than lightweight fabric gloves.

    Nitrile

    Best for: Weeding, planting, harvesting, wet conditions

    Nitrile coatings provide excellent grip and dexterity, but thin nitrile gloves shouldn’t be treated as thorn-proof.

    Synthetic Leather

    Best for: General-purpose gardening

    Synthetic leather offers a useful combination of durability, flexibility, and easy maintenance.

    Cotton or Knit

    Best for: Light gardening

    They’re comfortable and breathable but generally provide less protection from moisture and thorns.

    3. Thorn Protection

    If you’re growing roses, don’t underestimate the value of proper protection.

    A standard lightweight garden glove may be perfectly comfortable for planting tomatoes but completely inadequate when you’re reaching into a mature rose bush.

    For rose gardening, look for:

    • Leather palms

    • Reinforced fingers

    • Padded palms

    • Longer cuffs

    • Gauntlet-style forearm coverage

    For especially thorny plants, choose gloves designed specifically for pruning rather than relying on ordinary planting gloves.

    4. Grip

    A good grip helps you control:

    • Pruners

    • Trowels

    • Hand cultivators

    • Garden shears

    • Watering tools

    • Plant pots

    Textured or coated palms can be particularly useful when tools become wet.

    5. Breathability

    If you garden during hot U.S. summers, breathability matters.

    A thick leather glove may offer excellent protection but become uncomfortable on a 90°F afternoon.

    For summer vegetable gardening, consider a lightweight glove with:

    • Mesh backing

    • Breathable knit

    • Thin nitrile coating

    • Moisture-wicking material

    6. Wrist Closure

    An adjustable wrist closure may seem like a minor feature, but it can make a big difference.

    It helps prevent:

    • Soil from entering the glove

    • Small insects from getting inside

    • The glove from slipping during repetitive work

    A secure but comfortable wrist is especially useful during digging and weeding.

    Best Gardening Gloves by Task

    How to Measure Your Hand for Gardening Gloves

    Getting the right size is easier than guessing.

    Step 1: Measure your dominant hand

    Use a flexible measuring tape around the widest part of your palm, excluding the thumb.

    Step 2: Measure finger length if the manufacturer provides that option

    Some women’s gloves have shorter fingers or narrower palm designs.

    Step 3: Compare your measurements with the manufacturer’s chart

    Don’t automatically choose Small because you have small hands.

    Step 4: Consider your gardening task

    If you need fine dexterity, a snug fit is important.

    For heavy work, you may prefer slightly more room—but avoid excessive looseness.

     best gardening gloves for women

    How to Care for Your Gardening Gloves

    A little maintenance can extend the life of your gloves.

    For washable synthetic or nitrile gloves

    1. Shake off loose soil.

    2. Rinse according to the manufacturer’s instructions.

    3. Allow them to air dry completely.

    4. Store them somewhere dry.

    For leather gloves

    Avoid soaking them unnecessarily.

    Instead:

    • Brush off dry dirt

    • Follow the manufacturer’s cleaning instructions

    • Allow them to dry naturally

    • Use an appropriate leather conditioner when recommended

    Never store damp gloves in a closed garden shed or container.

    That can encourage unpleasant odors and deterioration.

    A Real-Life Gardening Scenario

    Imagine you’re growing 12 rose bushes in your backyard in North Carolina.

    Your first pair of lightweight fabric gloves feels wonderful when you’re planting annual flowers. But when pruning roses, the thin fabric catches repeatedly on thorns.

    You switch to a leather glove with a longer cuff.

    Suddenly, pruning becomes much easier.

    Now imagine the opposite scenario: you’re harvesting lettuce and planting basil in July.

    A thick leather glove would protect your hands, but you’d probably sacrifice some comfort and finger sensitivity.

    A lightweight nitrile glove makes much more sense.

    That’s the key lesson: don’t choose gloves based only on appearance. Choose them based on the job.

    Gardening Gloves and USDA Hardiness Zones

    USDA Hardiness Zones don’t determine which gloves you should buy, but they can help you understand your gardening season.

    The USDA Plant Hardiness Zone Map is based on average annual extreme minimum winter temperatures and is primarily used to help gardeners determine which perennial plants can survive local winter conditions.

    USDA Plant Hardiness Zone Map

    For example, a gardener in a colder northern zone may spend more time gardening during a shorter growing season, while gardeners in warmer zones may garden for much longer periods.

    For gloves, local weather matters more than the zone number.

    In hot Southern summers, prioritize breathable gloves.

    In cool spring or fall conditions, consider gloves with more coverage and insulation.

    Beginner Tips for Choosing Garden Gloves

    If you’re buying your first pair, don’t overthink it.

    Start with two pairs

    A practical beginner setup is:

    Pair #1: Lightweight nitrile or synthetic gloves for planting, weeding, and harvesting.

    Pair #2: Leather or thorn-resistant gloves for pruning and heavier work.

    This is often more useful than trying to find one glove that does everything.

    Keep gloves near your tools

    Store them next to your pruners, trowel, and hand cultivator.

    You’ll be much more likely to wear them.

    Keep a spare pair

    Wet gloves are uncomfortable.

    Having a second pair means you don’t have to stop gardening while the first pair dries.

    Frequently Asked Questions

    What are the best gardening gloves for women?

    For most gardeners, the best choice is a comfortable, properly fitted glove that matches the work you do most often. Synthetic leather is a strong all-purpose option, while leather is preferable for thorny work and nitrile is excellent for lightweight planting and weeding.

    What are the best thorn resistant gardening gloves for women?

    Look for leather or reinforced synthetic-leather gloves with extended cuffs and reinforced palms and fingers. For serious rose pruning, a dedicated gauntlet-style glove offers additional forearm coverage.

    Are nitrile gardening gloves good for women?

    Yes. Nitrile-coated gloves are excellent for planting, weeding, harvesting, and many everyday garden tasks. They offer good grip and dexterity, but thin nitrile gloves shouldn’t be considered fully thorn-proof.

    What are the best gloves for rose gardening?

    Choose gloves with strong puncture and abrasion protection, preferably leather or reinforced materials. Long cuffs are particularly useful because roses can scratch your forearms as well as your hands.

    Should gardening gloves be tight or loose?

    They should fit snugly without restricting movement. Excess material at the fingertips can make delicate tasks harder, while an overly tight glove can cause discomfort.

    Are leather gardening gloves worth it?

    For gardeners who regularly prune roses, handle branches, or perform heavy digging, leather can be worth the additional cost because it generally provides better abrasion and thorn protection than lightweight fabric gloves.

    Can gardening gloves be machine washed?

    Some synthetic and fabric gloves can be machine washed, but always check the manufacturer’s care instructions first. Leather gloves usually require different care.

    Key Takeaways

    The best gardening gloves for women aren’t necessarily the most expensive or the most heavily padded.

    The right pair should match your gardening style.

    For everyday gardening: Choose synthetic leather or a durable hybrid.

    For planting and harvesting: Choose lightweight nitrile or breathable gloves.

    For roses and thorny plants: Choose leather or reinforced thorn-resistant gloves.

    For long gardening sessions: Prioritize fit, flexibility, and breathability.

    For heavy digging: Choose a durable glove with reinforced palms and fingertips.

    And don’t forget the most important feature of all: proper fit.

    A glove that fits your hand correctly will generally be more comfortable, easier to control, and more useful than a supposedly premium glove that’s too loose or too tight.

    Final Verdict

    If you’re searching for the best gardening gloves for women, start by asking one simple question:

    What gardening job do I do most often?

    If you spend most of your time planting vegetables and pulling weeds, a breathable nitrile or synthetic-leather glove may be your best choice.

    If you’re constantly pruning roses or dealing with blackberry brambles, invest in stronger leather or thorn-resistant protection.

    And if you want one versatile pair for general gardening, a comfortable women’s-specific synthetic-leather or leather hybrid is a sensible starting point.

    The goal isn’t simply to keep your hands clean.

    It’s to make gardening more comfortable, confident, and enjoyable.

    For more practical gardening advice, visit HonestGardener.com and explore our other guides on container gardening, vegetable gardening, garden tools, and smart gardening products.

    Ready to upgrade your garden gear?

    Choose the glove that matches your garden, measure your hand carefully, and give your hands the protection they deserve.

    Happy gardening—and keep those hands thorn-free! 🌱🌹

    Want to Know More on Gardening?

    Please Read :
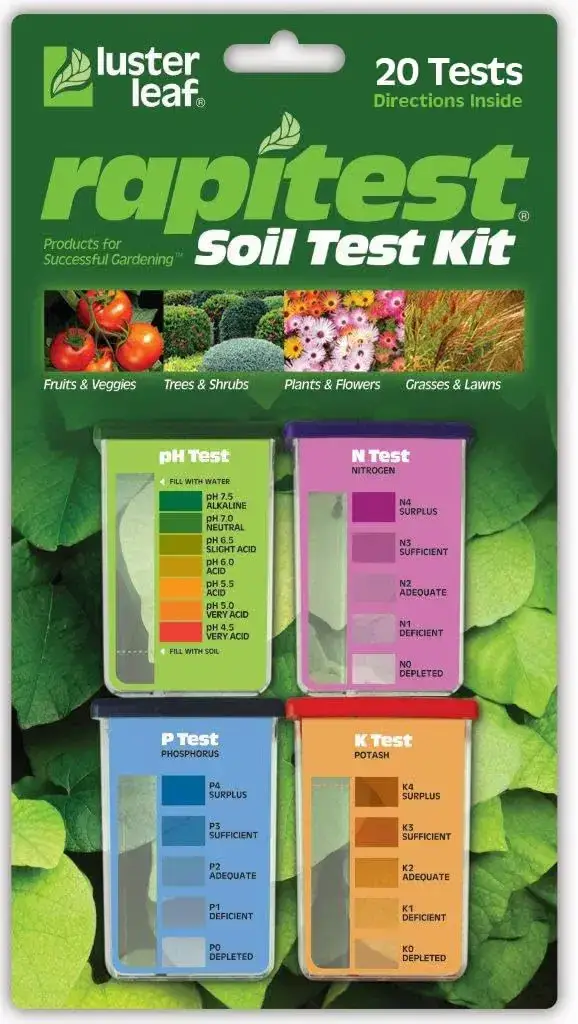
    Download Free Ebook

  • Best Self Watering Planters for Balcony Vegetables: 5 Easy Picks for 2026

     best self watering planters for balcony vegetables

    Have you ever planted tomatoes, peppers, lettuce, or herbs on your balcony, only to find them wilted after a hot weekend?

    You’re not alone.

    Balcony vegetable gardens dry out surprisingly quickly. Containers have limited soil volume, and warm weather, direct sunlight, and wind can pull moisture from the growing mix faster than you expect.

    That’s where self-watering planters can make a big difference.

    The best self watering planters for balcony vegetables use a built-in reservoir and a wicking system to supply moisture to the growing medium as needed. Instead of watering the soil from the top every day, the roots can draw moisture from below.

    In this guide, we’ll look at what makes a good self-watering planter, compare five worthwhile options, explain which vegetables work best, and show you how to set up a productive balcony garden—even if you’re a complete beginner.

    Affiliate Disclosure: HonestGardener.com may earn a commission when you purchase products through links on this page, at no additional cost to you. We only recommend products we believe may be useful for gardeners.

    Why Choose a Self-Watering Planter for a Balcony?

    Balcony gardening has one major challenge: water management.

    A traditional container can dry rapidly because it contains much less soil than an in-ground garden. During hot weather, some container plants may need watering more than once a day. University of Minnesota Extension notes that container plants often need frequent watering to maintain even moisture, particularly in hot, dry conditions.

    A self-watering container creates a reservoir beneath the growing area. Moisture can then move upward through a wicking system.

    The main advantages include:

    • Less frequent watering

    • More consistent soil moisture

    • Reduced stress during hot weather

    • Excellent option for busy gardeners

    • Useful for balconies, patios, and decks

    • Good solution for people who travel occasionally

    • Better control over moisture than many conventional pots

    However, self-watering doesn’t mean maintenance-free.

    You still need to monitor the reservoir, fertilize your plants, check for pests, and make sure the container has appropriate drainage.

    How Self-Watering Planters Work

    Most self-watering planters have three basic components:

    1. Growing area – where the potting mix and plant roots are located.

    2. Water reservoir – a separate chamber that stores water.

    3. Wicking system – allows water to move from the reservoir into the growing medium.

    The principle is similar to capillary action.

    As the growing medium becomes drier, moisture can move upward from the reservoir toward the roots.

    This is particularly useful for balcony vegetable gardening because it can help maintain a more stable moisture level.

    But remember: moist does not mean saturated.

    Most container vegetables prefer evenly moist soil rather than permanently soggy soil.

    best self watering planter for tomatoes

    What to Look for in the Best Self-Watering Planters for Balcony Vegetables

    Before buying a planter, don’t simply choose the one with the biggest reservoir.

    Consider your balcony, plants, climate, and available sunlight.

    1. Container Size

    Different vegetables need different amounts of root space.

    For example:

    A tiny planter might work beautifully for basil but struggle with a productive tomato plant.

    2. Water Reservoir

    Look for a reservoir that’s large enough to reduce watering frequency without making the container excessively heavy.

    A visible water-level indicator is especially helpful for beginners.

    3. Drainage

    Self-watering does not eliminate the need for drainage.

    A good system should prevent excessive water accumulation around the roots.

    4. Balcony-Friendly Footprint

    Measure your available space before buying.

    A narrow vertical planter can be more useful than a large rectangular planter if your balcony is small.

    5. Weight

    This is particularly important for apartment balconies.

    Wet soil plus a heavy planter can become surprisingly heavy. Never assume your balcony can safely support unlimited gardening containers. Follow your building’s rules and consult a qualified professional if you’re uncertain about structural load limits.

    5 Best Self-Watering Planters for Balcony Vegetables

    Below are five types/models worth considering for different balcony gardening situations.

    Self-Watering Planter Box With Trellis

    1. Self-Watering Planter Box With Trellis

    Best for: Tomatoes, cucumbers, beans, and climbing vegetables

    A self-watering planter with a built-in trellis is one of the smartest choices when vertical space is available.

    Some current designs combine a compact planter with a tall trellis, allowing climbing plants to grow upward rather than spreading across the balcony.

    For example, one current self-watering tomato planter design measures approximately 10 × 10 inches at the base and includes a 58-inch trellis. It is marketed for tomatoes, cucumbers, vines, and other climbing plants.

    Pros:

    • Saves floor space

    • Excellent for tomatoes and cucumbers

    • Built-in plant support

    • Self-watering design

    • Good for narrow balconies

    Cons:

    • Limited root volume for very large plants

    • Tall plants can become vulnerable to strong wind

    • May require additional staking

    Best use: One compact tomato or climbing vegetable per planter.

    Check Price on Amazon

    Two-Tier Self-Watering Planter Box

    2. Two-Tier Self-Watering Planter Box

    Best for: Small balconies with limited floor space

    A two-tier design allows you to grow several plants vertically while conserving valuable floor area.

    One current model features two planting levels, a built-in water reservoir, cotton-rope wicking, a visible water-level window, and lockable wheels.

    Pros:

    • Makes efficient use of vertical space

    • Easy to move

    • Water-level window

    • Suitable for herbs and vegetables

    • Raised design reduces bending

    Cons:

    • Upper and lower levels may receive different amounts of sunlight

    • Can be heavier when filled

    • Not ideal for very large root crops

    Best use: Lettuce, basil, parsley, spinach, peppers, and compact vegetables.

    Check Price on Amazon

    Self-Watering Raised Garden Bed

    3. Self-Watering Raised Garden Bed

    Best for: Growing several vegetables together

    If your balcony has enough room, a raised self-watering bed can provide considerably more growing space than individual pots.

    Some raised models incorporate a water reservoir and drainage controls, allowing gardeners to manage moisture while growing vegetables and herbs.

    Pros:

    • More growing space

    • Suitable for multiple vegetables

    • Easier access

    • Good for salad gardens

    • Can reduce bending

    Cons:

    • Takes more balcony space

    • Heavy when filled

    • More expensive than basic pots

    Best use: Lettuce, spinach, herbs, peppers, and compact vegetables.

    Check Price on Amazon

    Vertical Self-Watering Planter Tower

    4. Vertical Self-Watering Planter Tower

    Best for: Extremely small balconies

    When floor space is your biggest limitation, go vertical.

    A five-tier vertical self-watering planter, for example, can provide multiple growing pockets within a relatively small footprint. Current designs are marketed for strawberries, herbs, vegetables, and other compact plants.

    Pros:

    • Excellent space efficiency

    • Multiple planting locations

    • Easy to rearrange

    • Great for herbs and leafy vegetables

    • Attractive balcony appearance

    Cons:

    • Upper tiers may dry faster

    • Not suitable for large tomato plants

    • Some plants can shade lower tiers

    Best use: Strawberries, lettuce, herbs, green onions, and compact greens.

    Check Price on Amazon

    Self-Watering Planter With Adjustable Trellis

    5. Self-Watering Planter With Adjustable Trellis

    Best for: One climbing vegetable in a narrow space

    Adjustable-trellis planters are especially interesting for balconies because they combine vertical support with a small footprint.

    One current design has an approximately 11 × 11-inch footprint and an adjustable trellis reaching about 56 inches. It is intended for plants such as tomatoes, cucumbers, and beans.

    Pros:

    • Extremely compact

    • Adjustable support

    • Great for climbing vegetables

    • Self-watering system

    • Good airflow around vertical growth

    Cons:

    • Usually designed for one main plant

    • Tall plants can catch wind

    • Large tomato varieties may outgrow the container

    Check Price on Amazon

    Self-Watering Planter Comparison

    Our overall choice for most beginners: A medium-sized self-watering planter box.

    Best for tomatoes: A large self-watering planter with a sturdy trellis.

    Best for tiny balconies: A vertical self-watering planter.

    Best Vegetables for Self-Watering Containers

    Not every vegetable needs the same amount of space.

    Here are some of the easiest vegetables to grow in containers.

    Great choices for beginners

    • Lettuce

    • Spinach

    • Kale

    • Radishes

    • Green onions

    • Bush beans

    • Peppers

    • Basil

    • Parsley

    • Chives

    • Cherry tomatoes

    Vegetables needing more space

    • Full-size tomatoes

    • Cucumbers

    • Eggplant

    • Zucchini

    • Large pepper varieties

    For a small balcony, compact varieties are usually the better choice.

    Look for terms such as:

    • Bush

    • Patio

    • Dwarf

    • Compact

    • Container

    • Determinate

    How to Set Up a Self-Watering Balcony Planter

    Follow these simple steps.

    Step 1: Choose the Sunniest Location

    Most fruiting vegetables need plenty of direct sunlight.

    Observe your balcony for a full day before deciding where to place your planters.

    If your balcony receives only a few hours of sunlight, focus on crops that tolerate less direct sun, such as some leafy greens and herbs.

    Step 2: Choose the Right Container

    Match the container to the plant.

    Don’t put a full-size tomato plant into a tiny decorative planter simply because it looks attractive.

    Root space matters.

    Step 3: Use Quality Potting Mix

    Don’t fill vegetable containers with heavy garden soil.

    A quality container mix should provide:

    • Good drainage

    • Air space

    • Moisture retention

    • Adequate structure

    • Nutrient availability

    A container-specific growing mix is usually a better choice for balcony vegetables.

    Step 4: Fill the Reservoir

    Follow the manufacturer’s instructions.

    Do not assume every self-watering planter works identically.

    Some reservoirs use wicks, while others use specialized chambers or capillary systems.

    Step 5: Plant at the Correct Depth

    Follow the seed packet or transplant instructions.

    Avoid burying seedlings too deeply unless that particular crop benefits from deeper planting.

    Step 6: Add Mulch

    A thin layer of appropriate organic mulch can reduce evaporation.

    University of Minnesota Extension notes that mulch can reduce water loss and moderate soil temperature in containers.

    Step 7: Monitor Your Plants

    For the first few weeks, check your planter frequently.

    Look for:

    • Wilting

    • Yellow leaves

    • Slow growth

    • Excessively wet soil

    • Pests

    • Reservoir level

    Once you understand how quickly your planter consumes water, maintenance becomes much easier.

    How Often Should You Refill a Self-Watering Planter?

    There isn’t one universal answer.

    Water use depends on:

    • Container size

    • Plant size

    • Temperature

    • Wind

    • Sun exposure

    • Growing medium

    • Vegetable variety

    • Season

    A large mature tomato plant on a hot, windy balcony can use substantially more water than a small lettuce plant.

    Don’t rely solely on a calendar.

    Check the reservoir and inspect the growing medium and plants.

    USDA Hardiness Zones and Balcony Gardening

    USDA Hardiness Zones are primarily useful for understanding winter temperature suitability rather than determining how often to water a balcony container.

    The USDA system divides regions according to average annual extreme minimum temperatures and helps gardeners understand which plants can tolerate local winter conditions.

    Check the USDA Plant Hardiness Zone Map

    Why does this matter for balcony vegetables?

    Suppose you’re growing peppers in a northern U.S. city.

    You may have a warm summer growing season but need to move or protect your container plants before freezing temperatures arrive.

    In warmer zones, you may have a longer growing season.

    For annual balcony vegetables, however, local frost dates, temperature, sunlight, and the crop’s preferred temperature are often more immediately useful than the zone number alone.

    A Simple Balcony Vegetable Garden Example

    Imagine Sarah has a 6-foot-wide apartment balcony.

    She wants fresh vegetables but doesn’t want to spend every morning watering.

    Her setup could include:

    Planter 1: Cherry tomato + trellis
    Planter 2: Two pepper plants
    Planter 3: Lettuce + spinach
    Planter 4: Basil + parsley
    Planter 5: Green onions

    Instead of spreading five large containers across the floor, she could use a combination of a vertical planter, a self-watering planter with trellis, and one medium raised planter.

    The result is a productive mini garden without turning the balcony into a jungle.

    Common Self-Watering Planter Mistakes

    Mistake #1: Overwatering

    A reservoir doesn’t mean the soil should stay saturated.

    Most container vegetables prefer consistent moisture—not waterlogged roots.

    Mistake #2: Choosing a Tiny Pot for Tomatoes

    Tomatoes are hungry, thirsty plants.

    Give them sufficient root volume and strong support.

    Mistake #3: Ignoring Fertilizer

    Frequent watering can move nutrients through the growing medium.

    University of Minnesota Extension recommends regular fertilization for many container plants and emphasizes following fertilizer-label directions.

    Mistake #4: Forgetting Wind

    A tall tomato plant can act like a sail.

    Secure trellises and place tall planters where they won’t become unstable during windy weather.

    Mistake #5: Ignoring Balcony Weight

    A large container filled with wet soil can become extremely heavy.

    Start with smaller containers if you’re unsure about your balcony’s load capacity.

    Beginner Tips for Better Results

    Start small. Don’t try to grow 20 vegetables your first season.

    Choose compact varieties. They’re easier to manage in containers.

    Group plants according to water needs. This makes maintenance easier.

    Keep a simple watering record. After a few weeks, you’ll understand your planter’s pattern.

    Rotate crops when practical. Avoid repeatedly growing the same crop in the same growing medium without refreshing it.

    Inspect leaves regularly. Early pest detection can save a plant.

    For additional container-gardening guidance, university extension resources are excellent starting points. The University of Minnesota Extension, for example, provides detailed information on container watering, fertilization, and moisture management.

    Frequently Asked Questions

    Are self-watering planters good for vegetables?

    Yes. They can be excellent for many container vegetables because they help maintain more consistent moisture. They’re especially useful for balconies where containers can dry quickly.

    What is the best self watering planter for tomatoes?

    Choose a large planter with adequate root space and a sturdy trellis. Cherry and patio tomatoes are generally easier for balconies than large indeterminate varieties.

    Can I grow cucumbers in a self-watering planter?

    Yes. Choose a large enough container and provide a strong trellis. Cucumbers grow vigorously and need adequate moisture.

    Do self-watering planters prevent overwatering?

    Not automatically.

    The design can help manage moisture, but incorrect setup, poor drainage, or unsuitable growing media can still cause problems.

    How often do I need to fill the reservoir?

    It depends on the planter, plant, weather, and growing conditions. Check the reservoir regularly, particularly during hot weather.

    Are self-watering planters good for beginners?

    Absolutely. They’re particularly useful for beginners who struggle to maintain consistent watering.

    Can I grow vegetables on a shaded balcony?

    You can grow some leafy greens and herbs with less direct sun, but fruiting crops such as tomatoes and peppers generally need considerably more sunlight.

    Key Takeaways

    If you’re looking for the best self watering planters for balcony vegetables, don’t simply choose the largest or most expensive model.

    Instead, focus on:

    • Correct container size

    • A reliable water reservoir

    • Effective wicking

    • Proper drainage

    • Strong construction

    • Balcony-friendly dimensions

    • Adequate sunlight

    • Appropriate vegetable varieties

    For very small balconies, a vertical self-watering planter can maximize growing space.

    For tomatoes and cucumbers, choose a self-watering planter with a trellis.

    For a mixed vegetable garden, a larger self-watering raised planter can be the better option.

    And for beginners, a medium self-watering planter with a visible water-level indicator can make vegetable gardening much easier.

    Final Verdict: Which Self-Watering Planter Should You Buy?

    The best choice depends on your balcony and the vegetables you want to grow.

    Best overall: Medium self-watering planter box
    Best for tomatoes: Self-watering planter with trellis
    Best for tiny balconies: Vertical self-watering planter
    Best for multiple vegetables: Self-watering raised garden bed
    Best for beginners: Planter with visible reservoir indicator

    The goal isn’t to create the biggest balcony garden.

    It’s to create a manageable garden that consistently produces food without becoming another daily chore.

    A good self-watering planter can help you do exactly that.

    For more practical gardening advice, explore the other guides on HonestGardener.com, including our container-gardening and vegetable-growing resources.

    Ready to start? Pick one suitable planter, choose two or three compact vegetables, give them enough sunlight, and start growing. Your balcony doesn’t need to be huge to produce a surprisingly rewarding harvest.

    Want to Know More on Gardening?

    Please Read :
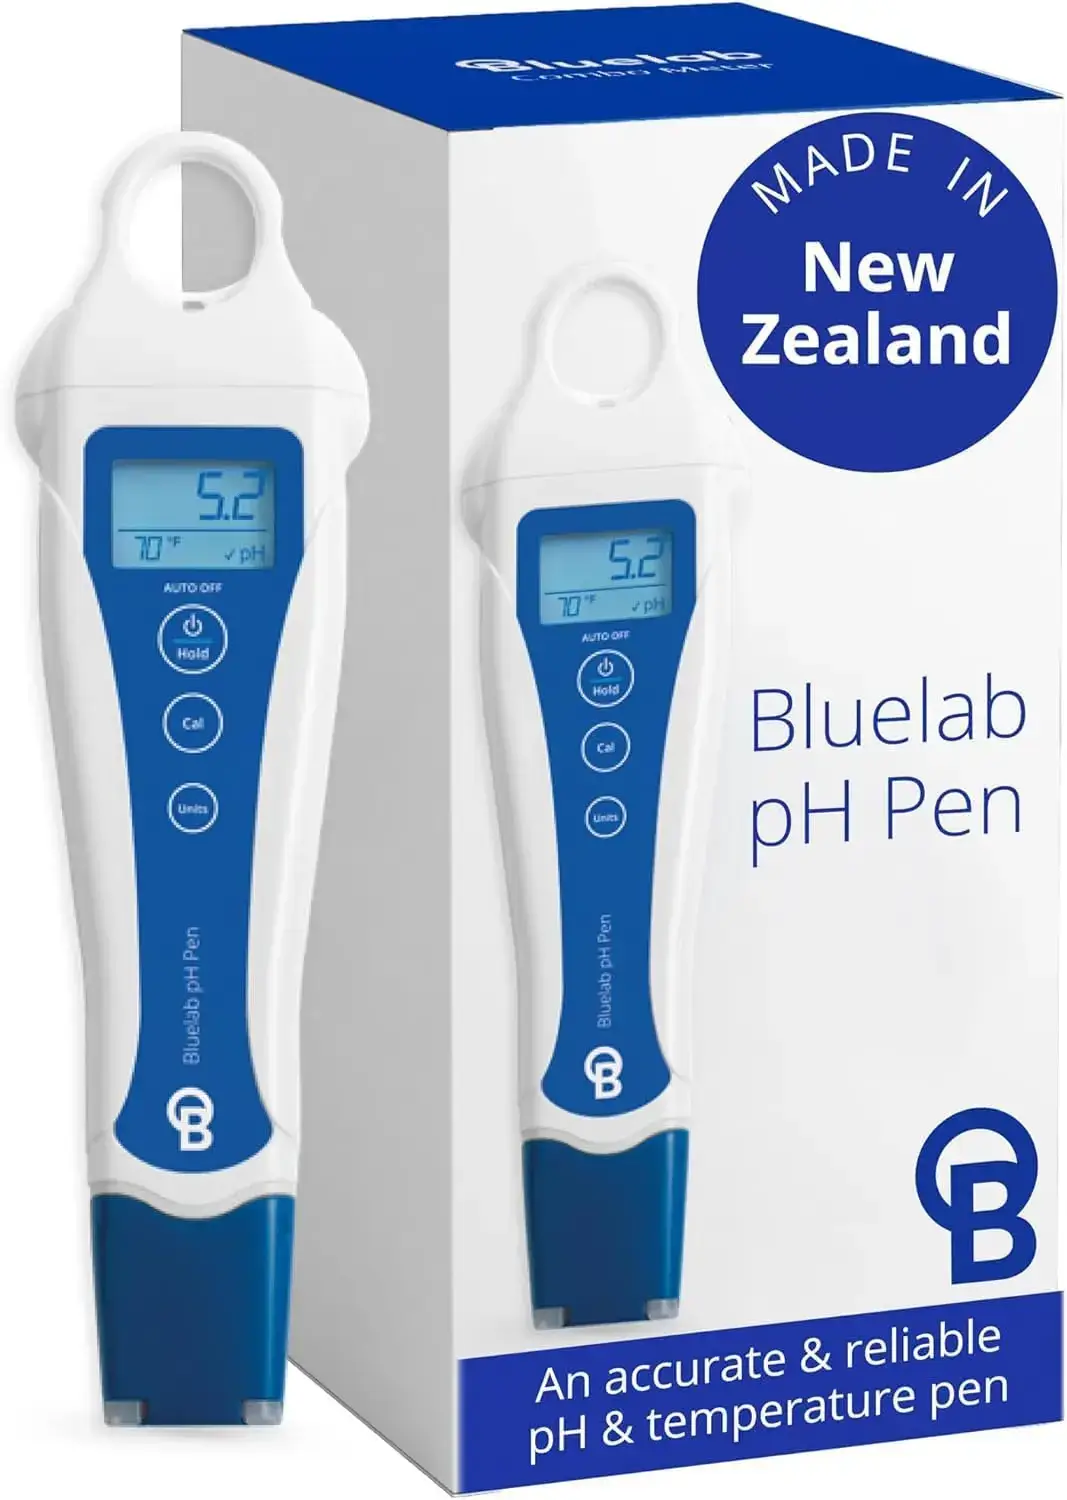
    Download Free Ebook

    best self watering planters for balcony vegetables

  • Best Seed Starting Mix for 2026: DIY Recipe + Top Store-Bought Picks

    best seed starting mix

    Why Your Seeds Keep Failing (And It’s Probably Not You)

    You planted a full tray of seeds with high hopes. A week later, half of them never sprouted, and the ones that did are thin, floppy, and keeling over at the base. Sound familiar?

    Here’s the part nobody tells beginners: it’s rarely the seeds’ fault. In most cases, the real problem is what’s underneath them. Regular garden soil or old leftover potting mix is often too heavy, too dense, or loaded with fungus that causes seedlings to rot right at the soil line — a problem gardeners call “damping off.”

    The fix is choosing (or making) the best seed starting mix — a light, airy, sterile medium built specifically for germination, not for feeding a mature plant. Get this one thing right, and you’ll notice the difference almost immediately: faster germination, stronger stems, and seedlings that are actually ready for the garden instead of struggling to survive their first two weeks.

    This guide walks through exactly what makes a seed starting mix work, a simple homemade recipe you can mix in ten minutes, and the store-bought options worth your money.

    If you’re just getting started, check out Seed Scarification.

    What Actually Makes a Seed Starting Mix “The Best”

    Not all bagged soil is created equal, and a good seed starting mix isn’t the same thing as potting soil or garden dirt. A quality mix should be:

    • Lightweight and fine-textured so tiny, fragile roots can push through easily

    • Well-draining to prevent soggy conditions that invite rot

    • Moisture-retentive enough that it doesn’t dry out between waterings

    • Low in nutrients, since seedlings are easily damaged by heavy fertilizer early on

    • Sterile, free of weed seeds, pathogens, and fungus gnats that garden soil often carries

    Garden soil fails almost every one of these tests — it compacts hard, drains poorly in small containers, and can carry disease straight to your seedlings.

    The Best DIY Seed Starting Mix Recipe

    You genuinely don’t need a long ingredient list. Most seasoned gardeners rely on a version of this same simple seed starting soil recipe, and it costs a fraction of what you’d pay for premium bagged mix.

    What You’ll Need

    • 4 parts coconut coir (or peat moss) — holds moisture and gives the mix its light, fluffy texture

    • 1 part perlite — improves drainage and aeration so roots don’t sit in wet soil

    • 1 part vermiculite — helps the mix hold water evenly without staying soggy

    • 1 part fine, screened compost (optional) — adds a gentle boost of nutrients for slightly older seedlings

    A “part” just means any consistent unit — a cup, a scoop, or a bucket — as long as you use the same one for every ingredient.

    Step-by-Step Instructions

    1. Rehydrate your coconut coir if it comes in a compressed brick. Soak it in warm water until it expands and breaks apart.

    2. Combine all ingredients in a large tub or wheelbarrow.

    3. Mix thoroughly by hand or trowel until everything is evenly blended and no dry pockets remain.

    4. Moisten the mix with water until it feels like a wrung-out sponge — damp, but not dripping.

    5. Fill your trays or seed pots, then sow your seeds according to the depth listed on the seed packet.

    6. Store leftovers in a sealed container or bag; homemade mix keeps well for future use

    Beginner tip: If your seeds need darkness to germinate, sprinkle a thin layer of vermiculite over the top after sowing — it helps block light while still letting moisture and air through.

    Real-Life Scenario: A Tale of Two Trays

    Scenario A: Jenna, a first-time gardener in Ohio (USDA Zone 6a), started her tomato seeds in leftover garden soil scooped from her backyard bed. Within a week, half her seedlings had thin, dark, pinched stems and toppled over — classic damping off.

    Scenario B: Her neighbor Priya started the same tomato variety, same week, using a simple coconut coir and perlite mix. Her seedlings sprouted two days faster and grew sturdy, upright stems with no losses.

    Same seeds, same climate, same week — the only real difference was what was underneath them. That’s the entire case for using a proper starting mix instead of whatever’s left in the garden bed.

    seedling starter mix

    Store-Bought vs. DIY: Which Should You Choose?

    Both routes work well — it really comes down to how many seedlings you’re starting and how much time you want to spend prepping soil.

    Choosing a Bagged Mix at the Garden Center

    If you’d rather skip the mixing altogether, look for a bag labeled specifically as a seed starting mix or seedling starter mix, not general potting soil. Check the label for:

    • A light, crumbly texture with visible perlite or vermiculite

    • No added synthetic fertilizer (seedlings don’t need it yet)

    • A brand that specifies it’s sterile or pathogen-free

    Watering and Care Once Seeds Are Sown

    Getting the mix right is half the battle — how you care for it afterward matters just as much.

    • Keep the mix evenly moist, never bone dry or waterlogged, using a spray bottle or bottom-watering tray for gentle, even moisture

    • Provide bright light as soon as seedlings emerge — a sunny window is rarely enough on its own; a grow light usually works better

    • Maintain warmth around 65–75°F for most vegetable seeds, checking guidance from your local Cooperative Extension office for specific crops

    • Thin seedlings once they develop true leaves, keeping only the strongest one per cell

    Timing Your Seed Starting by USDA Zone

    Your USDA Hardiness Zone determines when to start seeds indoors, which matters because starting too early can leave seedlings leggy and stressed before it’s safe to transplant.

    • Zones 3–5 (shorter growing season): Start most vegetable seeds indoors 6–8 weeks before your average last frost date

    • Zones 6–7 (moderate season): Start 5–7 weeks before last frost for most warm-season crops

    • Zones 8–10 (long, mild season): Many gardeners can start seeds slightly later, or even direct-sow certain crops outdoors sooner

    5 Top Seed Starting Supplies Worth Buying

    This section contains affiliate links. If you purchase through them, Honest Gardener may earn a small commission at no extra cost to you. We only recommend products we’d genuinely use ourselves.

    Organic Seed Starting Mix (Bagged)

    1. Organic Seed Starting Mix (Bagged)

    Pros: Ready to use out of the bag; consistent texture; widely available

    Cons: More expensive per seedling than DIY; bags can be bulky to store

    Check Price on Amazon →

    Coconut Coir Brick (Compressed)

    2. Coconut Coir Brick (Compressed)

    Pros: Lightweight to store and ship; expands significantly with water; eco-friendlier than peat

    Cons: Requires soaking and prep time before use

    Check Price on Amazon →

    Perlite (Horticultural Grade)

    3. Perlite (Horticultural Grade)

    Pros: Dramatically improves drainage; inexpensive; lasts a long time

    Cons: Lightweight and can float or make a mess if not moistened first

    Check Price on Amazon →

    Seedling Heat Mat with Thermostat

    4. Seedling Heat Mat with Thermostat

    Pros: Speeds up germination significantly; especially helpful for peppers and tomatoes

    Cons: Added upfront cost; needs monitoring to avoid overheating the mix

    Check Price on Amazon →

    Bottom-Watering Seed Starting Tray with Dome

    5. Bottom-Watering Seed Starting Tray with Dome

    Pros: Reduces damping-off risk by keeping foliage dry; humidity dome speeds germination

    Cons: Dome must be removed promptly once seeds sprout to prevent mold

    Check Price on Amazon →

    3-Ingredient Seed Starting Mix The Perfect Ratio

    Common Beginner Mistakes to Avoid

    • Using regular garden soil or old potting soil — both are too heavy and can carry disease

    • Skipping the pre-moistening step — dry peat moss or coir is difficult to re-wet evenly later

    • Overwatering right after sowing — soggy mix is one of the leading causes of damping off

    • Starting seeds too early for your zone — leggy, stressed seedlings rarely catch up

    • Using a mix with added fertilizer for very young seedlings, which can cause fertilizer burn

    Frequently Asked Questions

    Can I just use regular potting soil to start seeds? It’s not recommended. Potting soil is heavier and coarser than a true seed starting mix, which can smother delicate roots and hold too much moisture around young stems.

    How long does homemade seed starting mix last? Stored in a sealed container away from moisture, a DIY batch can last for a full season or longer, though it’s best mixed fresh each year for the most consistent results.

    Do I need to add fertilizer to my seed starting mix? Not at first. Seeds contain their own initial energy reserves, and seedlings typically don’t need feeding until they develop their first true leaves.

    What’s the difference between peat moss and coconut coir in a starting mix? Both perform similarly in terms of moisture retention, but coconut coir is generally considered a more sustainable option since peat moss harvesting can damage peat bogs.

    Is vermiculite safe to use in seed starting mix? Modern vermiculite sold for gardening is regulated and tested, though it’s still smart to buy from a reputable garden supplier and avoid inhaling dust while mixing.

    Key Takeaways

    • The best seed starting mix is light, sterile, well-draining, and low in nutrients — not the same as potting soil

    • A simple DIY recipe of coconut coir, perlite, and vermiculite works as well as most premium store-bought mixes

    • Pre-moistening your mix before sowing prevents uneven watering later

    • Your USDA zone determines the best timing to start seeds indoors

    • Avoiding garden soil is one of the simplest ways to prevent damping off

    Ready to Give Your Seedlings the Best Start?

    A great growing season starts before a single seed even touches soil. Mix up a batch of DIY seed starting mix this weekend, or grab a trusted bagged version, and set your seedlings up to grow strong from day one. For more step-by-step growing guides, visit the Honest Gardener blog.

    Sources: University Cooperative Extension programs, USDA Plant Hardiness Zone Map.

  • How Often to Water Tomato Plants in Containers (2026 Guide)

    How Often to Water Tomato Plants in Containers

    Why Your Container Tomatoes Keep Wilting (And It’s Not Your Fault)

    You checked on your tomato plant this morning. It looked fine. By 3 p.m., the leaves were drooping like a sad umbrella, and you’re standing there with a watering can wondering if you’ve already ruined it.

    Here’s the truth: figuring out how often to water tomato plants in containers trips up even experienced gardeners. Container soil dries out faster than garden soil, roots have nowhere to hide from the heat, and the “water once a week” advice you find online was written for tomatoes planted straight in the ground — not for a five-gallon pot baking on a concrete patio.

    The good news? Once you understand what’s actually driving your plant’s thirst, watering stops being a guessing game. This guide breaks down exactly how often to water container tomatoes, how to read your plant instead of relying on a rigid schedule, and which tools actually make life easier. By the end, you’ll have a system you can trust — not just another rule of thumb.

    New to growing in pots? Start with our guide to Vegetables That Grow in Containers.

    The Short Answer: How Often to Water Tomato Plants in Containers

    Most container-grown tomatoes need water once a day, and sometimes twice a day during hot summer stretches. Here’s the general breakdown:

    • Seedlings and new transplants: Water every 1–2 days, keeping soil lightly moist (not soggy)

    • Established, growing plants: Water once daily, especially once temps climb past 80°F

    • Mature, fruiting plants in peak summer heat: Water once in the morning and check again by afternoon — a second watering is common

    • Cooler or cloudy days: Watering every 1–2 days is usually sufficient.

    There’s no single perfect schedule, and that’s actually the point. Your watering frequency depends on your container, your climate, and your soil — not a number pulled from a random blog post.

    Why Containers Are So Much Thirstier Than Garden Beds

    It helps to understand why this is such a moving target. A handful of factors stack up fast:

    • Limited soil volume. In-ground tomato roots can chase moisture several feet down. Container roots are stuck with whatever’s in the pot.

    • Heat exposure. Pots — especially dark-colored plastic ones — absorb heat from all sides, warming the soil and speeding up evaporation.

    • Drainage. Containers are designed to drain quickly, which is great for preventing root rot but means water passes through faster than it does in garden soil.

    • Wind and sun exposure on patios/decks. Elevated surfaces often get more airflow and reflected heat than an in-ground bed.

    Think of a container like a small cooler versus the ground, which behaves more like a walk-in fridge — the smaller space simply can’t hold its temperature (or its moisture) as long.

    Water Tomato Plants in Containers

    How to Tell If It’s Actually Time to Water

    Forget the calendar. The most reliable tomato watering schedule is the one your plant and soil tell you, not the one printed on a chart. Here’s the step-by-step check:

    Step 1: Do the Finger Test

    Poke your finger 1–2 inches into the soil. If it feels dry, it is time to water. If it is still cool and damp, wait a bit longer.

    Step 2: Check the Weight of the Pot

    Lift the container (or nudge it, if it’s too heavy). A pot that feels noticeably lighter than after its last watering is a pot that’s thirsty.

    Step 3: Watch the Leaves — But Don’t Panic

    Slight leaf curling in the early afternoon heat is normal and doesn’t always mean underwatering. True stress shows up as consistent wilting that doesn’t bounce back by evening.

    Step 4: Water Deeply, Not Frequently in Small Sips

    When watering, pour until it drains freely from the bottom holes. A quick splash on top only wets the surface and encourages shallow, weak roots.

    Step 5: Water in the Morning

    Morning watering lets plants take up moisture before the heat of the day and reduces the risk of fungal disease that can come from damp foliage overnight.

    Beginner tip: If you’re not sure whether you’re overwatering or underwatering, err on the side of checking the soil first. Consistency matters more than frequency — irregular watering (bone dry, then flooded) is what actually causes problems like blossom end rot.

    Real-Life Scenario: Two Gardeners, Two Very Different Schedules

    Scenario A — Phoenix, Arizona (USDA Zone 9b): Maria grows a Beefsteak tomato in a black 10-gallon fabric pot on a south-facing patio. In July, with highs over 100°F, she waters every morning and checks again by 2 p.m., often giving a second light watering.

    Scenario B — Portland, Maine (USDA Zone 5b): Tom grows a Patio Princess tomato in a light-colored ceramic pot with partial afternoon shade. In the same July heat wave (upper 70s in his zone), he waters once daily and skips a day after a good rain.

    Same plant family, same month, completely different watering rhythm — because climate and container material changed everything. This is exactly why checking your USDA Hardiness Zone is a smart first step before setting any watering routine.

    Watering Frequency by Container Size (Quick-Reference Table)

    Fabric grow bags breathe well, which is great for root health but means they dry out noticeably faster than plastic or ceramic pots — factor that in when setting your container tomato watering schedule.

    Soil Type and Water Retention

    Your best soil for container tomatoes plays almost as big a role as pot size. A quality potting mix should hold moisture without staying soggy. According to guidance from university extension programs, mixes richer in organic matter retain water longer than sandy, fast-draining blends — which is exactly what you want in a hot container that already dries quickly.

    A few things that help soil hold moisture longer:

    • Adding a 2–3 inch layer of mulch (straw, shredded bark, or dried grass clippings) on top of the soil

    • Using a potting mix formulated for containers rather than garden topsoil, which compacts and drains poorly in pots

    • Mixing in compost to improve water-holding capacity without waterlogging roots

    Not sure what to use? Check our full breakdown of the best potting soil for tomatoes.]

    Signs of Overwatering vs. Underwatering

    It’s easy to confuse the two, and honestly, they can look similar at first glance. Here’s how to tell them apart:

    Signs of overwatering:

    • Yellowing lower leaves that feel soft or mushy

    • Soil that stays wet for days and smells sour

    • Roots that look brown and slimy (if you check them)

    Signs of underwatering:

    • Leaves that curl and feel dry or crispy at the edges

    • Soil pulling away from the sides of the pot

    • Wilting that improves quickly after a deep watering

    If you’re consistently seeing signs of overwatering tomato plants, cut back before you reduce for the season — container tomatoes recover from underwatering far more easily than from root rot.

    Tools That Make Container Watering Easier

    You don’t need to guess, and you definitely don’t need to babysit your tomato plant every hour. A handful of tools take the stress out of the equation.

    This section contains affiliate links. If you purchase through them, Honest Gardener may earn a small commission at no extra cost to you. We only recommend products we’d genuinely use in our own garden.

    Soil Moisture Meter

    1. Soil Moisture Meter

    Pros: Removes the guesswork from the finger test; great for beginners; inexpensive

    Cons: Cheaper models can be inconsistent; needs occasional recalibration

    Check Price on Amazon →

    Self-Watering Container Planter

    2. Self-Watering Container Planter

    Pros: Built-in reservoir reduces daily watering to every few days; great for vacations or busy schedules

    Cons: Higher upfront cost; reservoir needs occasional cleaning to prevent algae

    Check Price on Amazon →

    Drip Irrigation Kit with Timer

    3. Drip Irrigation Kit with Timer

    Pros: Automates watering completely; consistent moisture reduces blossom end rot risk

    Cons: Takes some setup time; timer batteries need periodic replacement

    Check Price on Amazon →

    Fabric Grow Bags (5–10 Gallon)

    4. Fabric Grow Bags (5–10 Gallon)

    Pros: Excellent drainage and root aeration; lightweight and easy to move

    Cons: Dries out faster than plastic pots, meaning more frequent watering

    Check Price on Amazon →

    Straw Mulch (Weed-Free)

    5. Straw Mulch (Weed-Free)

    Pros: Cuts down evaporation significantly; inexpensive; improves soil over time

    Cons: Needs topping up occasionally; can attract pests if it stays too damp

    Check Price on Amazon →

    Comparison: Manual Watering vs. Self-Watering Containers vs. Drip Irrigation

    Seasonal Watering Tips Based on Your USDA Zone

    Your USDA Hardiness Zone won’t tell you exactly how often to water, but it’s a helpful starting point for setting expectations:

    • Zones 8–10 (hot, long summers): Expect daily, sometimes twice-daily watering for much of the season

    • Zones 5–7 (moderate summers): Daily watering during heat waves, every other day otherwise

    • Zones 3–4 (short, cooler summers): Watering needs are generally lower, but containers still dry out faster than garden beds

    For more specifics on your local growing conditions, your regional Cooperative Extension office (many affiliated with land-grant universities like the University of Minnesota) is a reliable, free resource.

    Beginner Mistakes to Avoid

    • Watering on a fixed schedule no matter what — always check the soil first

    • Letting the plant wilt repeatedly before watering — inconsistent moisture is a leading cause of blossom end rot

    • Using a pot without drainage holes — no drainage means no amount of “correct” watering will save the roots

    • Watering the leaves instead of the soil — wet foliage invites fungal disease

    • Skipping mulch — it’s one of the easiest ways to cut down how often you need to water

    Frequently Asked Questions

    How do I check if my tomato plant is getting too much water?

    Look for yellowing lower leaves, soil that stays soggy for days, or a sour smell from the pot. If the leaves feel soft rather than crispy, overwatering is the more likely culprit.

    Can I water container tomatoes at night?

    It’s better to avoid it. Watering at night leaves foliage damp for hours, which can encourage fungal issues. Morning watering is the safer habit.

    Do self-watering containers really reduce how often I need to water?

    Yes — most self-watering planters only need their reservoir refilled every few days instead of daily hand-watering, which is especially helpful during heat waves.

    How much water does a container tomato plant need per day?

    A mature, fruiting plant in a large pot can use several quarts to a couple of gallons of water on a hot day, though this varies by pot size, plant size, and climate.

    Should I water differently once tomatoes start ripening?

    Some gardeners slightly reduce watering once fruit is ripening to concentrate flavor, but avoid letting the soil go bone dry — sudden swings in moisture can cause fruit to crack.

    Key Takeaways

    • Container tomatoes generally need daily watering, sometimes twice a day in extreme heat

    • Always check soil moisture with the finger test rather than relying on a fixed schedule

    • Pot size, material, and your USDA zone all affect watering frequency

    • Mulch and quality potting soil reduce how often you need to water

    • Consistency matters more than frequency — avoid the wilt-then-flood cycle

    Ready to Grow Healthier Container Tomatoes?

    Watering doesn’t have to be a daily source of stress. Start with the finger test, watch your plant’s specific conditions, and adjust from there — your tomatoes will tell you what they need. For more container-growing tips, explore our full Best Soil for Growing Tomatoes in Containers and browse the Honest Gardener blog for more no-nonsense growing advice.

    Sources: University of Minnesota Extension, Espoma Organic, USDA Plant Hardiness Zone Map.

    How Often to Water Your Container Tomato A Quick Decision Chart

  • Best Soil for Growing Tomatoes in Containers: 7 Easy Soil Mix Tips for Bigger Harvests

    best soil for growing tomatoes in containers

    The best soil for growing tomatoes in containers is a lightweight, nutrient-supporting soilless potting mix that drains well while retaining enough moisture for healthy root growth.

    For most home gardeners, look for a quality potting mix containing some combination of:

    • Coconut coir or peat moss

    • Compost or composted bark

    • Perlite

    • Vermiculite

    • Other organic matter

    • A suitable starter fertilizer

    University of New Hampshire Extension specifically recommends a quality soilless potting mix for container tomatoes rather than ordinary garden soil. Garden soil can become compacted and may drain poorly in containers.

    The simple answer

    If you want the easiest solution, buy a high-quality vegetable or all-purpose container potting mix and use it according to the manufacturer’s directions.

    For gardeners who prefer making their own mix, a simple recipe is also possible.

    Why Soil Matters So Much for Container Tomatoes

    Have you ever planted a healthy-looking tomato seedling in a pot, watered it faithfully, and then watched it turn yellow, wilt, or stop producing fruit?

    You may blame the fertilizer, weather, or tomato variety.

    But sometimes the real problem is the soil inside the container.

    Growing tomatoes in containers is different from growing them in a garden bed. In the ground, roots can explore a large volume of soil for water and nutrients. A container gives those roots a much smaller environment.

    That means your potting mix needs to do several jobs at once:

    • Hold enough moisture

    • Drain excess water

    • Provide oxygen around the roots

    • Supply nutrients

    • Remain loose instead of becoming compacted

    • Support healthy root development

    The good news? You don’t need an expensive or complicated formula.

    With the right ingredients and a properly sized container, even a beginner can grow productive tomatoes on a patio, balcony, deck, or small backyard.

    What Makes a Good Potting Mix for Tomatoes?

    The ideal soil for container tomatoes needs a balance between water retention and drainage.

    Too much water creates an oxygen-starved root environment.

    Too little water causes stress, wilting, blossom-end problems, and poor fruit development.

    1. Excellent drainage

    Tomato roots need oxygen.

    A potting mix containing perlite, coarse vermiculite, pine bark, or similar materials can create air spaces and improve drainage.

    2. Good moisture retention

    A mix that drains extremely quickly may require constant watering, especially during hot American summers.

    Both coconut coir and peat moss are excellent for boosting soil moisture retention.

    3. Organic matter

    Compost, composted bark, or worm castings can contribute organic matter and nutrients.

    However, don’t assume that adding huge quantities of compost automatically makes the soil better.

    In a container, balance is more important than simply adding more organic material.

    4. Nutrient availability

    Tomatoes are productive plants.

    They need access to nutrients throughout the growing season, and nutrients can be lost from containers through repeated watering.

    That’s why even a nutrient-rich potting mix may eventually need supplemental fertilizer.

    soil for container tomatoes

    Best Ingredients for Tomato Soil Mix

    Here’s what each major ingredient contributes.

    Iowa State University Extension also recommends a growing medium that drains well but doesn’t dry too rapidly, and notes that soilless mixes have advantages over garden soil in containers.

    DIY Tomato Soil Mix for Containers

    Want to make your own tomato soil mix for containers?

    Try this beginner-friendly formula:

    Simple 3-Part Tomato Potting Mix

    2 parts quality potting mix

    1 part finished compost

    1 part perlite

    For example, if you’re filling a large container:

    • 2 gallons potting mix

    • 1 gallon finished compost

    • 1 gallon perlite

    Mix everything thoroughly before planting.

    Why this works

    The potting mix provides the basic growing medium.

    The compost contributes organic matter and nutrients.

    The perlite improves drainage and air space.

    If your purchased potting mix already contains significant compost and perlite, you don’t necessarily need to add large quantities of either.

    Don’t overcomplicate the recipe.

    A good commercial potting mix can be better than an improperly balanced homemade mix.

    Should You Add Garden Soil?

    Generally, no.

    Garden soil may seem like the obvious choice because tomatoes grow in garden beds. But containers behave differently.

    Regular garden soil can become dense and compacted inside a pot, restricting drainage and reducing air around the roots. Extension recommendations consistently favor lightweight soilless mixes for container vegetables.

    Instead, choose a potting mix specifically designed for containers.

    tomato soil mix for containers

    How to Prepare Tomato Soil Step by Step

    Step 1: Choose the container

    Start with a sufficiently large container.

    For many tomato varieties, at least 4–5 gallons per plant is a useful starting point, although larger containers can provide more root room and moisture stability. University of New Hampshire Extension recommends 4–5 gallon containers for individual plants.

    For large indeterminate varieties, consider going larger.

    Step 2: Check drainage holes

    Your container should have drainage holes.

    If water cannot escape, even the best potting soil for tomatoes can become waterlogged.

    Step 3: Add your potting mix

    Fill the container with your prepared mix, leaving enough room near the top for watering.

    Don’t compress the mix aggressively.

    The roots need air spaces.

    Step 4: Plant the tomato

    Remove the seedling carefully from its nursery container.

    Tomatoes have an unusual ability to develop roots along buried portions of their stems, so planting somewhat deeply can help create a stronger root system.

    Step 5: Water thoroughly

    After planting, water slowly until moisture reaches the entire root zone and excess water exits through the drainage holes.

    Step 6: Add support

    Set up a tomato cage, stake, or trellis.

    Don’t wait until the plant becomes huge and difficult to support.

    What Size Container Is Best for Tomatoes?

    Container size can make a surprisingly big difference.

    As a general guide:

    Iowa State Extension gives smaller minimum container sizes for cherry tomatoes and at least 4 gallons for standard tomatoes, while noting that larger containers generally provide advantages.

    When in doubt, choose the larger container.

    More soil volume generally means more buffering against rapid drying and nutrient fluctuations.

    USDA Hardiness Zones and Container Tomatoes

    Many U.S. gardeners use USDA Hardiness Zones when planning their gardens.

    The USDA Plant Hardiness Zone Map divides the country into zones based primarily on average annual extreme minimum winter temperatures.

    However, there’s an important point:

    USDA Hardiness Zones aren’t a complete tomato-growing calendar.

    Tomatoes are warm-season plants, so you should also consider:

    • Last spring frost

    • First fall frost

    • Summer heat

    • Day length

    • Local growing conditions

    • Variety maturity

    For example, a gardener in Zone 5 may have a much shorter tomato-growing season than someone in Zone 9.

    A gardener in Arizona or Texas may have the opposite problem: extreme summer heat.

    You can check your location using the official USDA Plant Hardiness Zone Map.

    Watering Tomatoes in Containers

    Even the best soil for tomatoes in pots won’t save a plant from inconsistent watering.

    Container tomatoes can dry out considerably faster than tomatoes growing in the ground.

    Water when needed

    Check the moisture several inches below the surface rather than relying only on what the top looks like.

    During hot weather, containers may require watering much more frequently.

    Water deeply

    When you water, aim to moisten the entire root zone.

    Avoid giving tiny amounts of water repeatedly.

    Water consistently

    One important reason for maintaining consistent moisture is fruit quality.

    University of New Hampshire Extension notes that an even moisture supply during fruit development helps reduce blossom-end rot and supports fruit development.

    Beginner trick

    If you’re unsure whether your pot needs water, stick your finger into the mix.

    If the upper layer feels dry but the deeper mix is still moist, you may not need to water immediately.

    How Often Should Container Tomatoes Be Fertilized?

    Container plants have a limited supply of nutrients.

    Every time you water, some nutrients can potentially move out through the drainage holes.

    That’s why tomatoes grown in containers often benefit from regular feeding.

    A practical approach is:

    1. Start with a quality potting mix.

    2. Follow the fertilizer instructions on the package.

    3. Feed according to the tomato variety and growing conditions.

    4. Avoid excessive fertilizer.

    5. Increase attention to feeding once the plant begins producing heavily.

    More fertilizer does not automatically mean more tomatoes.

    Overfertilizing can encourage excessive foliage at the expense of balanced growth and fruit production.

    best soil for tomatoes in pots

    7 Common Tomato Soil Mistakes to Avoid

    1. Using straight garden soil

    Garden soil tends to be too dense and compact for container gardening.

    2. Choosing a cheap, dense mix

    If the mix becomes hard and compact after watering, roots may struggle.

    3. Ignoring drainage

    No drainage holes = serious risk of waterlogged roots.

    4. Adding too much compost

    Compost is useful, but more isn’t always better.

    5. Letting containers dry completely

    Repeated severe drying can stress tomato plants.

    6. Overfertilizing

    Follow the product label instead of guessing.

    7. Choosing a tiny container

    A tomato plant can quickly outgrow a small pot.

    5 Amazon Products to Consider for Container Tomatoes

    Affiliate Disclosure: HonestGardener.com may earn a commission when you purchase products through qualifying affiliate links. This comes at no additional cost to you and helps support our gardening content.

    Product availability and prices can change. Check the current Amazon listing and product label before purchasing.

    FoxFarm Ocean Forest Potting Soil

    1. FoxFarm Ocean Forest Potting Soil

    Best for: Gardeners who want a nutrient-rich ready-to-use potting medium.

    Pros:

    • Ready to use

    • Popular among container gardeners

    • Contains organic components

    • Convenient for beginners

    Cons:

    • Can be more expensive than basic mixes

    • May be too nutrient-rich for some young seedlings

    Check Price on Amazon–>>

    Espoma Organic Potting Mix

    2. Espoma Organic Potting Mix

    Best for: Gardeners looking for an organic-oriented container mix.

    Pros:

    • Organic-focused formulation

    • Suitable for container gardening

    • Good option for vegetable gardeners

    • Easy to use

    Cons:

    • Availability can vary

    • May still require additional feeding for heavy-producing tomatoes

    Check Price on Amazon–>>

    Miracle-Gro Performance Organics All Purpose Container Mix

    3. Miracle-Gro Performance Organics All Purpose Container Mix

    Best for: Beginners who want a widely available container mix.

    Pros:

    • Convenient

    • Designed for containers

    • Easy to find

    • Beginner-friendly

    Cons:

    • Product formulations can vary by market

    • Check the current package label before buying

    Check Price on Amazon–>>

    Burpee Organic Premium Potting Mix

    4. Burpee Organic Premium Potting Mix

    Best for: Vegetable gardeners who prefer an organic-oriented potting medium.

    Pros:

    • Suitable for container vegetables

    • Convenient bagged mix

    • Designed for container growing

    Cons:

    • May cost more than basic potting mixes

    • Availability may vary

    Check Price on Amazon–>>

    PRO-MIX Potting Mix

    5. PRO-MIX Potting Mix

    Best for: Gardeners who want a lightweight professional-style growing medium.

    Pros:

    • Lightweight

    • Good aeration potential

    • Useful for container gardening

    • Can be customized with amendments

    Cons:

    • Some formulations are sold in large quantities

    • May require fertilizer depending on the specific product

    Check Price on Amazon–>>

    Tomato Soil Product Comparison

    Important: The “best” product depends on your tomato variety, container size, climate, watering habits, and whether you prefer organic-certified or conventional inputs.

    A Simple Container Tomato Setup

    Imagine you’re growing one determinate tomato on a sunny suburban patio in North Carolina.

    You could use:

    Container: 7–10 gallons

    Growing medium: Quality vegetable potting mix + modest amount of finished compost + perlite if additional drainage is needed

    Plant: Compact determinate variety

    Location: Sunny patio

    Support: Tomato cage

    Mulch: Thin organic mulch layer

    Watering: Consistent moisture without keeping the soil saturated

    Feeding: Tomato fertilizer according to label directions

    This setup is simple enough for a beginner but provides the basic conditions a tomato needs to thrive.

    What About Hot U.S. States?

    Gardeners in places such as Texas, Arizona, Florida, and parts of California may face very different challenges from gardeners in the Northeast.

    In hot weather:

    • Containers can dry rapidly.

    • Dark pots can become very warm.

    • Plants may require more frequent monitoring.

    • Afternoon heat can stress plants.

    • Mulching can help reduce moisture loss.

    In cooler northern states, gardeners may need to focus more on frost timing and the length of the growing season.

    That’s why soil quality and climate management have to work together.

    Beginner Tips for Growing Better Tomatoes in Containers

    Tip #1: Don’t buy “dirt”—buy potting mix

    Look specifically for a product labeled potting mix or designed for containers.

    Tip #2: Bigger is usually easier

    A larger container gives you more room for roots and more soil volume to buffer moisture changes.

    Tip #3: Don’t bury the drainage holes

    The water needs somewhere to go.

    Tip #4: Add support early

    Tomato plants become surprisingly heavy once fruit develops.

    Tip #5: Mulch the surface

    A modest layer of organic mulch can help reduce evaporation and temperature fluctuations.

    Tip #6: Don’t chase complicated recipes

    A quality commercial potting mix can produce excellent results.

    Tip #7: Watch the plant—not just the calendar

    Leaves, soil moisture, growth rate, and fruit development can tell you more than a rigid watering schedule.

    best soil for growing tomatoes in containers

    Frequently Asked Questions

    What is the best soil for growing tomatoes in containers?

    The best soil for growing tomatoes in containers is a lightweight, well-draining potting mix that retains moisture without becoming waterlogged. A quality soilless mix containing coir or peat plus an aeration material such as perlite is a strong choice.

    Can I use garden soil for container tomatoes?

    It’s generally better to avoid using garden soil by itself. Garden soil can become compacted and drain poorly in containers. Use a quality potting mix instead.

    What is the best potting soil for tomatoes?

    A good tomato potting soil should be lightweight, well-draining, moisture-retentive, and capable of supporting nutrient availability throughout the growing season.

    How many gallons of soil does a tomato plant need?

    A 4–5 gallon container can work for many individual tomato plants, but larger containers are often easier to manage and can be especially helpful for large indeterminate varieties.

    Can I make my own tomato soil mix?

    Yes. A simple beginner recipe is approximately two parts quality potting mix, one part finished compost, and one part perlite.

    Is compost good for container tomatoes?

    Yes, finished compost can be useful, but it should be part of a balanced growing medium rather than the entire container.

    Should I add perlite to tomato potting soil?

    Perlite can be useful when a mix needs additional aeration and drainage. If your commercial potting mix already drains well, you may not need much additional perlite.

    Can I reuse tomato potting soil next year?

    You can sometimes reuse container mix, but inspect the previous plants for disease problems and replenish the mix’s structure and nutrients. If a plant had serious soilborne disease, replacing the growing medium may be the safer choice.

    Is the best soil for tomatoes in pots different from garden soil?

    Yes. Container growing requires a medium that remains lightweight and well aerated. Straight garden soil can become too dense in a container.

    Key Takeaways

    • Use potting mix instead of straight garden soil.

    • Choose a mix that provides drainage, moisture retention, and aeration.

    • Use a sufficiently large container.

    • Make sure the pot has drainage holes.

    • Don’t let the plant repeatedly dry out completely.

    • Feed container tomatoes according to the fertilizer label.

    • Choose tomato varieties appropriate for your space.

    • Consider your local climate in addition to your USDA Hardiness Zone.

    • Don’t overcomplicate your soil recipe.

    Final Verdict: What’s the Best Soil for Container Tomatoes?

    The best soil for growing tomatoes in containers isn’t necessarily the most expensive soil or the soil with the longest ingredient list.

    It’s the growing medium that creates the right environment for tomato roots.

    For most U.S. gardeners, that means a high-quality soilless potting mix with good drainage, moisture retention, organic matter, and adequate nutrition.

    If you want the easiest approach, start with a quality commercial potting mix designed for containers.

    If you enjoy DIY gardening, combine a quality potting mix with a modest amount of finished compost and perlite.

    Then put just as much attention into container size, watering, sunlight, support, and feeding.

    That’s the combination that turns a bag of potting mix into a productive tomato garden.

    Ready to grow your best container tomatoes yet?

    For more practical, beginner-friendly gardening guides, visit HonestGardener.com and explore our latest container gardening, vegetable gardening, soil, and garden-tool guides.

    Want to Know More on Gardening?

    Please Read :
    Download Free Ebook

  • What Veggies to Plant in Late Summer for Fall Harvest: Boost Your Yield!

    what veggies to plant in late summer for fall harvest

    Is your vegetable garden looking tired by August?

    Tomatoes may be slowing down, cucumbers are fading, and empty spaces are appearing in your raised beds. Many gardeners assume the season is ending—but late summer is actually the perfect time to start a second harvest.

    Knowing what veggies to plant in late summer for fall harvest can turn those empty beds into a fresh supply of crisp lettuce, sweet carrots, tender spinach, and flavorful radishes well into autumn.

    In this guide, you’ll learn:

    • The best vegetables to sow in late summer

    • How to calculate your fall planting dates

    • Which crops thrive in cooler weather

    • Step-by-step planting instructions

    • Beginner mistakes to avoid

    Whether you garden in raised beds, containers, or a backyard plot, these strategies will help you boost your yield and extend your harvest season.

    Why Plant a Fall Garden?

    Most gardeners focus on spring planting, but fall gardens often produce better-quality vegetables.

    Cooler temperatures improve flavor

    Crops such as spinach, kale, carrots, and lettuce become sweeter after cool nights because they convert starches into sugars.

    Fewer pests

    As temperatures fall, garden pests decrease, saving young plants.

    Better moisture retention

    Late-summer soil stays warm for quick germination, while cooler autumn weather reduces water loss.

    More food from the same space

    A fall garden allows you to harvest two crops from one bed in a single year, making it one of the most efficient gardening techniques available.

    How to Calculate Your Late-Summer Planting Date

    The key to successful late summer vegetable planting is working backward from your first expected fall frost date.

    Step 1: Find your first frost date

    Use the USDA Plant Hardiness Zone Map or your local extension service to find the average first frost date for your area.

    Step 2: Check the crop’s days to maturity

    For example:

    • Radishes: 25–30 days

    • Spinach: 35–45 days

    • Lettuce: 45–60 days

    • Carrots: 60–75 days

    Step 3: Add a fall buffer

    Because days become shorter in autumn, add 10–14 extra days to the maturity time.

    Example: If your first frost is October 20 and spinach takes 40 days, add 10 days for the fall buffer = 50 days. Count back 50 days from October 20, giving a planting date of August 31.

    This simple method creates a reliable fall garden planting schedule for almost any vegetable.

    What Veggies to Plant in Late Summer for Fall Harvest

    The Best Fast-Growing Fall Vegetables

    If you’re wondering what veggies to plant in late summer for fall harvest, start with crops that mature quickly and tolerate cool weather.

    🥬 Leafy Greens (30–60 days)

    Spinach

    • Excellent cold tolerance

    • Sweeter after frost

    • Ideal for salads and cooking

    Lettuce

    • Choose loose-leaf varieties for continuous harvest

    • Germinates quickly in warm soil

    Arugula

    • Ready in about 30 days

    • Adds a peppery flavor to salads

    🌱 Root Vegetables (25–75 days)

    Radishes

    • One of the fastest growing fall vegetables

    • Harvest in as little as 25 days

    Carrots

    • Develop sweeter flavor in cool weather

    • Best sown directly in the garden

    Beets

    • Both roots and greens are edible

    • Reliable fall producer

    🌿 Brassicas (50–80 days)

    Kale

    • Extremely cold hardy

    • Produces leaves well into winter in many regions

    Bok Choy

    • Fast-growing and compact

    • Perfect for raised beds and containers

    Turnips

    • Quick-growing roots and nutritious greens

    These crops consistently rank among the best vegetables for fall garden success across most USDA zones.

    Step-by-Step Planting Guide

    Follow this simple process for a productive fall garden.

    Step 1: Remove spent summer crops

    Pull out declining tomato, cucumber, or bean plants and remove any diseased foliage.

    Step 2: Refresh the soil

    Add:

    • 1–2 inches of compost

    • A balanced organic vegetable fertilizer

    • A light cultivation of the top 3–4 inches of soil

    Step 3: Water the bed thoroughly

    Pre-moistened soil helps seeds germinate evenly during hot late-summer weather.

    Step 4: Sow seeds at the correct depth

    Step 5: Keep the soil consistently moist

    During the first week, check moisture daily. Warm soil can dry out quickly, and uneven moisture is a common cause of poor germination.

    Step 6: Thin seedlings

    Once seedlings develop their first true leaves, thin them to the recommended spacing to ensure good airflow and root development.

    what veggies to plant in late summer for fall harvest

    Beginner Tips for a Bigger Fall Harvest

    Use shade during germination

    Hot August sun can overheat seeds. Cover newly sown beds with:

    • Shade cloth (30–40%)

    • Floating row cover

    • An old sheet supported by hoops

    Remove the cover once seedlings emerge.

    Water in the morning

    Morning watering reduces evaporation and allows foliage to dry before evening.

    Succession sow every 10–14 days

    Plant small batches of lettuce, spinach, and radishes every two weeks for a continuous harvest rather than one large crop.

    Mulch after seedlings establish

    A thin layer of straw or shredded leaves helps retain moisture and suppress weeds.

    Don’t over-fertilize leafy greens

    Too much nitrogen can produce lush growth that is more susceptible to frost damage.

    Real-Life Fall Garden Example

    A gardener in USDA Zone 6 harvested garlic in July, leaving a 4×8 raised bed empty. Instead of leaving it bare, she:

    1. Added 2 inches of compost.

    2. Sowed spinach on August 20.

    3. Sowed radishes between the spinach rows.

    4. Added a second sowing of lettuce on September 5.

    The radishes were harvested by mid-September, creating more space for the spinach. The lettuce provided continuous harvests through October, and the spinach continued producing leaves until early November under a lightweight row cover.

    This single bed produced three additional harvests after the summer crop was removed.

    Common Mistakes to Avoid

    Even experienced gardeners can make a few mistakes when planning a late summer vegetable garden. Fortunately, most of these are easy to avoid.

    1. Planting Too Late

    One of the biggest mistakes is waiting until autumn officially begins.

    Many cool-season vegetables need 40–70 days to mature before the first expected frost.

    Tip: Count backward from your area’s average first frost date before sowing seeds.

    2. Forgetting to Water

    Late summer is often the hottest part of the gardening season.

    New seedlings have shallow roots and dry out quickly.

    Best Practice

    • Water deeply every morning.

    • Apply 2–3 inches of mulch.

    • Avoid watering during the hottest afternoon hours.

    3. Ignoring Shade

    Young seedlings struggle under intense afternoon sun.

    Temporary shade cloth or planting beside taller crops helps them establish healthy roots.

    4. Overcrowding Plants

    Trying to fit too many vegetables into a small area reduces airflow and increases disease pressure.

    Always follow the spacing recommendations on seed packets.

    5. Skipping Soil Improvement

    After harvesting summer crops, soil nutrients are often depleted.

    Before planting again:

    • Add compost

    • Mix in aged manure

    • Apply a balanced organic vegetable fertilizer

    Healthy soil equals healthier fall vegetables.

    what veggies to plant in late summer for fall harvest

    Caring for Your Fall Garden

    Once your vegetables are planted, regular care ensures a productive harvest.

    Water Consistently

    Aim for approximately 1 inch of water each week, increasing during unusually hot weather.

    Drip irrigation or soaker hoses help reduce evaporation and keep foliage dry.

    Fertilize Lightly

    Leafy vegetables usually need less fertilizer than fruiting crops.

    A light application of compost or fish emulsion every 3–4 weeks is often enough.

    Mulch Well

    Organic mulch helps:

    • Keep soil cooler

    • Reduce weeds

    • Retain moisture

    • Protect roots from temperature swings

    Straw and shredded leaves are excellent choices.

    Protect Against Early Frost

    Unexpected cold nights happen.

    Keep these supplies ready:

    • Floating row covers

    • Frost blankets

    • Old bedsheets (temporary protection)

    Many cool-season vegetables tolerate light frost, but young seedlings appreciate extra protection.

    Best Amazon Products for Late Summer Gardening

    These tools can make planting and maintaining a productive fall garden easier.

    Raised Garden Bed Kit

    1. Raised Garden Bed Kit

    Best For: Better drainage and soil control

    Pros

    • Easy assembly

    • Improved soil quality

    • Excellent for beginners

    Cons

    • Higher initial investment

    • Limited growing area

    Organic Vegetable Fertilizer

    2. Organic Vegetable Fertilizer

    Best For: Feeding cool-season vegetables

    Pros

    • Slow-release nutrients

    • Safe for edible crops

    • Improves soil health

    Cons

    • Requires reapplication

    Heavy-Duty Soaker Hose

    3. Heavy-Duty Soaker Hose

    Best For: Efficient watering

    Pros

    • Conserves water

    • Reduces leaf diseases

    • Easy installation

    Cons

    • May require hose timer

    Garden Shade Cloth

    4. Garden Shade Cloth

    Best For: Protecting seedlings

    Pros

    • Prevents heat stress

    • Reusable

    • Lightweight

    Cons

    • Requires simple support frame

    Floating Row Covers

    5. Floating Row Covers

    Best For: Frost protection

    Pros

    • Extends harvest season

    • Protects from insects

    • Lightweight

    Cons

    • Must be secured during windy weather

    Frequently Asked Questions

    What vegetables grow best when planted in late summer?

    Cool-season vegetables such as lettuce, spinach, kale, carrots, radishes, beets, turnips, broccoli, cabbage, and peas are excellent choices.

    When should I start planting for a fall harvest?

    Begin 6–10 weeks before your area’s average first fall frost, depending on the crop’s maturity time.

    Can I plant tomatoes in late summer?

    In most climates, it’s too late to start tomatoes from seed for a fall harvest. Focus on fast-growing cool-season vegetables instead.

    How often should I water newly planted vegetables?

    Keep the soil consistently moist until seedlings establish, then water deeply about once a week, adjusting for weather conditions.

    Is fertilizer necessary for fall vegetables?

    Adding compost and a balanced organic fertilizer helps replenish nutrients depleted by summer crops and supports healthy growth.

    Key Takeaways

    • Late summer is an excellent time to start a productive fall vegetable garden.

    • Focus on fast-growing, cool-season crops.

    • Improve soil with compost before planting.

    • Water consistently and mulch to conserve moisture.

    • Protect young plants from intense heat and early frosts.

    • Succession planting provides continuous harvests throughout autumn.

    Final Thoughts

    Many gardeners think the growing season ends when summer fades, but that’s far from the truth.

    Whether you have a spacious backyard, raised beds, or a few containers on a patio, late summer offers a second chance to grow delicious vegetables while making the most of your garden space.

    Ready to Grow a Bigger Fall Harvest?

    Don’t let your garden sit empty after summer crops finish. Plant cool-season vegetables now and enjoy weeks of fresh, flavorful produce.

    Visit HonestGardener.com for more expert gardening guides, seasonal planting tips, DIY projects, and trusted product recommendations to help you grow with confidence.

    Want to Know More on Gardening?

    Please Read :
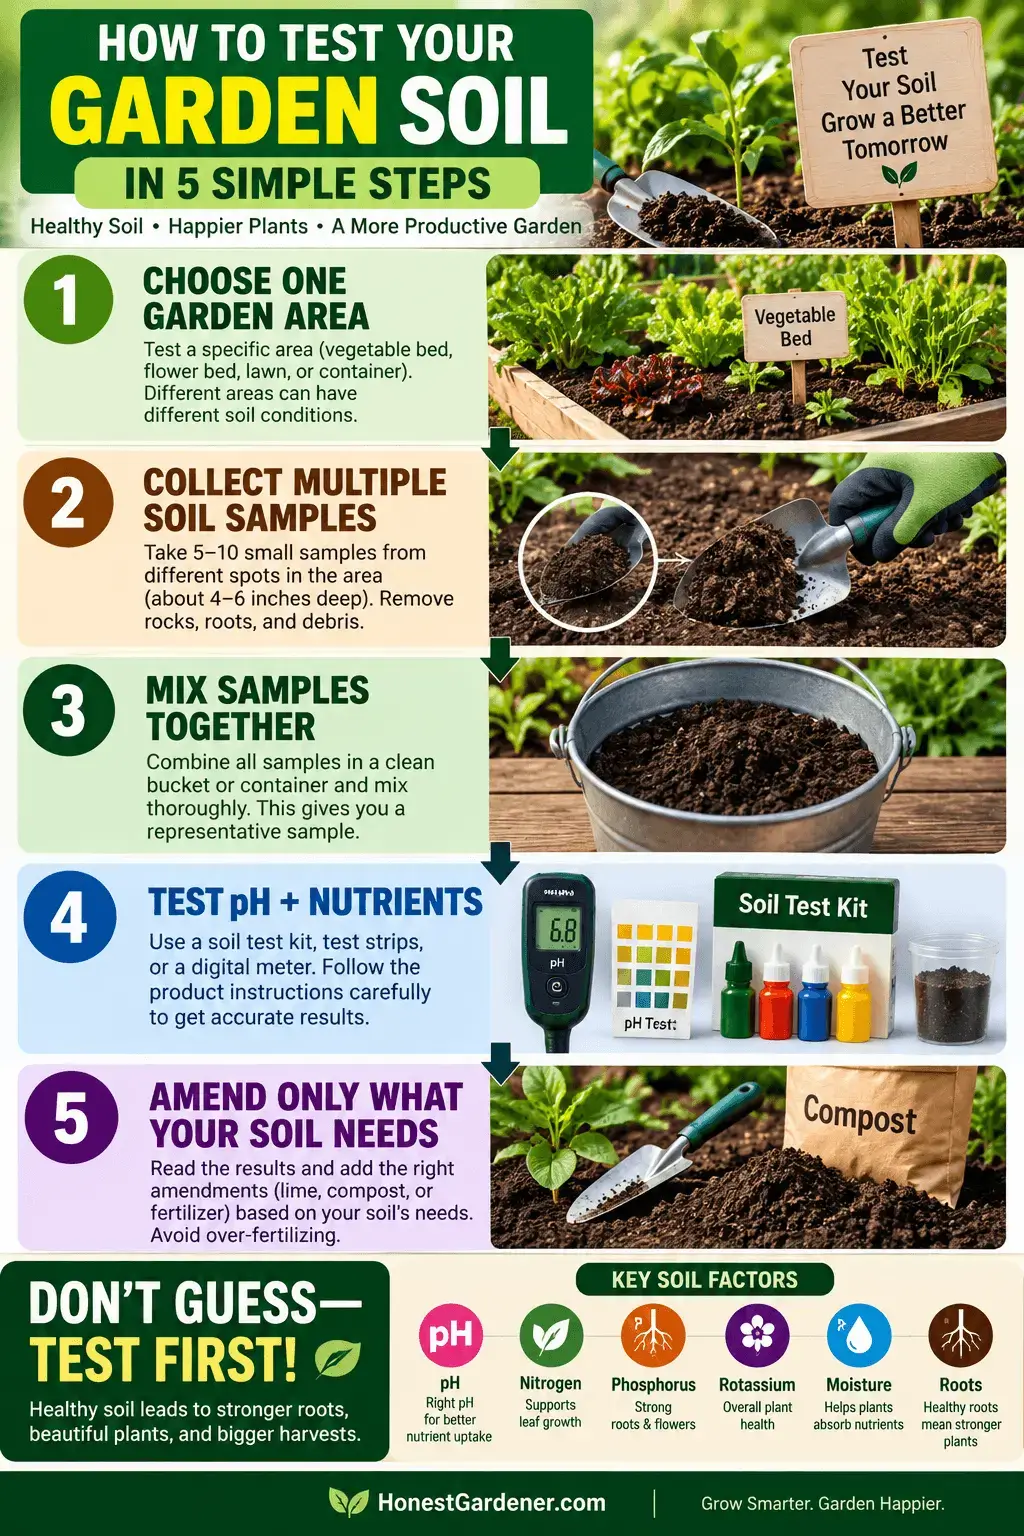
    Download Free Ebook