




Maintaining a thriving garden on a balcony or patio often requires finding a reliable way to keep your greens hydrated, which is why learning how to build a diy drip system for potted plants is a game-changer for busy gardeners. Whether you’re managing a few succulents or a jungle of ferns, automated watering ensures consistent moisture levels without the daily chore of carrying a heavy watering can. Depending on the scale of your setup, you can expect to spend between $15 and $125 on materials, with basic gravity-fed systems falling at the lower end and automated timer-based kits reaching the higher price points.
Key Takeaways
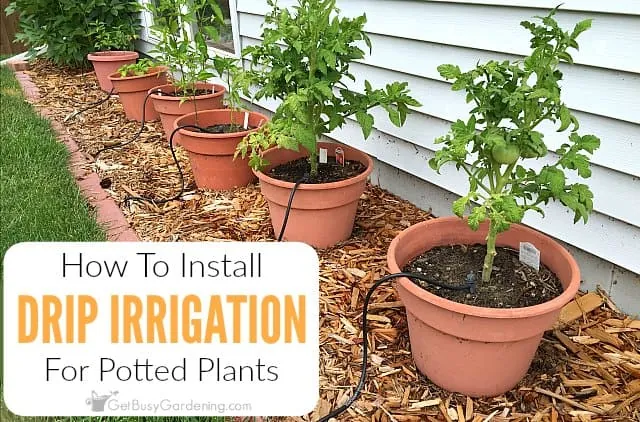
- Gravity-fed systems are the most cost-effective solution for small collections.
- Automated timers prevent overwatering, which is the leading cause of root rot.
- Consistent moisture is more beneficial for plant health than sporadic, heavy watering.
- Always test your drip rate before leaving your plants unattended for extended periods.
- Proper filtration prevents mineral buildup from clogging small-diameter emitters and tubing.
How Do Drip Systems Work?
At the most fundamental level, a drip irrigation system moves water from a reservoir or a faucet through a network of flexible tubing to a specific point at the base of your plant.
By using small-diameter lines and specialized emitters, you can control the flow rate so that water seeps into the soil gradually rather than flooding the surface. This targeted water delivery minimizes evaporation and ensures that the root zone receives the hydration it needs. For container gardening, this is significantly more efficient than overhead watering, which often wastes water on foliage or outside the pot.
Components for a DIY Drip System for Potted Plants
To assemble your own system, you’ll need a few foundational components that you can find at most hardware stores or garden centers. The core infrastructure consists of a main supply line, usually 1/4-inch or 1/2-inch vinyl tubing, and a set of connectors that allow you to branch off to individual pots.
| Component | Function | Material Type |
|---|---|---|
| Main Tubing | Transports water from source | Polyethylene / Vinyl |
| Emitters | Regulates flow speed | Pressure-compensating |
| Connectors | Joins tubing sections | Plastic / Barbed |
| Timer | Automates water frequency | Digital / Mechanical |
| Reservoir | Holds water source | Plastic bucket / Barrel |
Why Use Automated Watering?
The primary advantage of installing a system is the stability it provides to your plants. Many common houseplants and vegetables, such as tomatoes or peppers, suffer when soil moisture fluctuates wildly between bone-dry and soaking wet. An automated system provides a steady hydration cycle, which encourages stronger root systems and more robust growth. Furthermore, if you travel frequently, a drip system provides peace of mind, knowing your plants won’t wilt during a heatwave or a long weekend away.
Gravity-Fed vs. Pressure-Based Systems
Choosing between a gravity-fed or pressure-based setup depends on your water source and your budget. Gravity-fed systems rely on the height difference between your water reservoir and your plants. By placing a bucket on a shelf or a stand, you create enough pressure to push water through the lines.
This is an excellent budget-friendly method for small balconies. Pressure-based systems, meanwhile, hook directly into an outdoor spigot and require a pressure regulator to prevent the tubing from bursting. These are better suited for larger collections or permanent installations.
Comparing Irrigation Methods
| Feature | Gravity-Fed | Pressure-Based |
|---|---|---|
| Cost | $15–$45 | $50–$125 |
| Complexity | Low | Moderate |
| Reliability | Variable | High |
| Water Source | Elevated Bucket | Garden Spigot |
Can You Build a Cheap System?
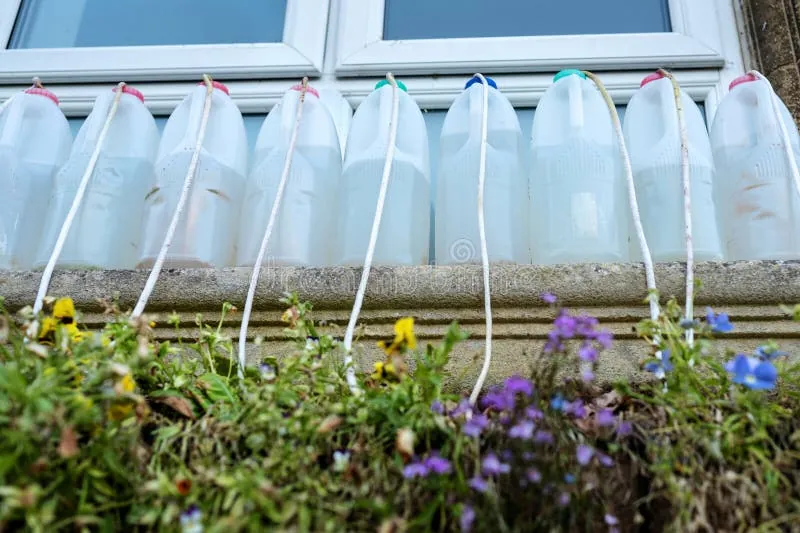
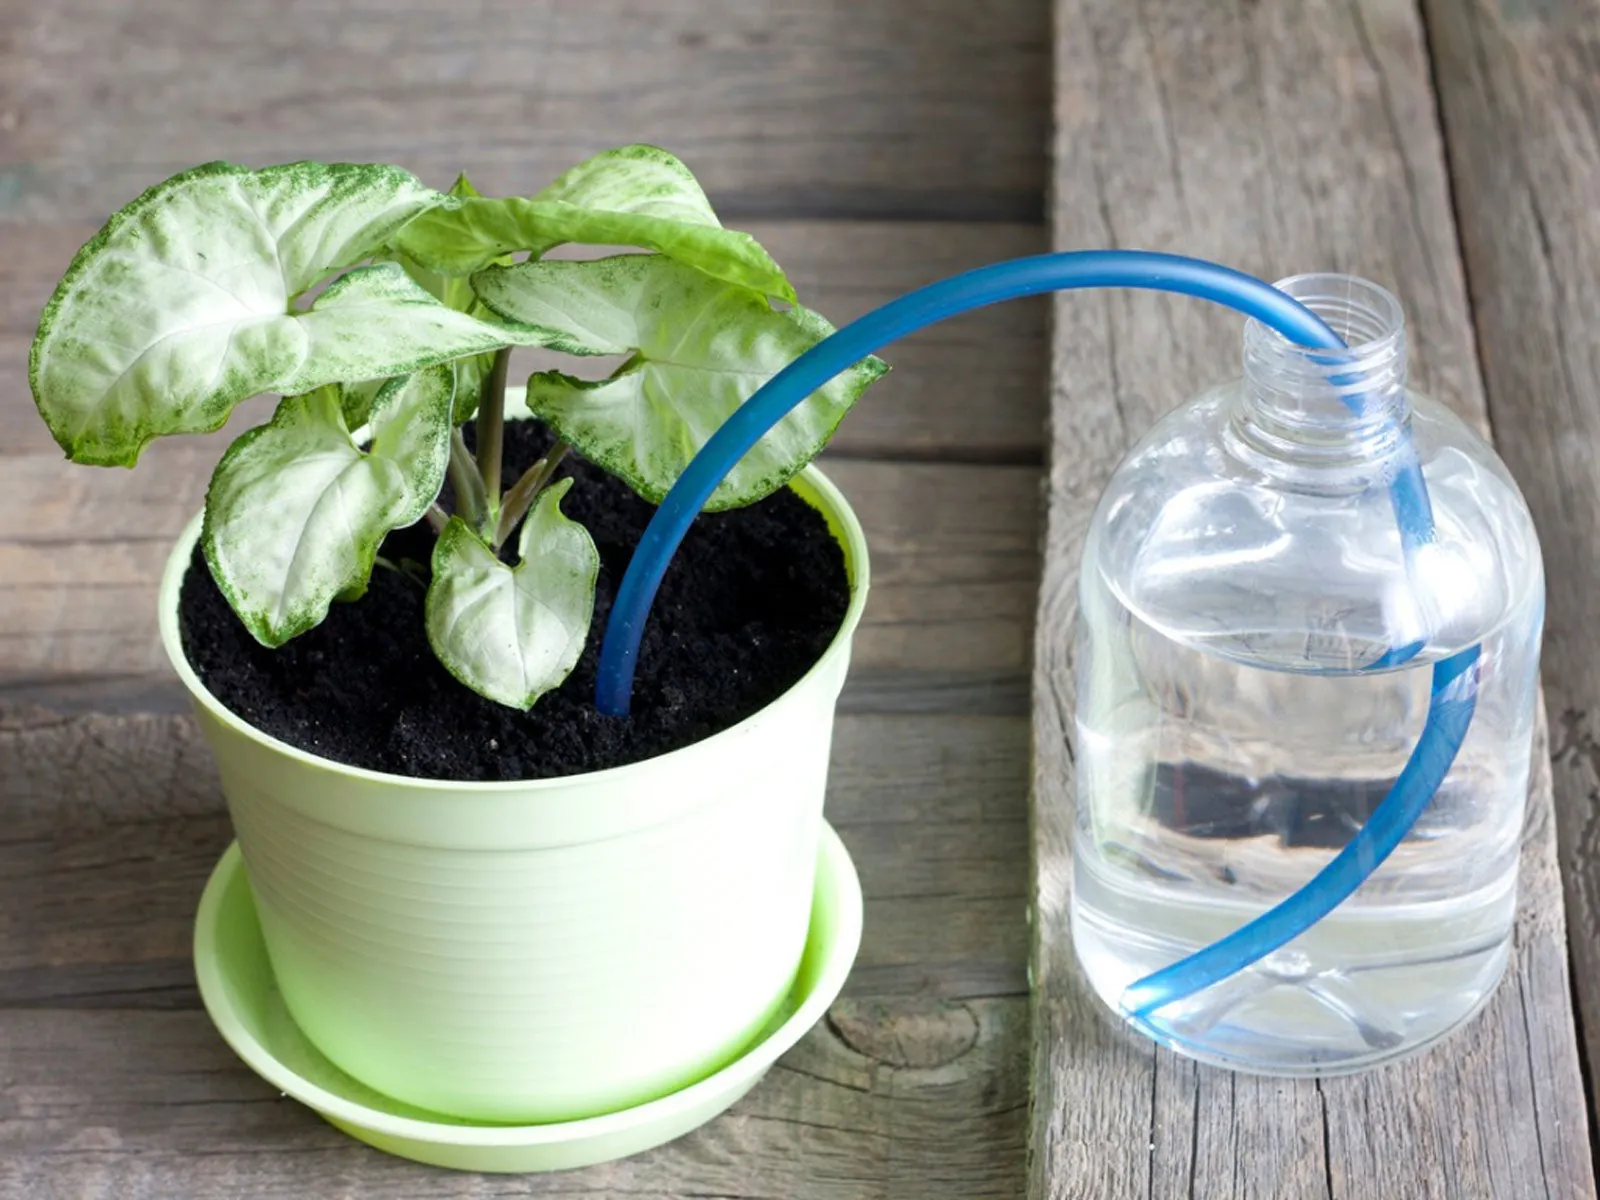
You can absolutely create a highly effective irrigation system using repurposed materials and minimal investment. The most famous “DIY” approach involves the bottle wick method, where a plastic bottle filled with water is inverted into the soil, or a piece of cotton rope is run from a water container into the pot.
While these aren’t traditional “drip” systems in the mechanical sense, they function on the same principle of capillary action. For those who prefer a more structured look, purchasing a basic kit that includes a manifold and micro-tubing is often the most economical path.
Essential Tools for Installation
Before you begin your project, gather the necessary tools to ensure a professional finish. You don’t need expensive power tools, but a few specific items will make the job much easier.
A sharp pair of snips or tubing cutters is essential for creating clean edges on your vinyl lines, as jagged cuts can lead to leaks at the connection points. You’ll also need a tubing hole punch to create openings for your emitters. Having these items on hand prevents frustration and ensures that your system remains leak-free for years.
- Tubing cutters (specifically designed for irrigation lines)
- Hole punch tool (for 1/4-inch take-off fittings)
- Adjustable wrench (if connecting to a spigot)
- Teflon tape (for threaded pipe connections)
- Zip ties or stakes (to secure tubing to pots)
Setting Up Your Drip Schedule
Once the physical installation is complete, you must determine the correct watering frequency. This is where many beginners struggle. Overwatering is a common mistake that leads to root rot, which the University of California Division of Agriculture and Natural Resources identifies as a frequent cause of plant decline in container environments.
To avoid this, start with a conservative schedule. Observe your plants for a week and adjust the timer or the flow rate of your emitters based on how quickly the soil dries out between cycles.
Watering Schedule Guidelines
| Plant Type | Watering Frequency | Soil Moisture Goal |
|---|---|---|
| Succulents | Once every 7–10 days | Near-dry |
| Leafy Greens | Every 2–3 days | Moist but not soggy |
| Tomatoes/Peppers | Daily or every other day | Consistently damp |
| Tropicals | Every 3–4 days | Evenly moist |
Troubleshooting Common Drip Issues
Even the best-designed systems will eventually encounter issues. The most common problem is a clogged emitter. If you notice a plant looking wilted despite the system running, check the emitter at the base of that specific pot. Mineral deposits, often referred to as “scale,” can build up inside the tiny openings.
You can usually clear these by soaking the emitter in a mild vinegar solution or simply replacing it if it’s beyond repair. Another issue is tubing kinks, which can restrict water flow to certain zones of your garden. Always ensure your lines have a gentle curve rather than a sharp bend.
Warning: Never attempt to force a connector into a cold, stiff piece of tubing, as this can cause the line to crack; instead, dip the end of the tubing in warm water for thirty seconds to soften the plastic before making the connection.
How to Prevent System Leaks
Leaks are the enemy of any irrigation setup. They waste water, create a mess, and lower the pressure for the rest of your plants. To minimize the risk of leaks, always use the correct size fittings for your tubing. A 1/4-inch connector should fit snugly into 1/4-inch tubing.
If you have to use force, you might have the wrong size. Additionally, ensure that your main line is properly staked. When tubing is left to hang loosely, the weight of the water can pull on connections and loosen them over time. Secure your tubing to the sides of pots or along your balcony railing using UV-resistant zip ties.
Expanding Your Drip System
One of the best aspects of a modular drip system is how easily it can grow with your garden. If you decide to add more pots next season, you don’t need to rebuild from scratch. You can simply add a “T” connector to your existing main line and extend a new branch to the new plant.
This scalable design allows you to start small and add as many containers as your water source can handle. Just remember that as you add more emitters, the total water pressure across the system will drop slightly, so you may need to adjust your timer to run for a few extra minutes.
Maintenance and Winterization
Maintenance is the key to longevity. At the end of the growing season, or before a hard freeze, you must winterize your system. If you leave water in the lines during freezing temperatures, the expansion can crack your tubing and connectors.
Simply disconnect your timer, drain the lines, and store your reservoir in a shed or garage. If you’re in a climate that doesn’t freeze, you should still perform a seasonal system flush by opening the end of your main line and letting water run through to clear out any sediment that may have accumulated throughout the year.
Pro Tip: Use a small mesh filter at the intake point of your reservoir to catch debris before it enters the system; this single addition can reduce the frequency of emitter cleanings by more than half.
Related guides
Frequently Asked Questions
How do I know if my plants are getting enough water?
Check the soil moisture two hours after a watering cycle. The top inch of soil should feel damp but not saturated. If the soil is muddy, reduce your timer duration. If the soil remains dry, increase the duration or add a second emitter to the pot. Observe your plants for signs of wilting or yellowing leaves, which are physical indicators of improper hydration levels.
Can I use a drip system for indoor plants?
Yes, you can, but it requires more caution. Ensure your pots have drainage holes and saucers to catch excess water, as you don’t want water leaking onto your floors. Use a small, dedicated reservoir, like a decorative jar or a hidden tank, rather than a bulky bucket. Indoor systems are excellent for ferns, peace lilies, and other high-humidity plants that require consistent moisture to thrive.
What is the best way to hide the tubing?
To keep your balcony or garden looking neat, run your main supply line along the back of your pots or along the edge of your balcony railing. You can use clips or adhesive hooks to secure the tubing against surfaces. For a more aesthetic approach, you can bury the tubing under a thin layer of decorative mulch or decorative stones, which also helps protect the plastic from UV degradation.
How often should I replace the tubing?
High-quality, UV-resistant irrigation tubing can last for three to five years before it starts to become brittle. You’ll know it’s time to replace it when you notice the plastic cracking or becoming stiff and difficult to bend. If you notice leaks appearing frequently at connection points, it’s usually a sign that the tubing has lost its elasticity and should be replaced for reliability.
Will the drip system work if my water pressure is low?
Yes, a drip system is actually ideal for low-pressure scenarios. Because these systems use small-diameter tubing and controlled emitters, they don’t require high pressure to function. If you’re using a gravity-fed system, the height of your water barrel is the only pressure you have. Simply ensure the barrel is at least two feet higher than the highest plant pot to ensure consistent flow to all emitters.
Conclusion
Starting your own garden irrigation project is a rewarding way to improve your plant care routine while reclaiming your free time. Begin by mapping out your balcony or patio space and calculating the number of emitters you need. Once you have your materials, start with a small, simple loop, test it for leaks, and watch your plants thrive with consistent care.
{“@context”:”https://schema.org”,”@type”:”FAQPage”,”mainEntity”:[{“@type”:”Question”,”name”:”How do I know if my plants are getting enough water?”,”acceptedAnswer”:{“@type”:”Answer”,”text”:”Check the soil moisture two hours after a watering cycle. The top inch of soil should feel damp but not saturated. If the soil is muddy, reduce your timer duration. If the soil remains dry, increase the duration or add a second emitter to the pot. Observe your plants for signs of wilting or yellowing leaves, which are physical indicators of improper hydration levels.”}},{“@type”:”Question”,”name”:”Can I use a drip system for indoor plants?”,”acceptedAnswer”:{“@type”:”Answer”,”text”:”Yes, you can, but it requires more caution. Ensure your pots have drainage holes and saucers to catch excess water, as you don’t want water leaking onto your floors. Use a small, dedicated reservoir, like a decorative jar or a hidden tank, rather than a bulky bucket. Indoor systems are excellent for ferns, peace lilies, and other high-humidity plants that require consistent moisture to thrive.”}},{“@type”:”Question”,”name”:”What is the best way to hide the tubing?”,”acceptedAnswer”:{“@type”:”Answer”,”text”:”To keep your balcony or garden looking neat, run your main supply line along the back of your pots or along the edge of your balcony railing. You can use clips or adhesive hooks to secure the tubing against surfaces. For a more aesthetic approach, you can bury the tubing under a thin layer of decorative mulch or decorative stones, which also helps protect the plastic from UV degradation.”}},{“@type”:”Question”,”name”:”How often should I replace the tubing?”,”acceptedAnswer”:{“@type”:”Answer”,”text”:”High-quality, UV-resistant irrigation tubing can last for three to five years before it starts to become brittle. You’ll know it’s time to replace it when you notice the plastic cracking or becoming stiff and difficult to bend. If you notice leaks appearing frequently at connection points, it’s usually a sign that the tubing has lost its elasticity and should be replaced for reliability.”}},{“@type”:”Question”,”name”:”Will the drip system work if my water pressure is low?”,”acceptedAnswer”:{“@type”:”Answer”,”text”:”Yes, a drip system is actually ideal for low-pressure scenarios. Because these systems use small-diameter tubing and controlled emitters, they don’t require high pressure to function. If you’re using a gravity-fed system, the height of your water barrel is the only pressure you have. Simply ensure the barrel is at least two feet higher than the highest plant pot to ensure consistent flow to all emitters.”}}]}

1 Comment
How to Design a Low Maintenance Garden in 3 Steps
October 02, 2026, at 11:59 am[…] drip irrigation before planting. Lay half-inch main tubing along the edges of your beds, then run quarter-inch emitter lines to where each plant will sit. Emitters delivering 1 gallon per hour work for shrubs; those delivering 0.5 gallons per […]